Vendor Management
Vendor Management
When it comes to the management of purchase operations in an organization, maintaining a good relationship with the vendors of the products that you want to purchase is very important. The Odoo Purchase module will assist you to create and maintain the contacts of vendors efficiently in your database. This will ensure quick access to the details of the vendors whenever you are in need. Odoo ERP system makes the process of configuration and maintenance of vendor list easy for its users so that they can seamlessly manage vendors and vendor related operations at a single place.
The user will get access to the vendor management window from the Orders menu of the Purchase module.
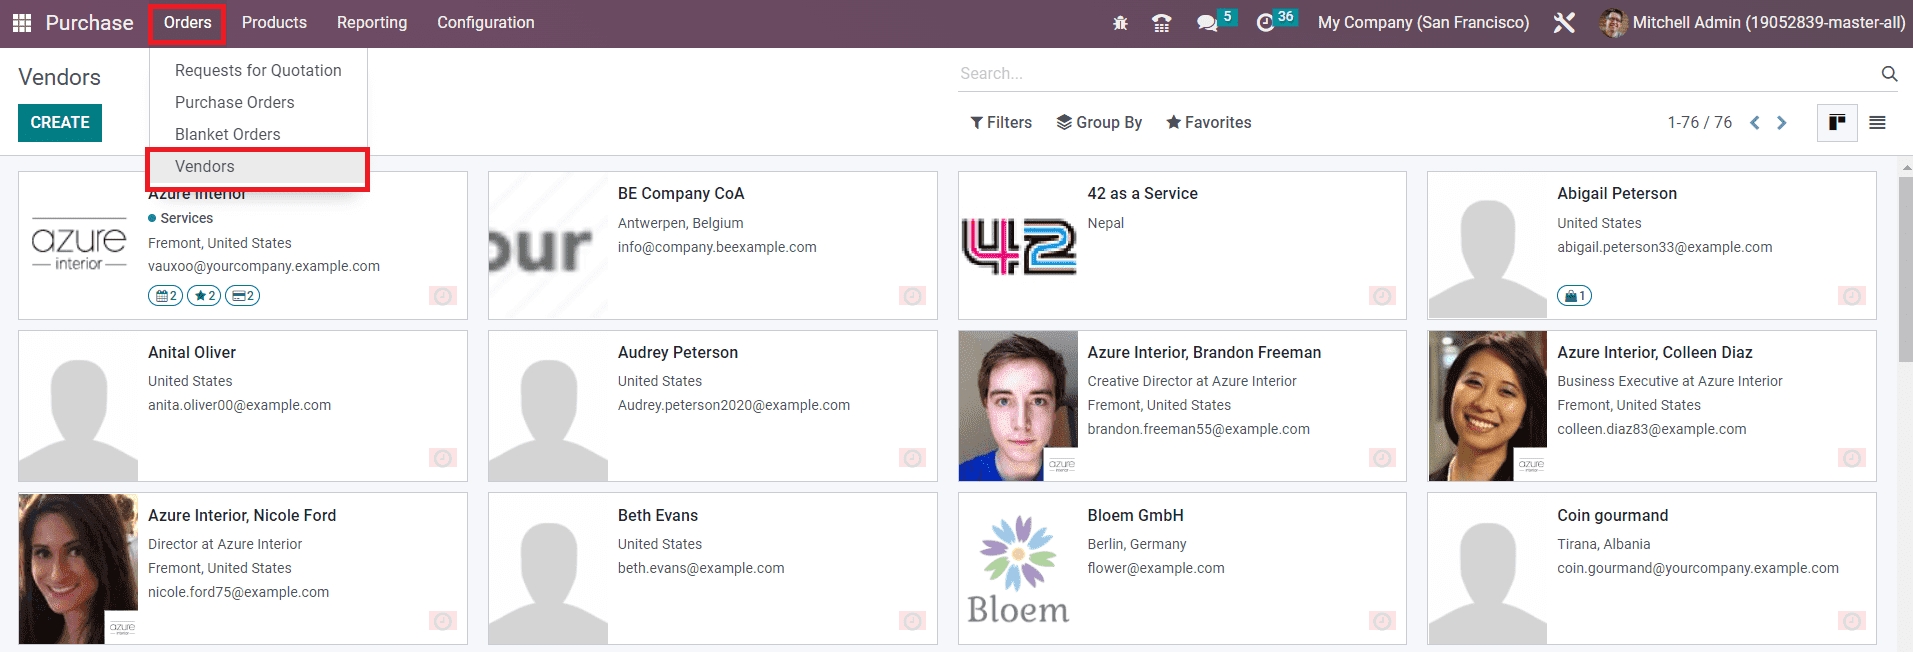
Click the Vendors option given under the Orders menu which will direct you to a new window with the details of the all configured vendors as shown in the screenshot above. The user will get Kanban as well as List views on this platform and you can select a required view from the icons given on the top right corner of the screen. In the Kanban view, you will get the preview of the vendor profile along with the details of the name of the vendor, address, email address, tags, number of meetings scheduled, opportunities, purchases, sales, and many more.
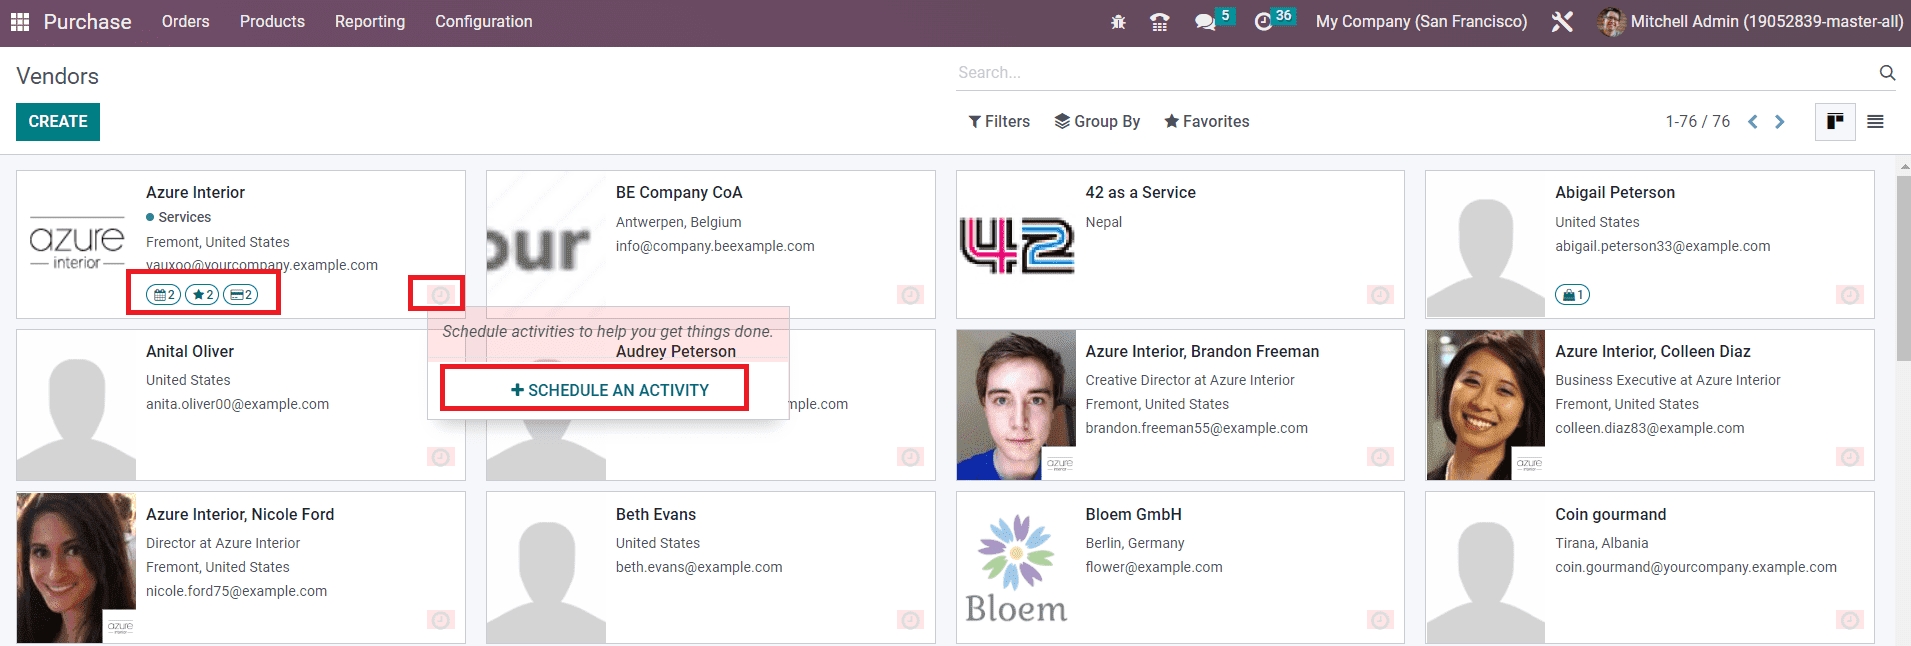
Clicking on the small clock icon given on the vendor profile will assist you to schedule an activity with the respective vendor.
The list view of this platform will show the Name, Phone, Email, Salesperson, Activities, City, Country, and Company of the vendor.
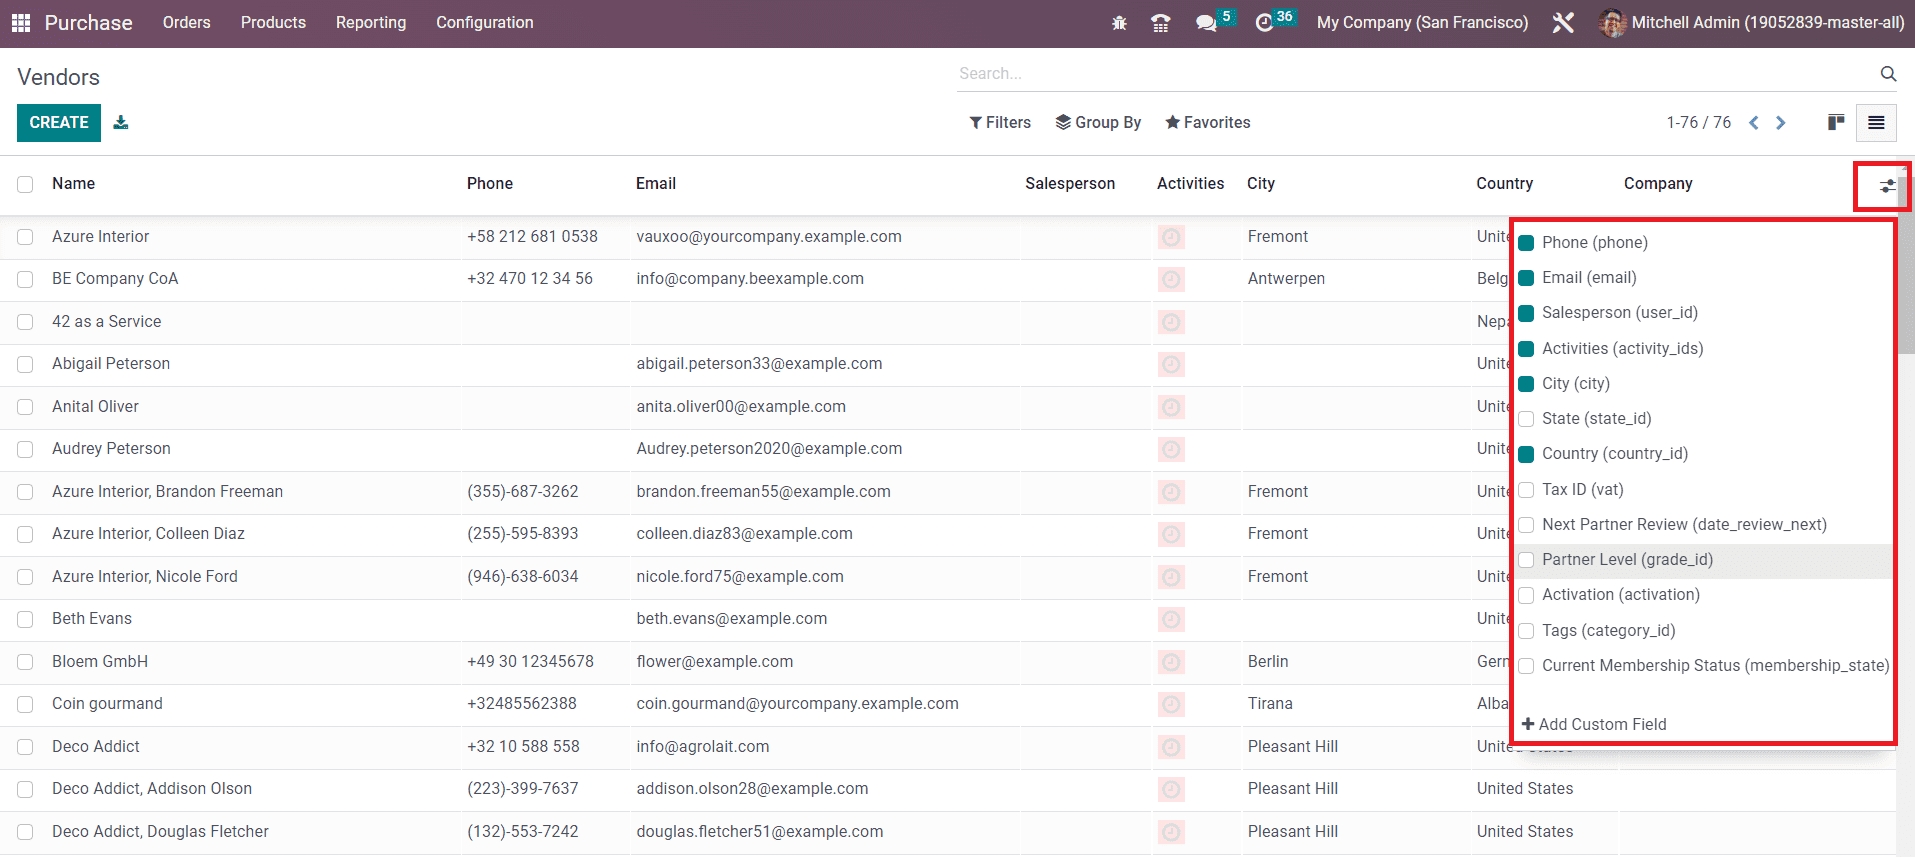
You can expand the preview of the list view by adding more fields from the list highlighted in the screenshot above.
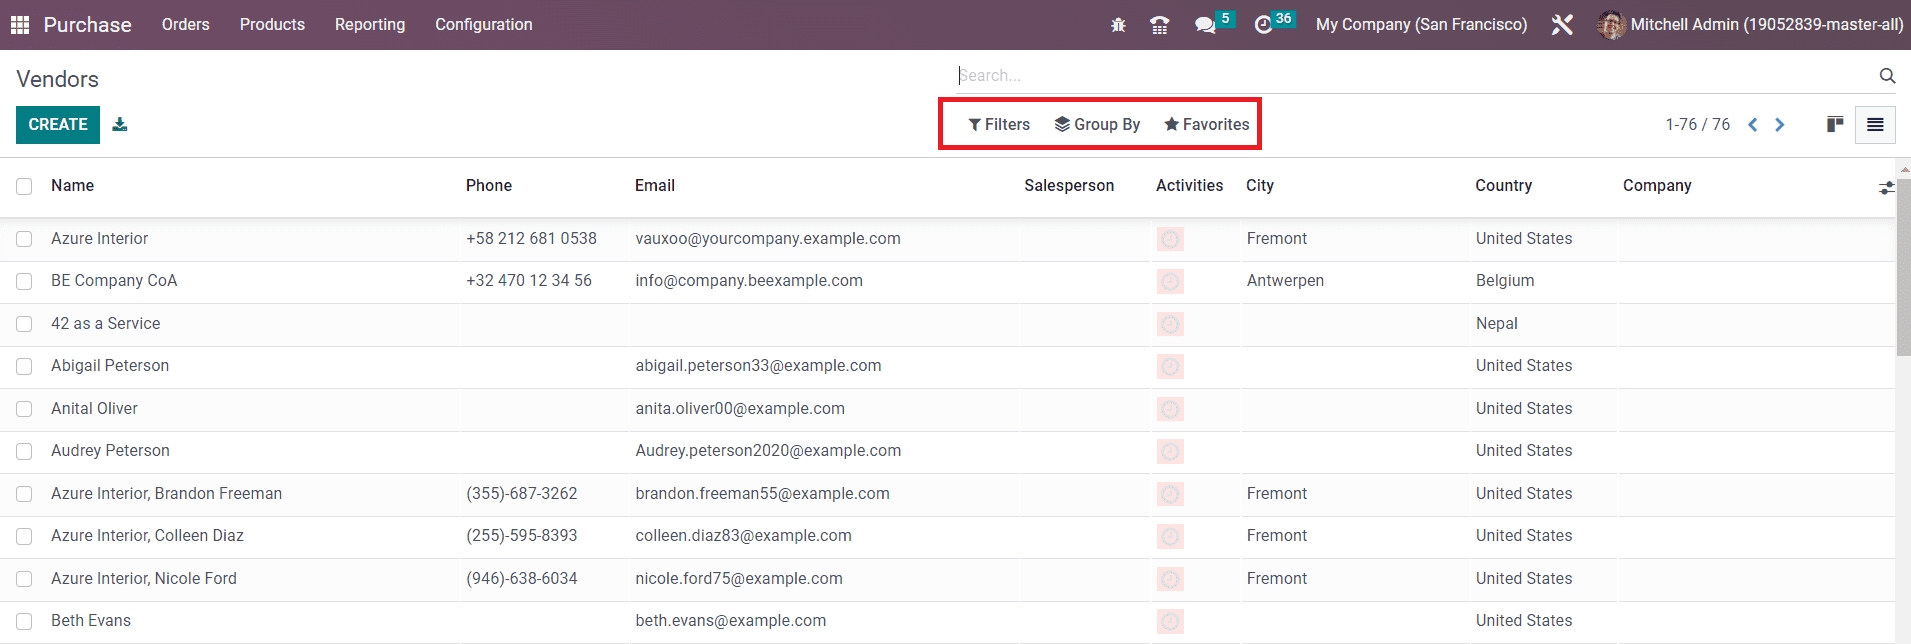
The Filters, Group By, and Favorites options can be used to sort the available list of vendors as per your requirements with default and customizable features. In order to configure a new vendor to your database, you can use the Create button.
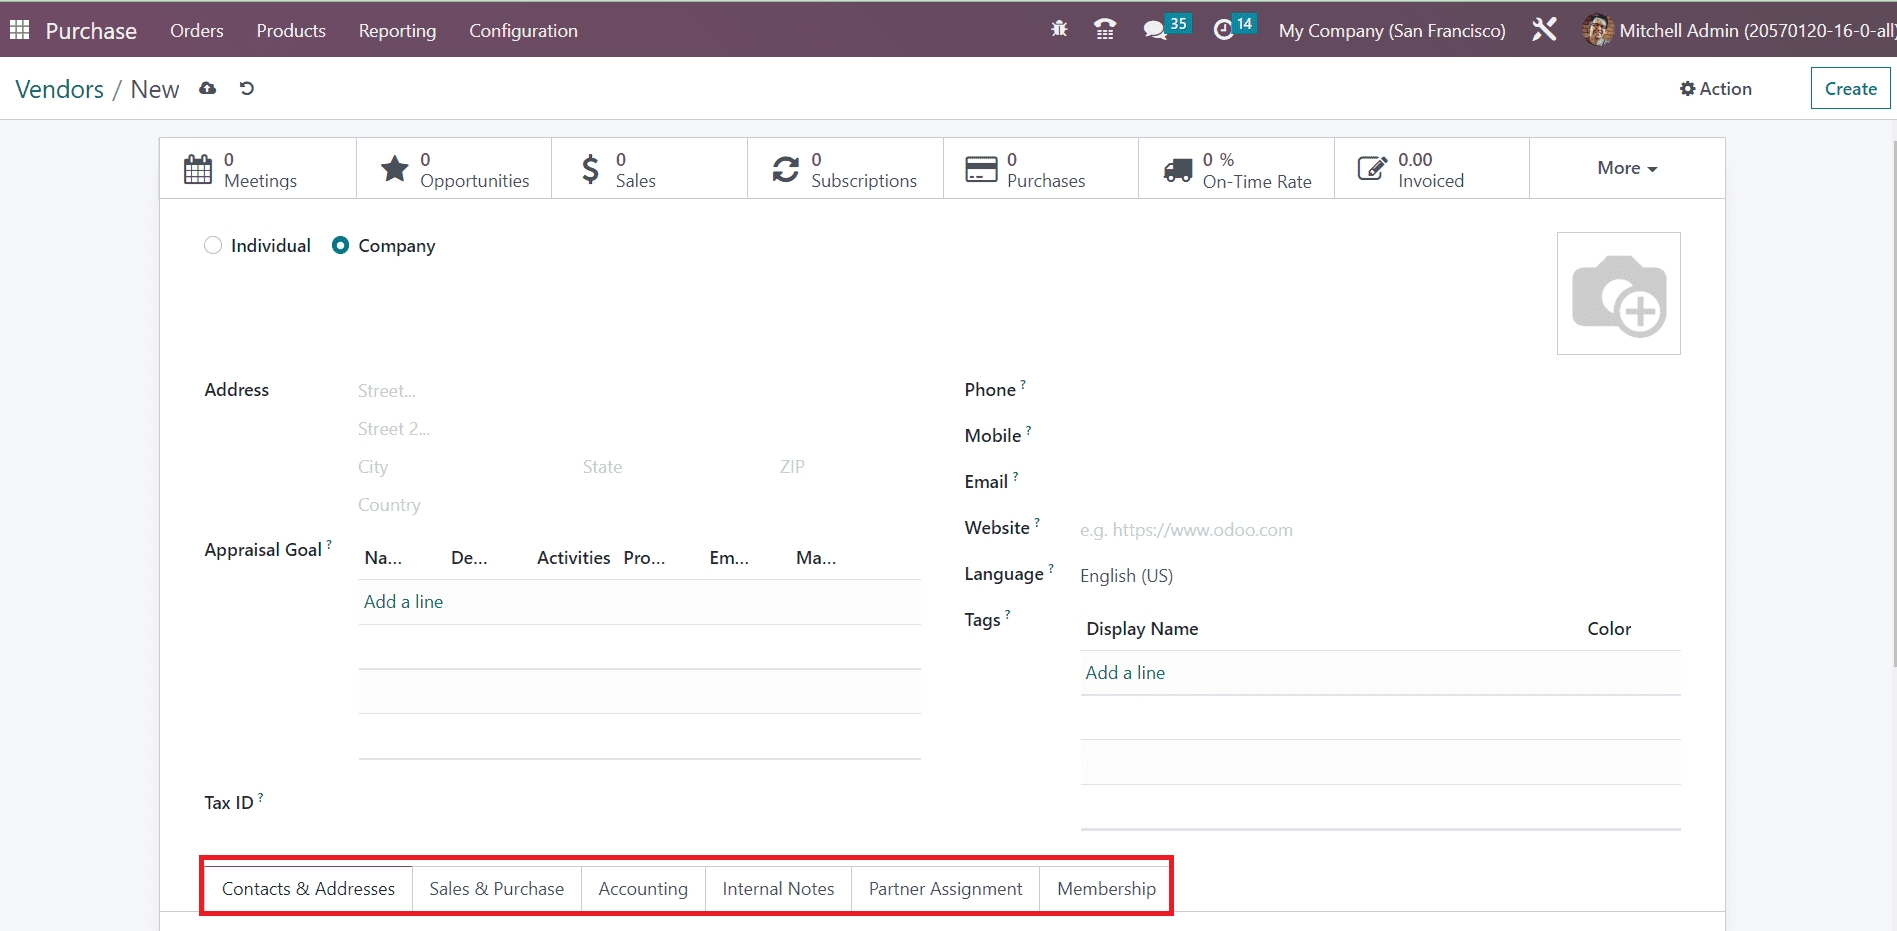
The method of configuring a new vendor in the Purchase module is the same as that of the customer configuration in the Sales module. You can complete the Contacts & Addresses, Sales & Purchases, Accounting, Internal Notes, Partner Assignment, and Membership tabs by following the steps we discussed in the Sales chapter.
You will get some additional smart buttons on the vendor profile after completing the configuration process as shown in the image below.
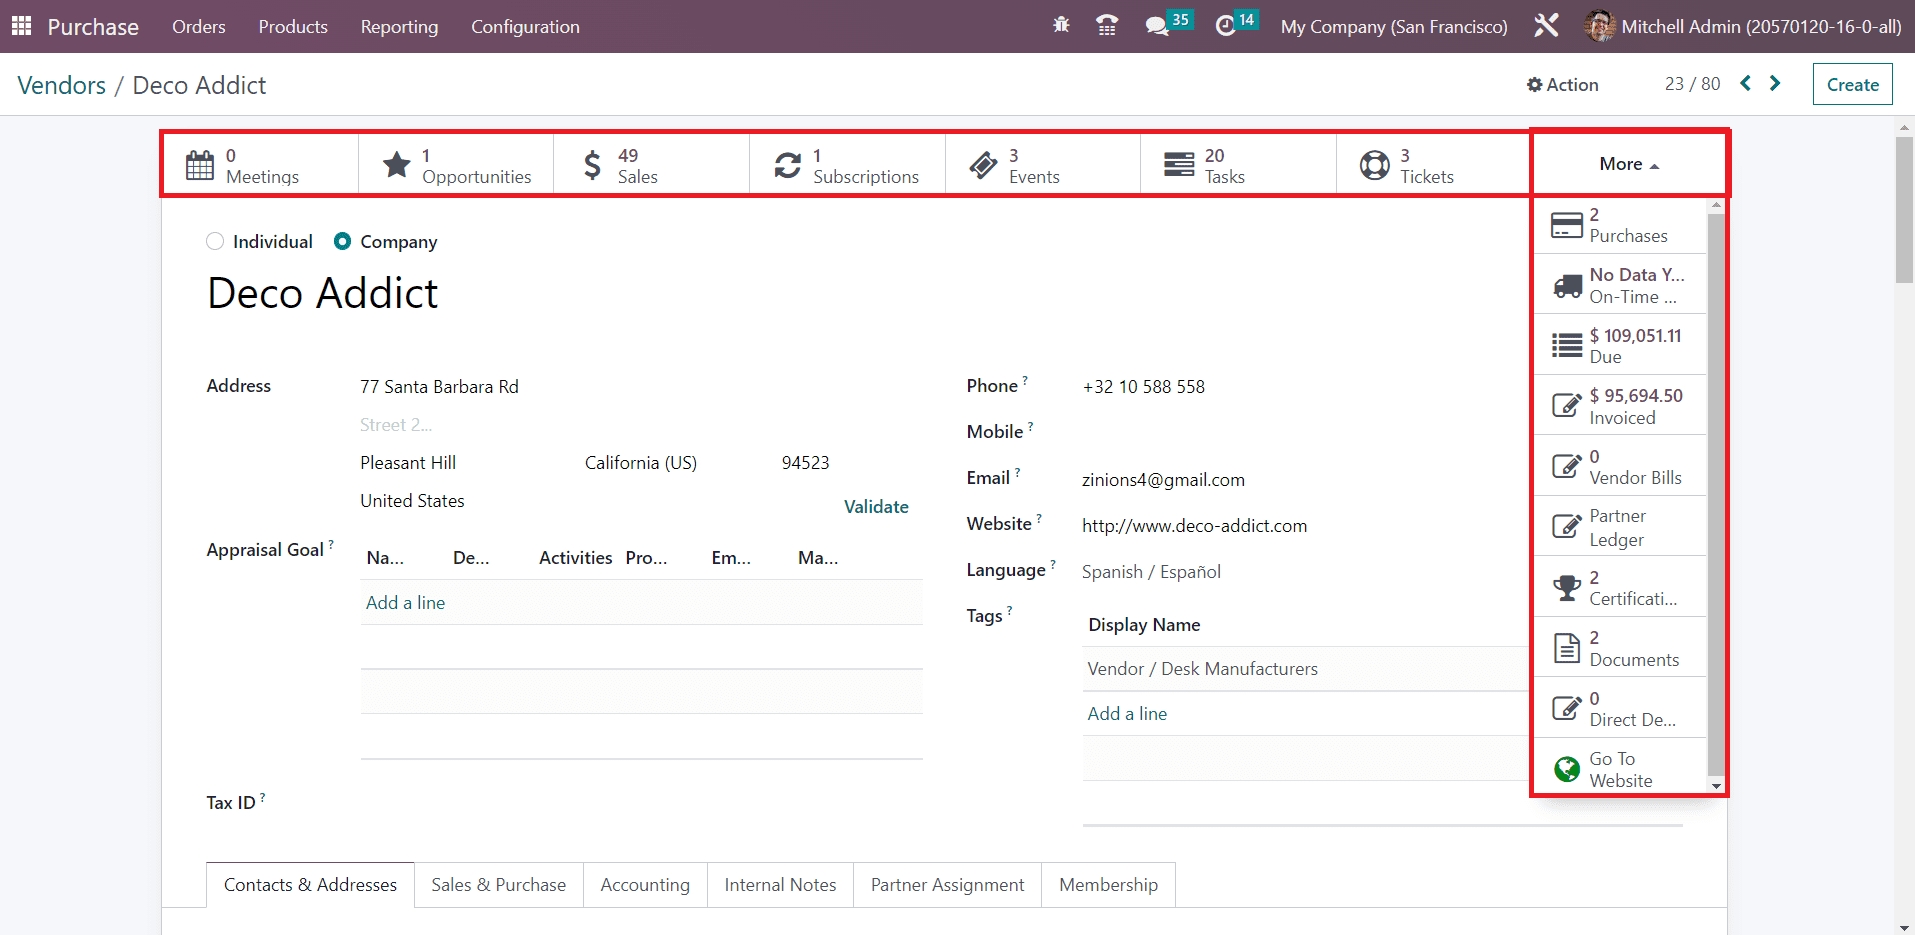
The Meetings button will record all scheduled activities with this vendor. The total number of opportunities, sales, subscriptions, events, tasks, and tickets created from this vendor can be observed using the corresponding smart buttons. Clicking on the More option will show additional smart buttons such as Purchases, On-time Delivery, Due, Invoiced amount, Vendor Bills, Ledger, Certificates, Documents, and Direct Debit Mandates.
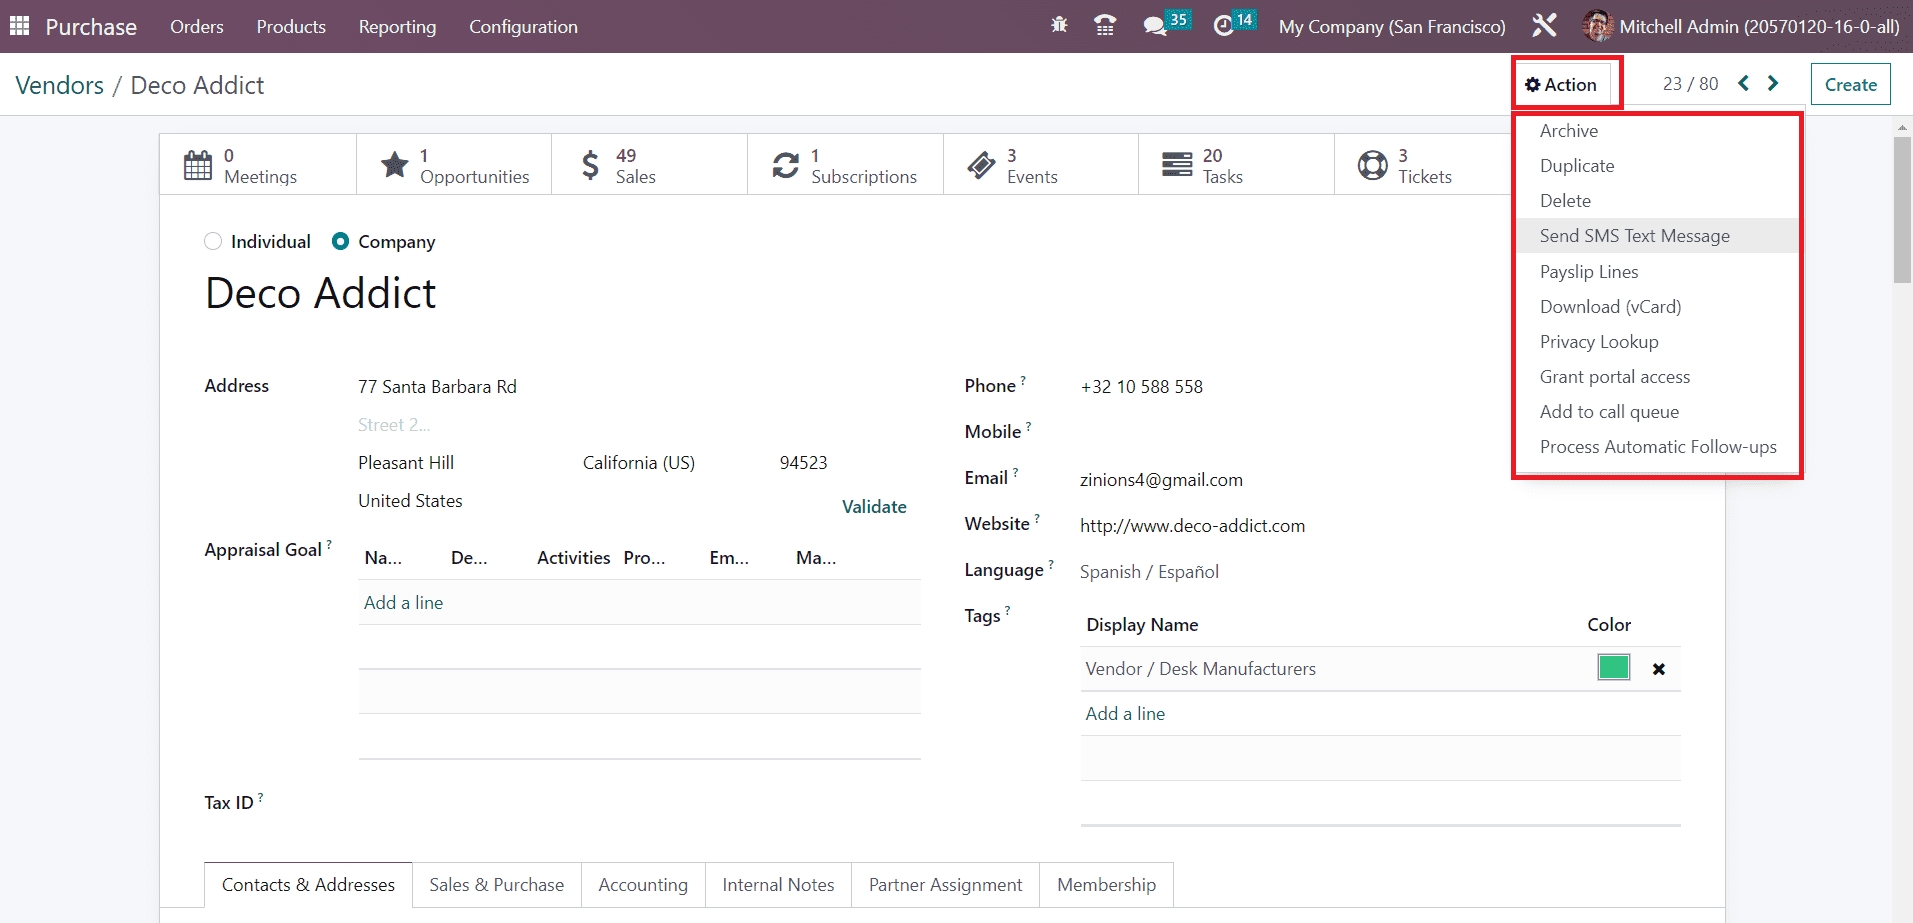
You will get a set of separate operation tools under the Action button. With the help of this button, you will get access to Archive, Duplicate, Delete, Send SMS Text Messages, Payslip lines, Download (vCard), Privacy Lookup, Grant Portal Access, and Process Follow-ups.
This is how we manage vendors in the Purchase module. Now, let’s move to the management of the vendor pricelist in Odoo 16.
Last updated