Replenishment
Replenishment is a crucial inventory operation which helps to maintain a sufficient quantity of stock in your inventory. In order to ensure an uninterrupted supply of goods, you need to replenish the inventory according to demand. Odoo ERP System provides quick support to the replenishment operations of a company. You can perform replenishment in two different methods. You can replenish products either from the product management window or by creating a new replenishment operation from the Inventory module.
First, let’s look at the replenishment of products from the product management window.
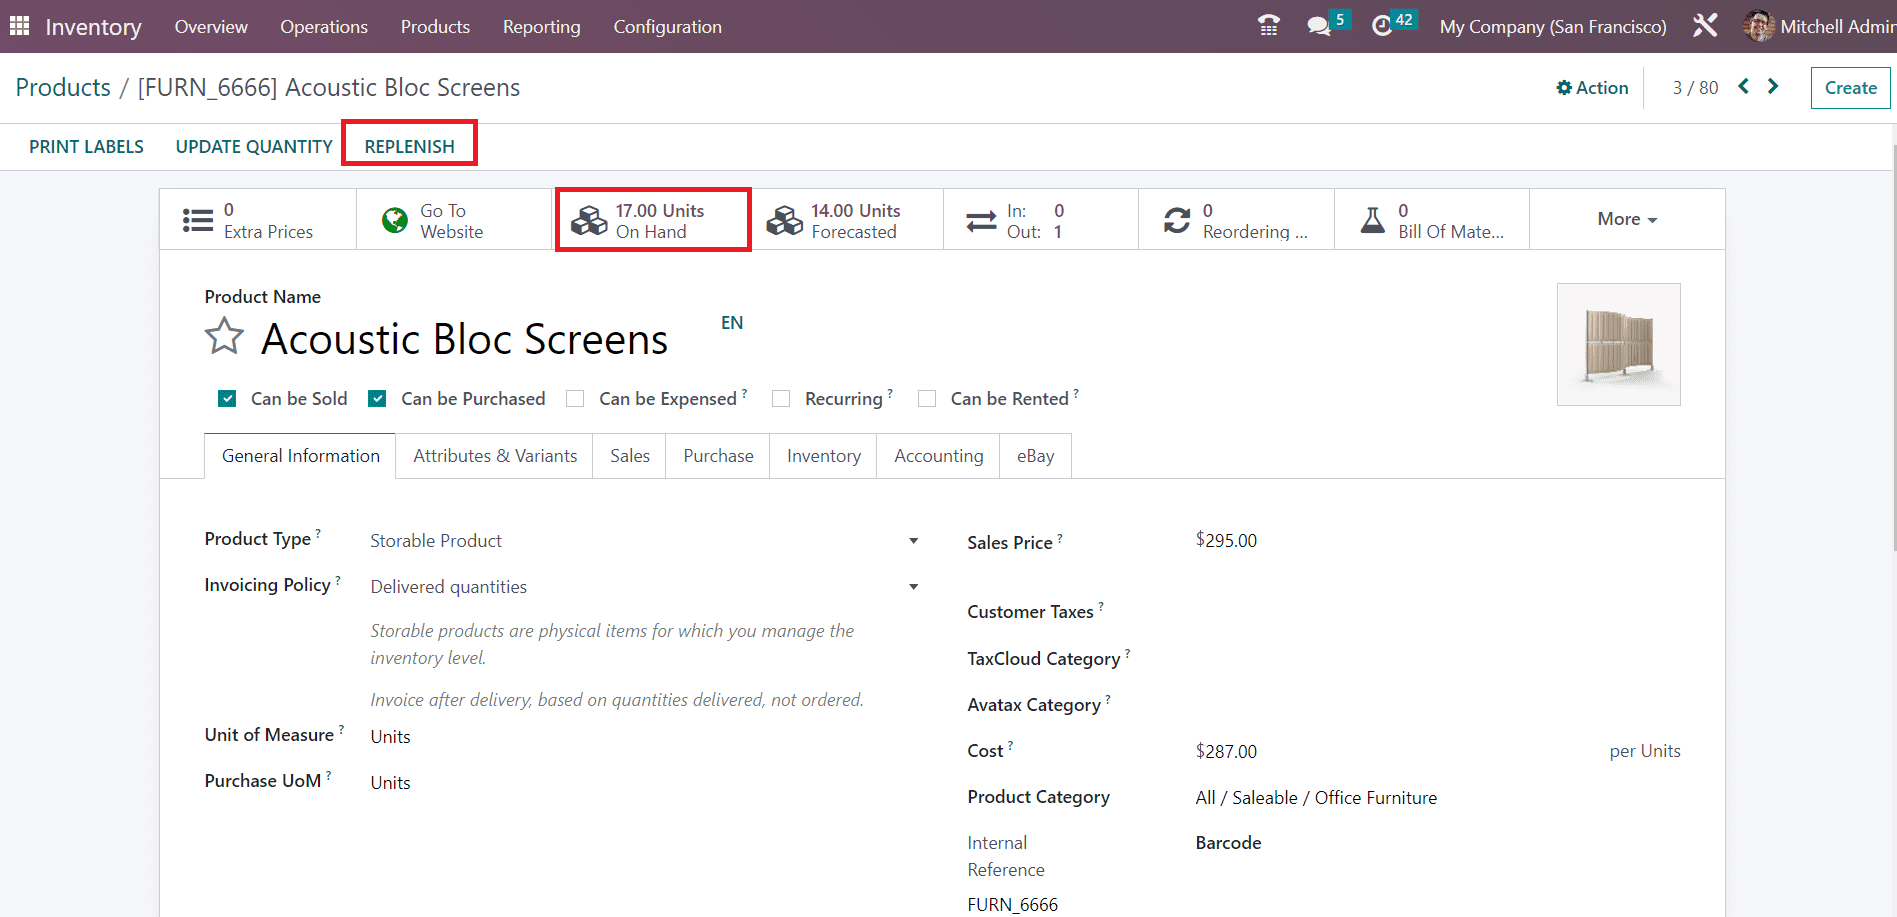
Here, you can find that the available quantities on hand are 17. You can replenish the product by clicking on the Replenish button.
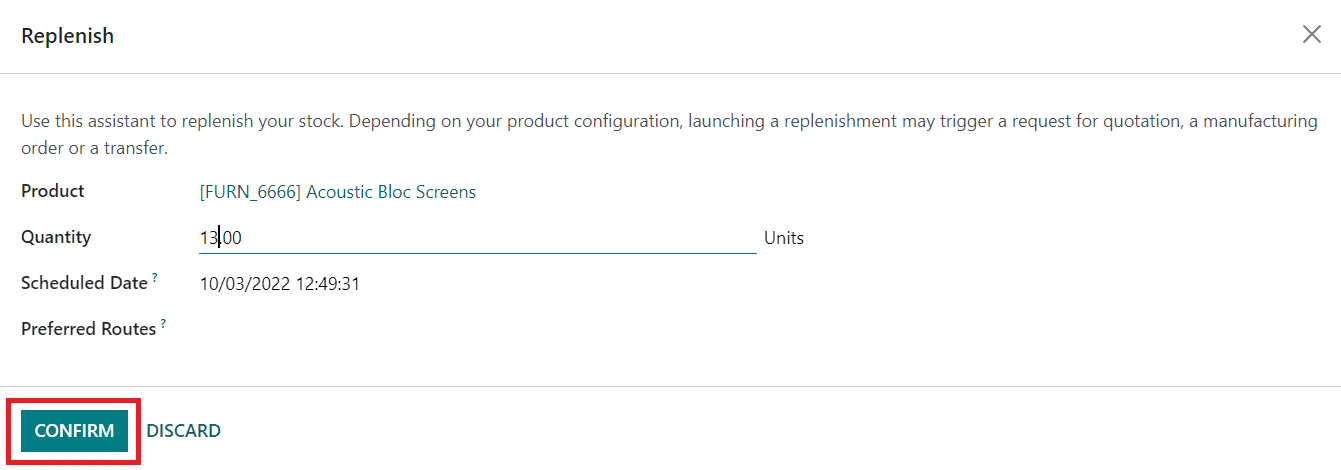
A pop up will appear as shown above where you can mention the quantity of the product that you want to replenish. Here, we requested 13 quantities of this product to replenish. You can schedule a date at which the replenishment should take place. Along with this, you can set a preferred route for replenishment. Clicking on the Confirm button will trigger a request for quotation for buying this product, a manufacturing order, or a transfer. The replenishment action will take place based on the preferred route. If you have selected Buy as the preferred route, Odoo will automatically generate a quotation for purchase based on the product configuration. You can confirm the quotation and complete the purchase procedures.
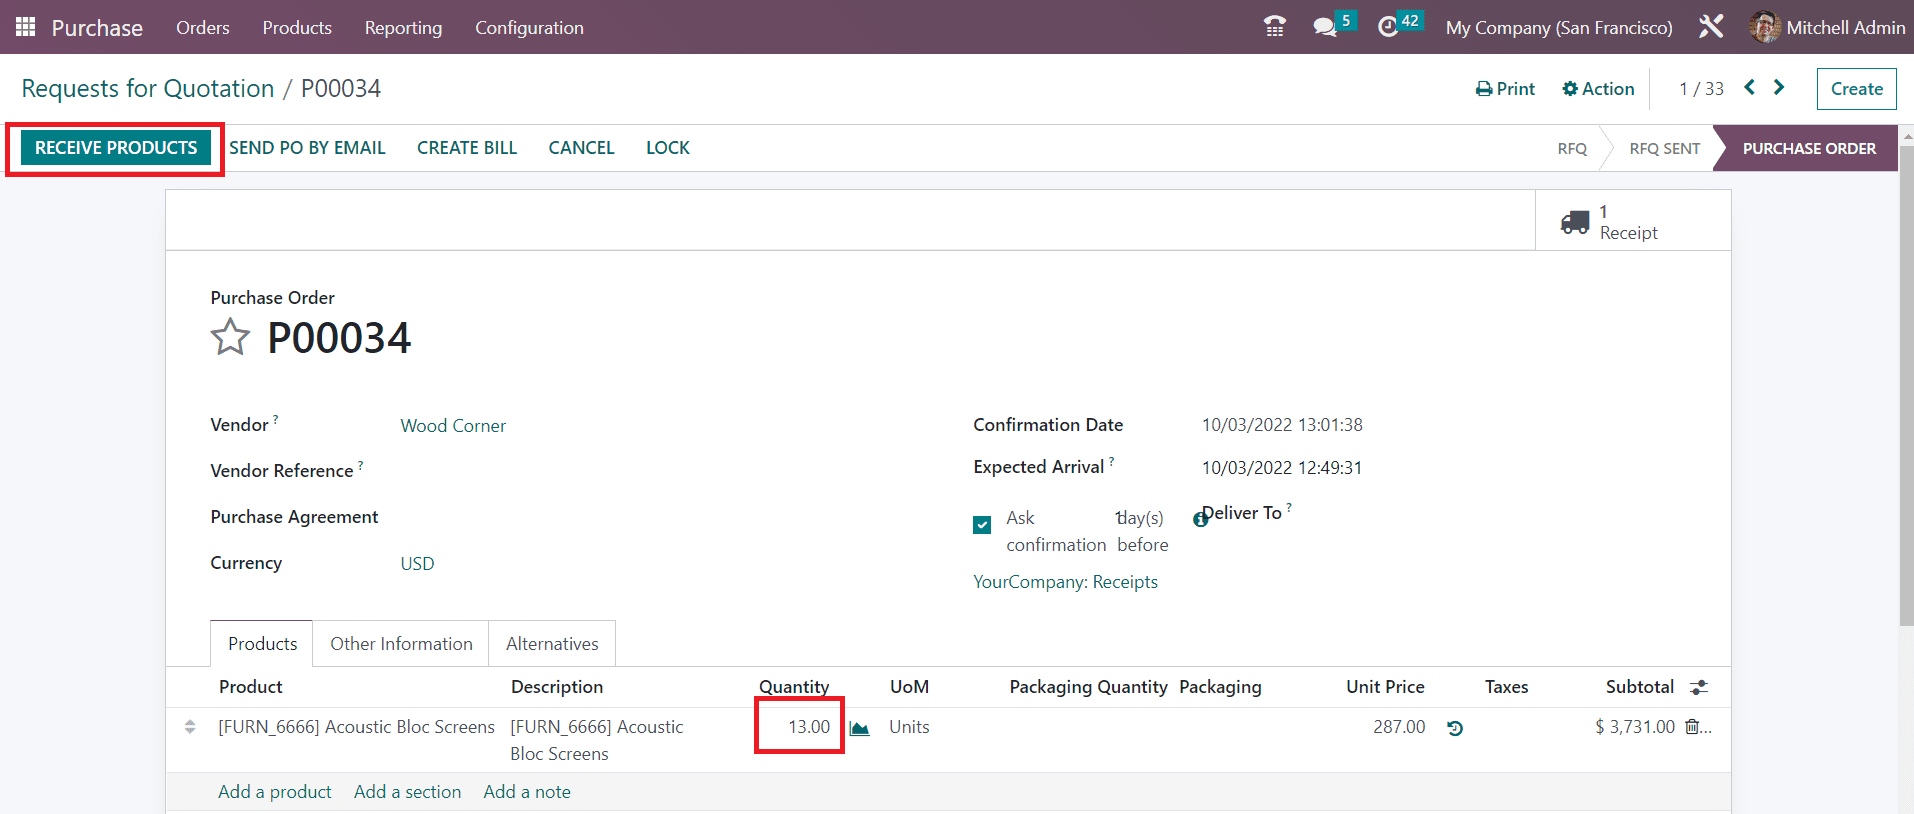
You can find the purchase order of the 13 units of the products from the Purchase module. By clicking on the Receive Products button, the products will be added to your inventory.
Now, you can check the On hand quantity of the products.
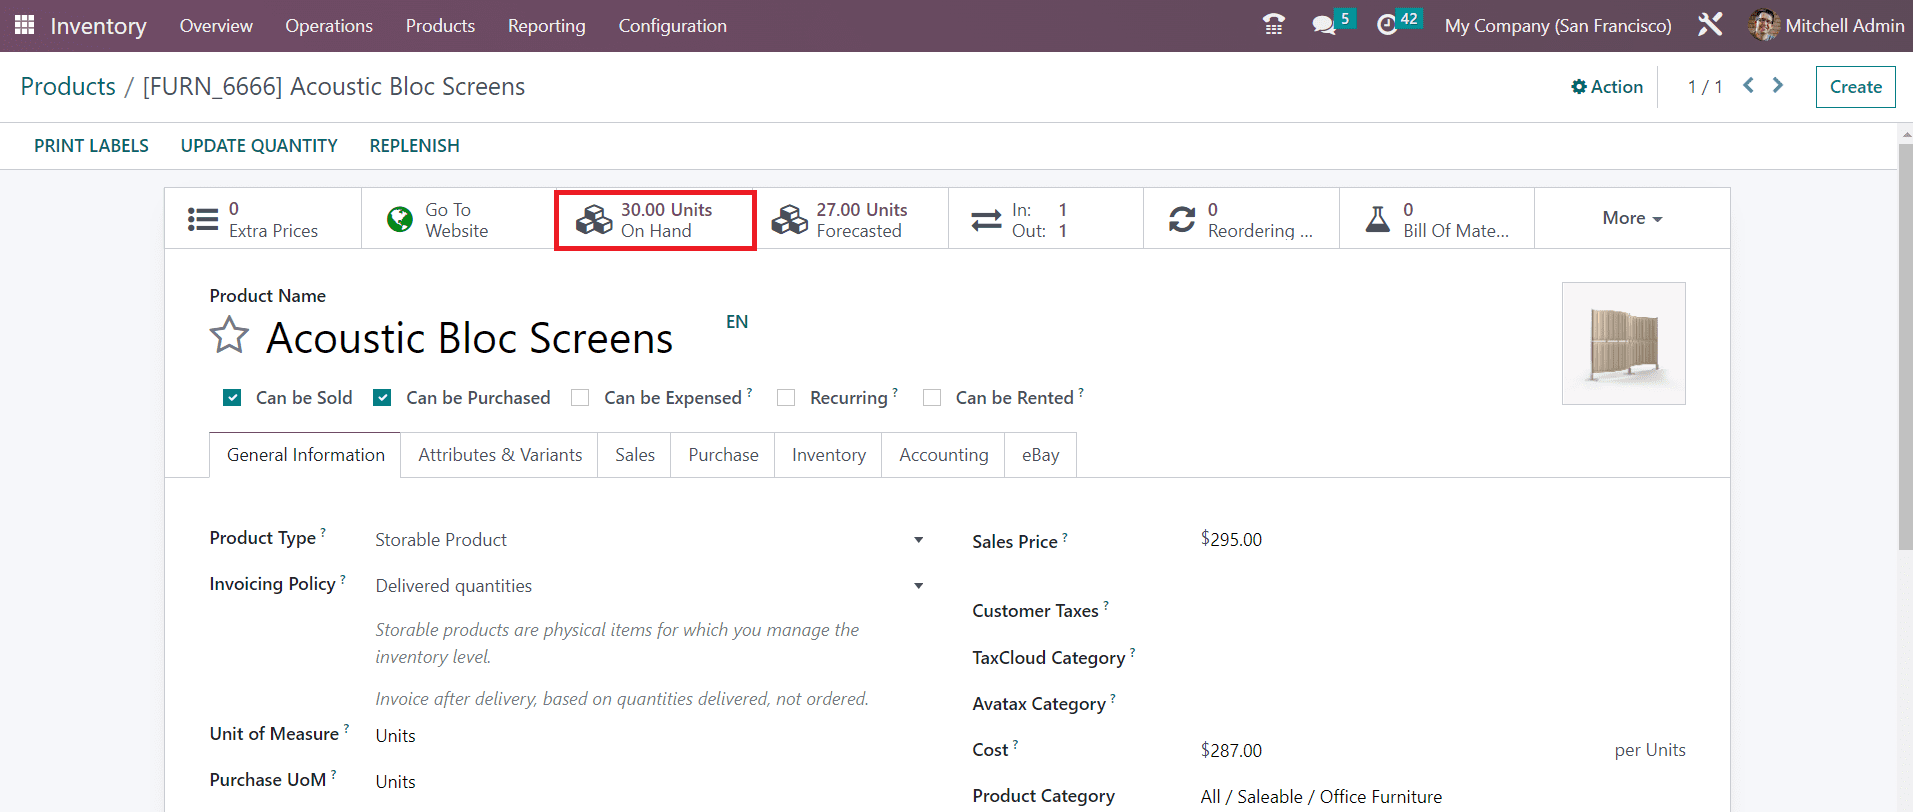
Earlier it was 17 and now it has changed to 30 which means that 13 quantities of the product are replenished.
In the Odoo 16 Inventory module, you can access the Replenishment management window from the Operations window. This advanced platform includes the list of preconfigured replenishment orders.
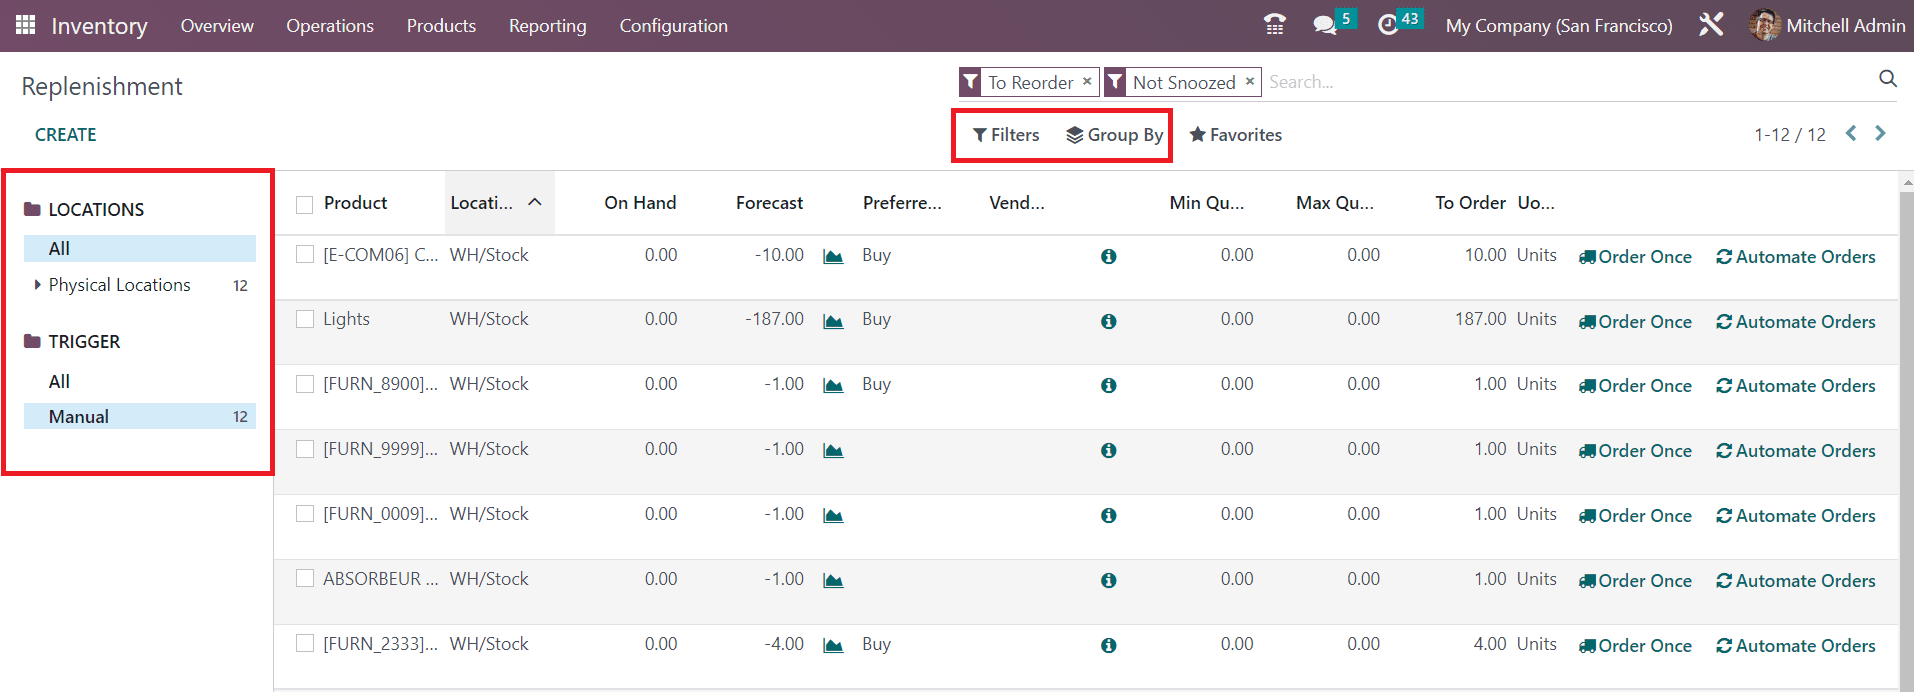
You can search for particular replenishment orders using the search bar. The Filters include default and customizable options which will easily retrieve required data. You can group the orders based on their Location, Product, and Category with the help of the Group By option. On the left side of the window, you will get a dedicated sorting panel that will allow you to sort the data based on the Locations. Using the Trigger option, you can separate the manual replenishment from all replenishment orders.

The preview of the list includes the name of the Products, Location, On Hand, Forcast, Preferred Route, Vendor, Minimum Quantity, Maximum Quantity, To Order, and UoM. You can manually create a new replenishment using the Create button. A new line will appear to mention the details of the replenishment of a specific product.

When you mention the name of the product in the specified field, the Location, On Hand, and Forecast details of the product will automatically appear on the respective fields. You can select the Preferred Route from the given drop-down menu.
Then mention the Minimum Quantity and Maximum Quantity of the product required to be replenished. As soon as you mention the To Order quantity, you will get two options to order the product such as Order Once and Automatic Orders. By clicking on the Order Once button, you can instantly create replenishment by generating a request for quotation. Clicking on the Automatic Orders button will manage the replenishment orders automatically. You can snooze the operation for a particular period of time using the Snooze option.

This option allows you to snooze the operation for 1 Day, 1 Week, 1 Month, or for a Custom period. It is also possible to set a Snooze Date on this pop-up window.
Now, let’s check the Inventory Adjustment features in the Inventory module.
Last updated