Assets
Assets
Asset management now becomes easier with the guidance of the Odoo Accounting module. Odoo offers dedicated platforms in the module for managing assets that are purchased for long-term use. As time passes, the fixed assets will undergo depreciation and their value will reduce eventually.
First, let’s create Asset Models from the Configuration menu of the module. The product you purchase as an asset will be added to the corresponding asset model in Odoo. The list of asset models will show the Asset Name, Fixed Asset Account, Depreciation Account, Method, Number of Depreciation, and Period Length.

Click the Create button and Odoo will lead you to a new configuration window as shown in the screenshot below.

In the Asset Model Name field, you can provide a name for the asset model. You can set the Depreciation Method as a Straight Line, Declining, or Declining then Straight Line. The Straight Line is a widely used depreciation method that is easier to calculate. It can be calculated by dividing the gross value by duration. In the Declining method, you can set a declining factor. The value is calculated by multiplying the residual value with the specified declining factor. The Declining then Straight Line method is a combination of both methods mentioned above. It operates like the Declining method but with a minimum depreciation value equal to the Straight Line value.
The number of depreciation required to depreciate your asset can be defined in the Duration field. You can set the Computation method as No Prorata, Constant Periods, Based on days per period. The name of your Company can be observed in the respective field. Mention the account used to record the purchase of the asset and its original price in the Fixed Asset Account. The account used in the depreciation entries, to decrease the asset value can be specified in the Depreciation Account field. The Expense Account field can be used to add the account used in the periodical entries to record a part of the asset as an expense. The configuration can be completed by specifying the Journal for recording the accounting entries of this asset model.

In order to automate the assets, you can go to the Configuration menu and select the Chart of Accounts.
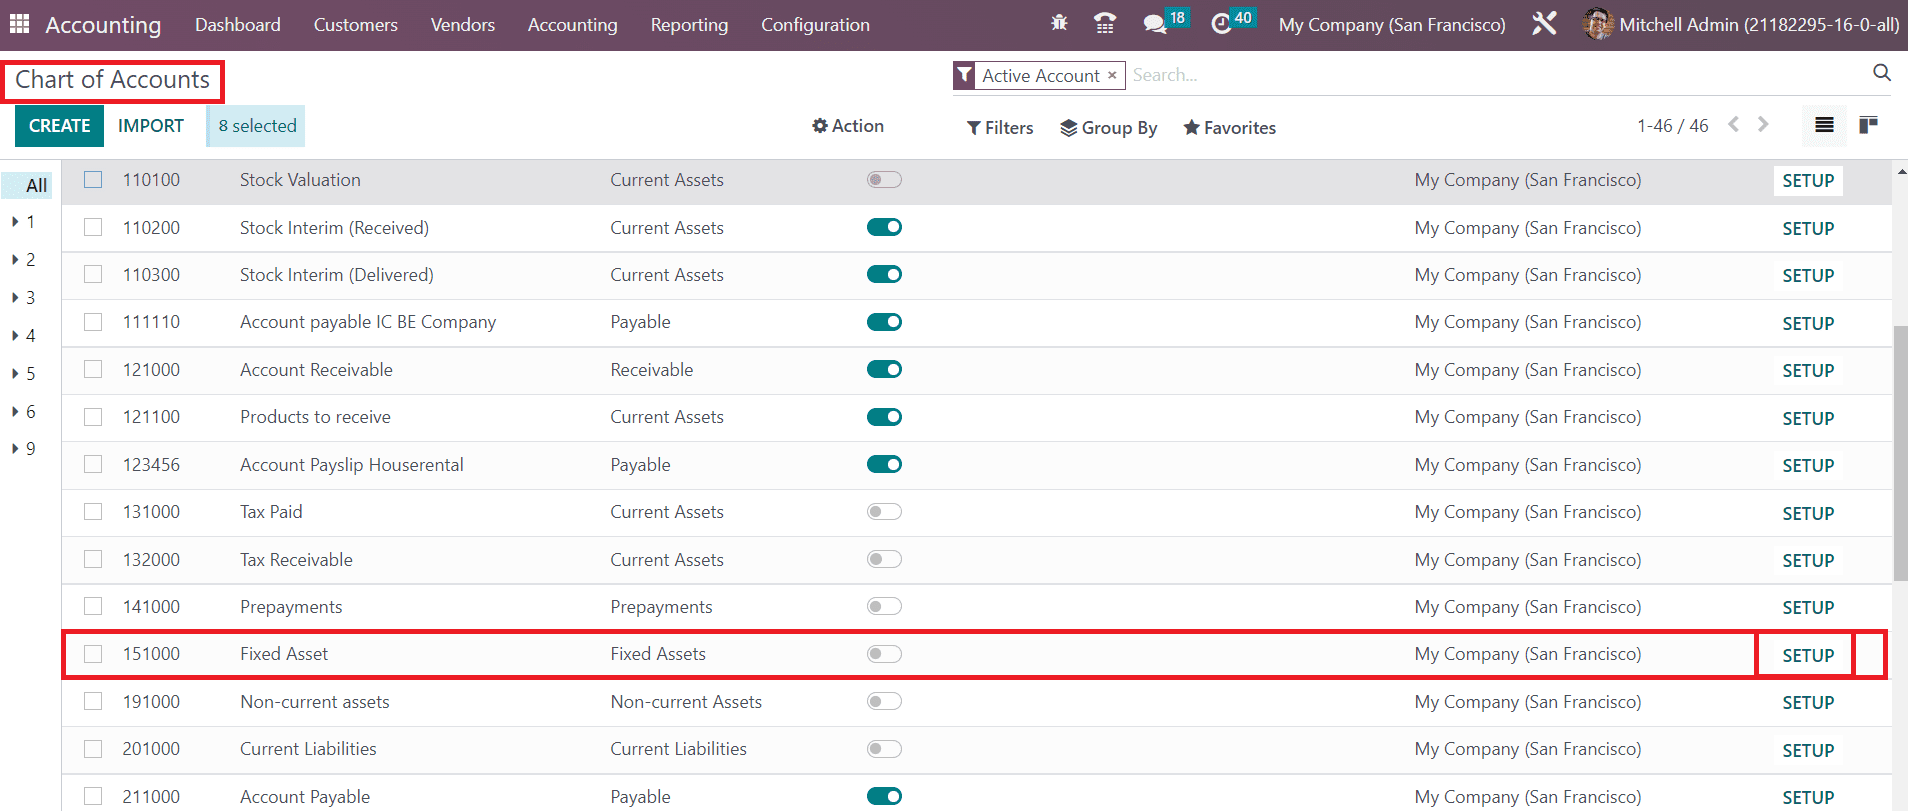
From the given list, you can select the account you mentioned in the asset model and click the Setup button.
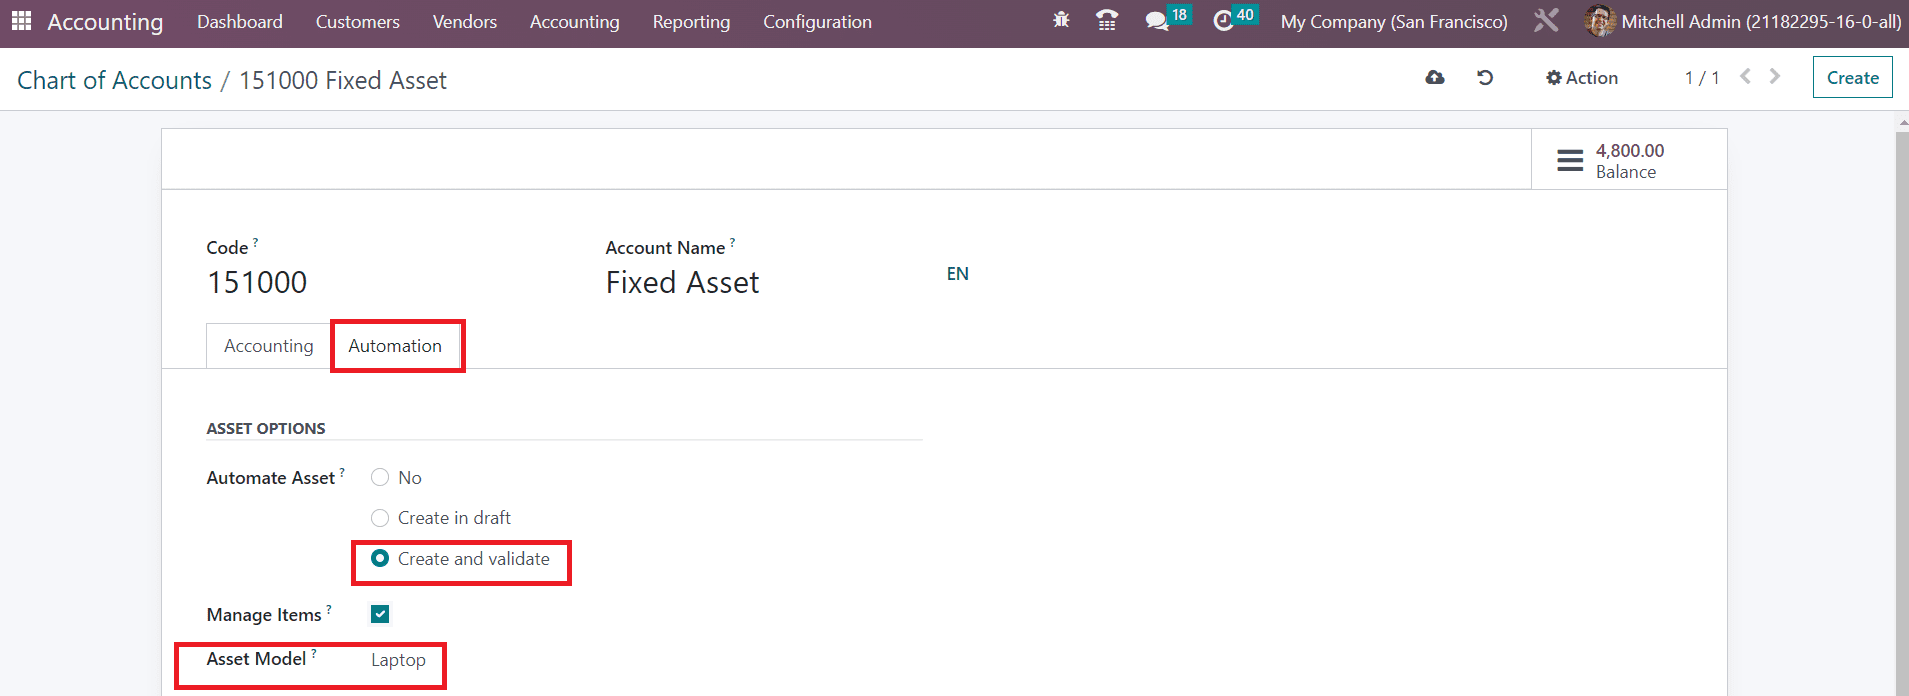
Here, you can select the Create and Validate option in the Automate Asset field. As soon as you select this option, you will be able to get an additional field to mention the Asset Model. You can mention the newly created Asset Model here.
Now let’s take a look at how to create a record of assets in Odoo. First, generate a vendor bill for the purchased asset. While generating the vendor bill, make sure to select the account as the same as that of the asset model.
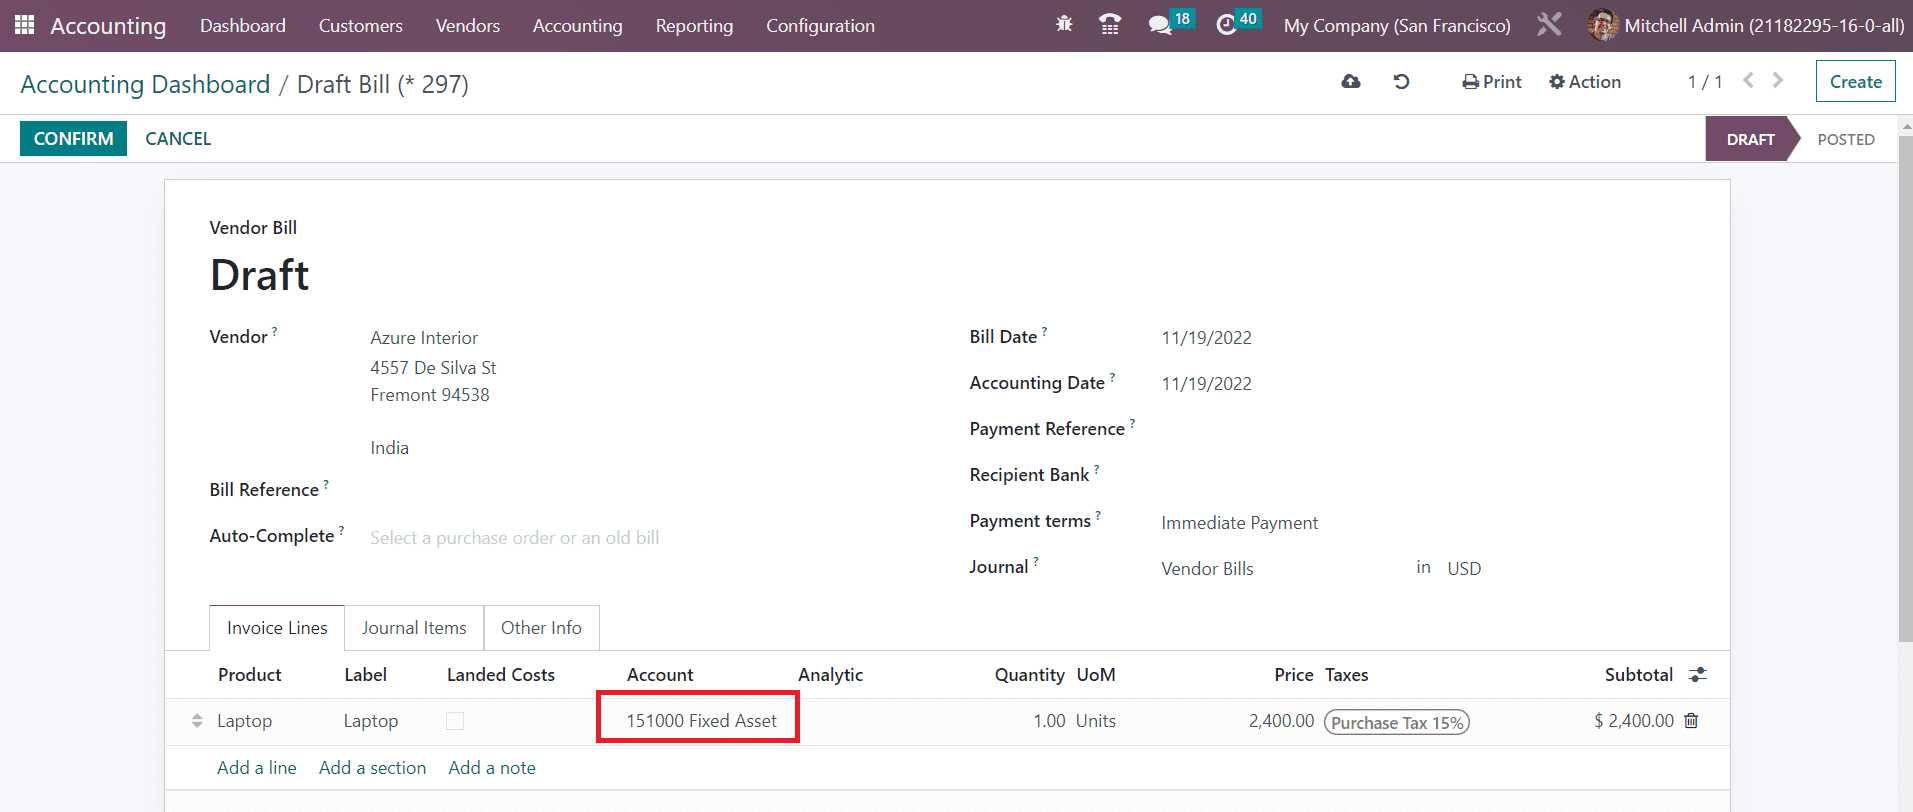
Once you validate this vendor bill, you will get the Asset smart button on the screen as shown below.
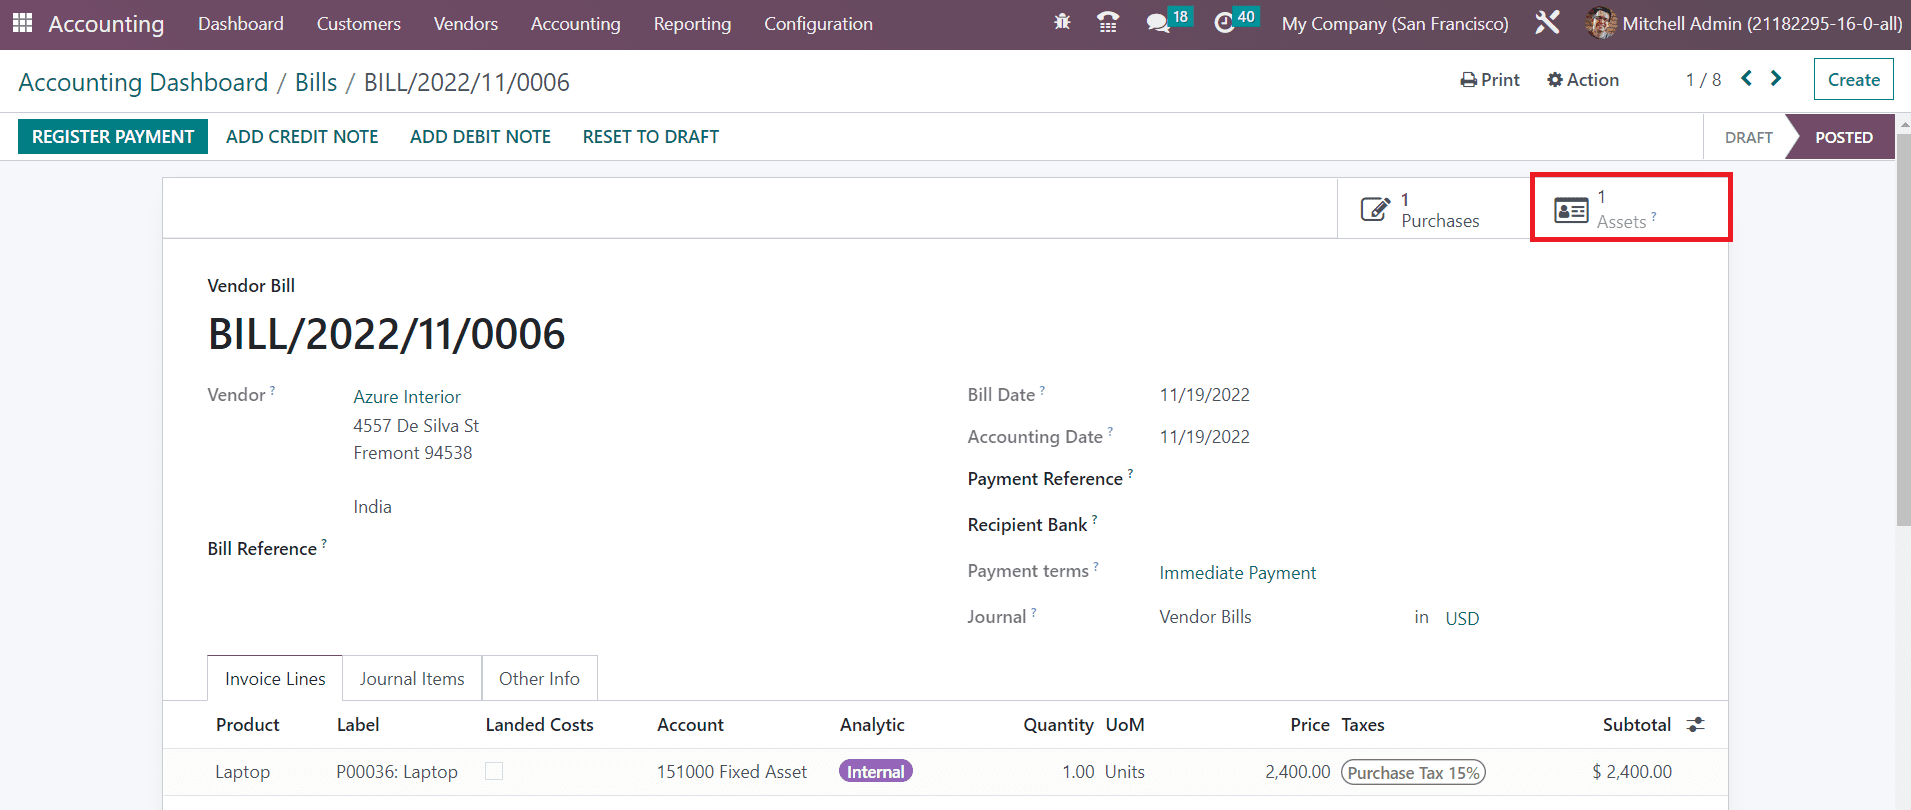
By clicking on this button, you can observe the respective asset recorded in Odoo.
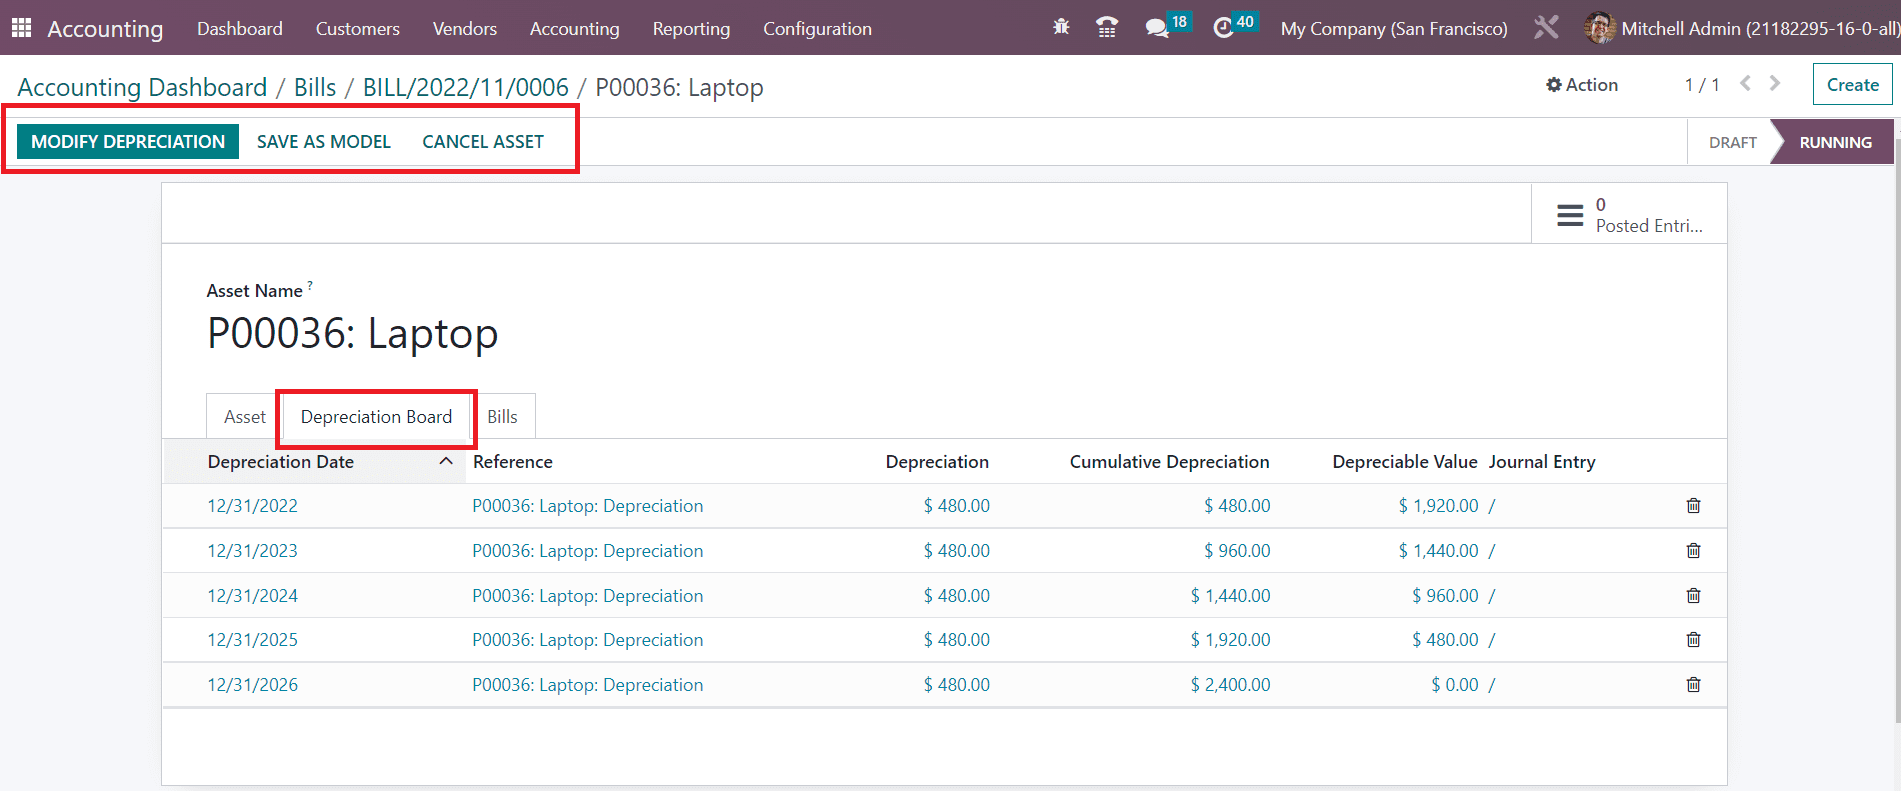
In the Depreciation Board tab, you will get the details of the upcoming depreciations. By clicking on the Modify Depreciation button, you can modify the current depreciation. You will get a pop-up as shown below where you decide the action to act on the current depreciation.

If you want to dispose of the asset, you set the Action as Dispose. The Date will be available in the respective field. The account used to write the journal item in case of loss can be specified in the Loss Account field. The Note field can be used to add internal notes for the modified depreciation.
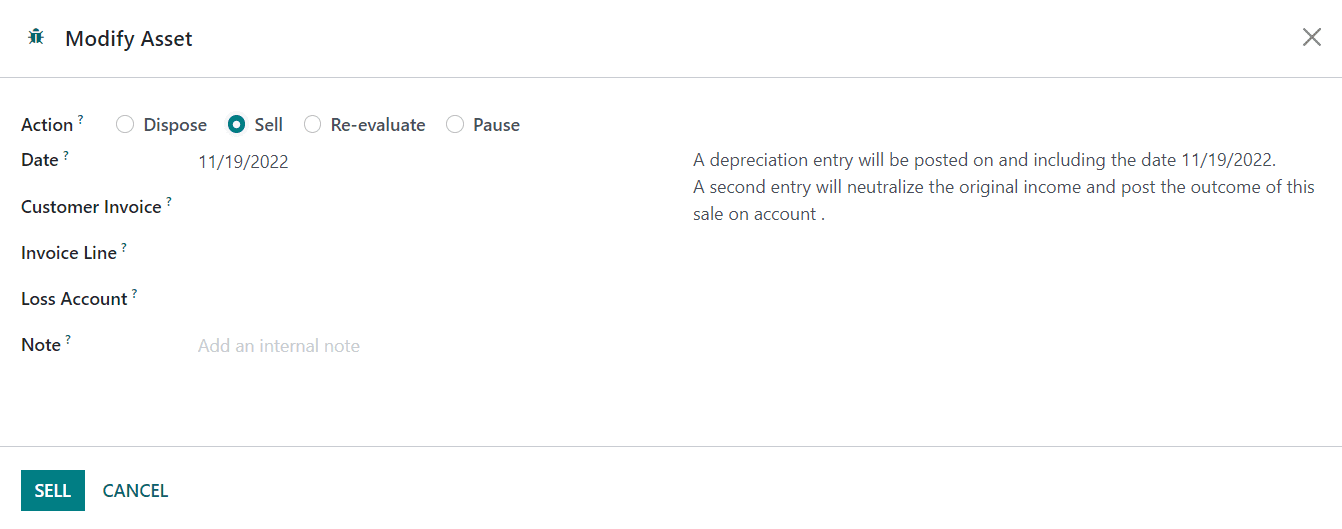
In the case of Sell as action, you need a disposal invoice in order to generate the closing journal entry in the Customer Invoice field. Specify the Invoice Line related to this asset in the given space.
The depreciation can be re-evaluated by using the Re-evaluate option as Action. Here, the new residual amount for the asset can be added in the Depreciation Amount field.
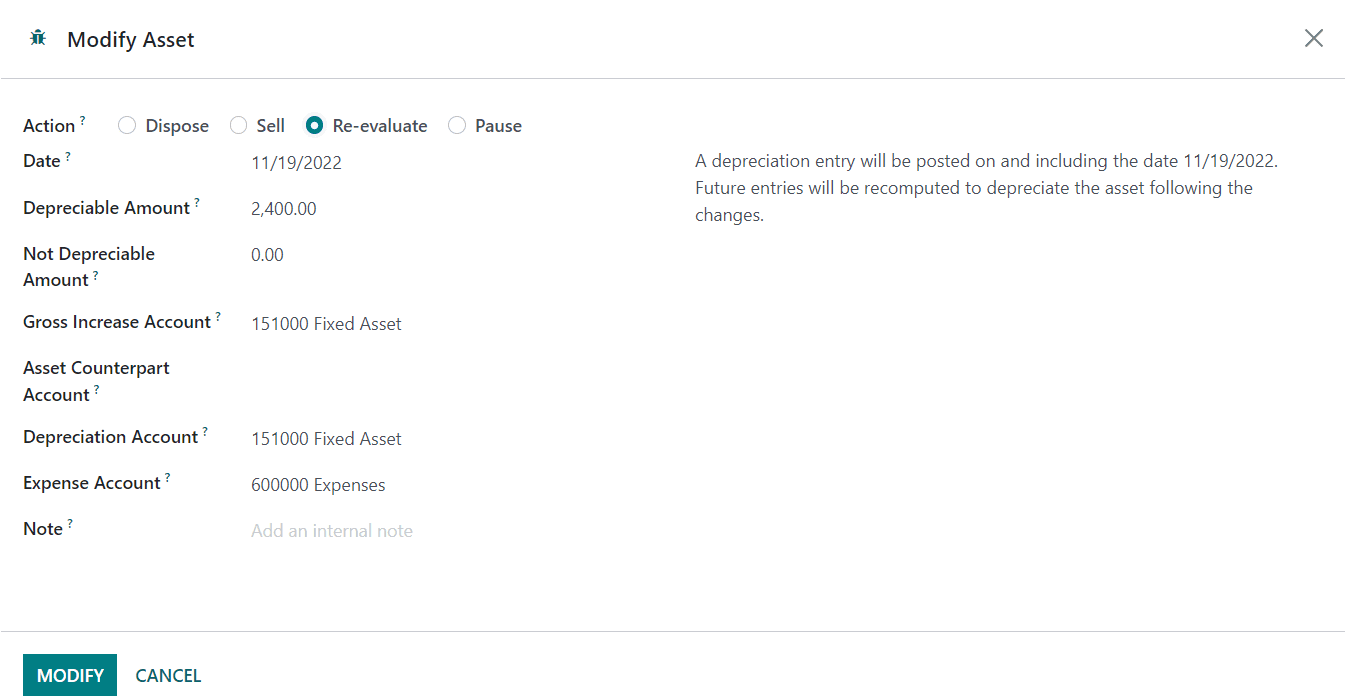
In the Not Depreciation Amount field, you can add the new salvage amount for the asset. You can observe the Gross Increase Account, Asset Counterpart Account, Depreciation Account, and Expense Account in the corresponding fields.

Select the Pause option as Action if you want to pause the depreciation. Once you click the Modify button, the changes in the depreciation can be seen on the Depreciation Board tab.
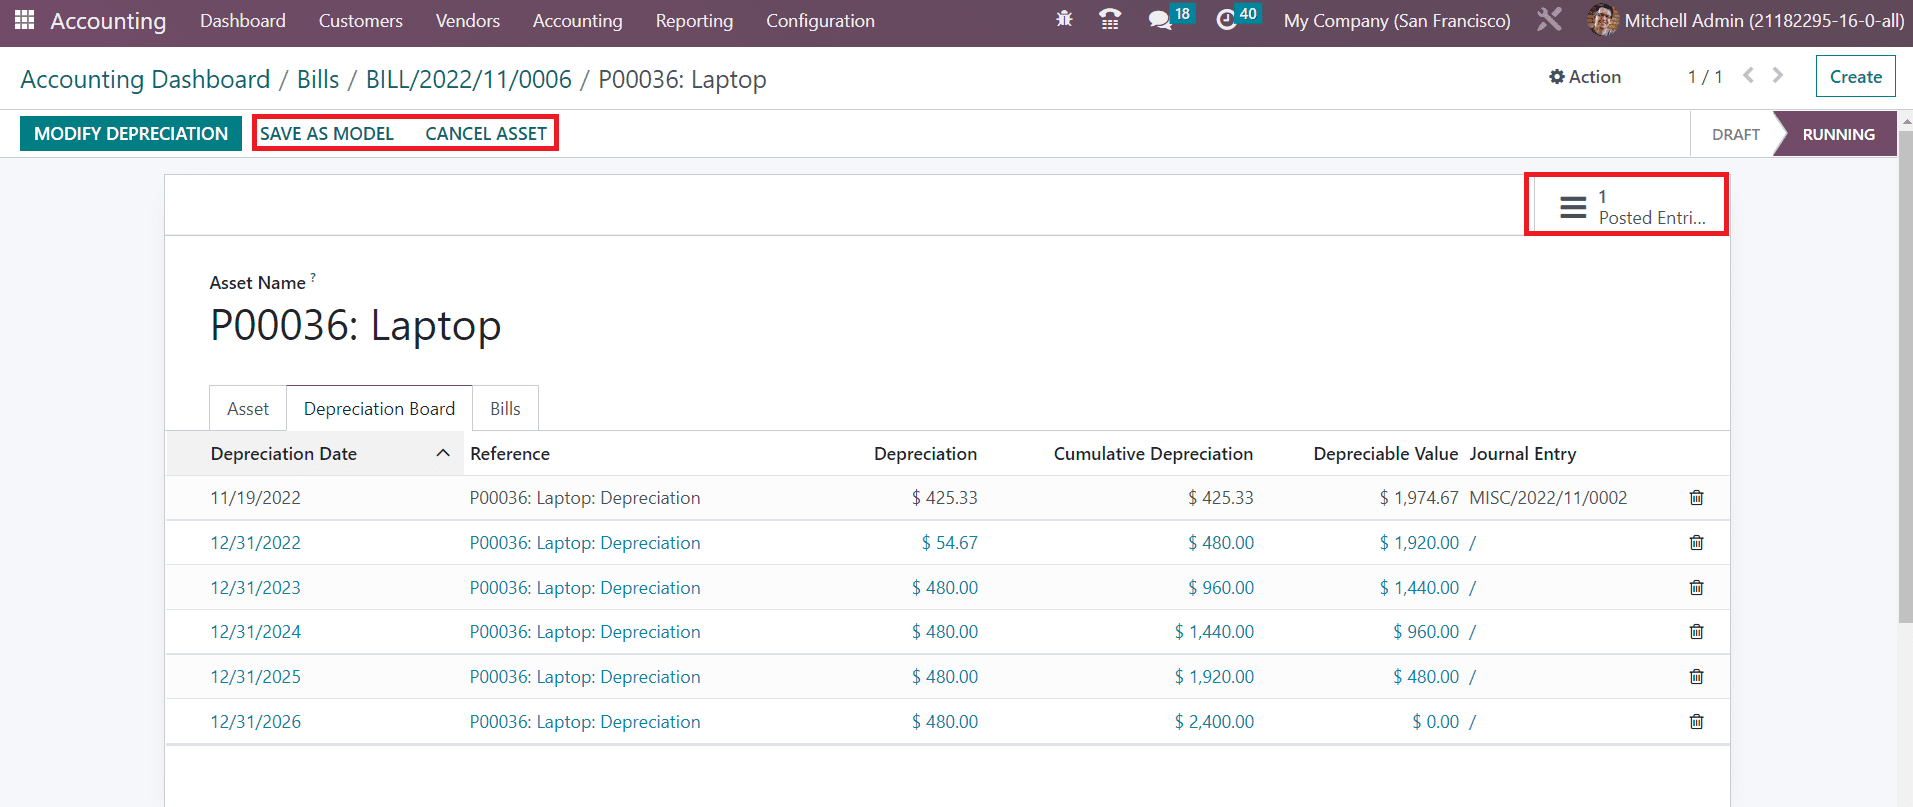
The posted journal entries can be observed and managed using the available smart button Posted Entries. You can save this asset as an asset model by clicking on the Save as Model. If you want to cancel the running asset, use the Cancel Asset button.
In the Odoo Accounting module, you will get a separate platform to manage and create Assets under the Accounting menu. The already created assets can be seen here as shown below with the details of Asset Name, Acquisition Date, Original Value, Method, Book Value, Depreciation Value, and Status.

You can manually configure a new asset in your system by using the Create button. The new configuration window appears on your screen as shown below.
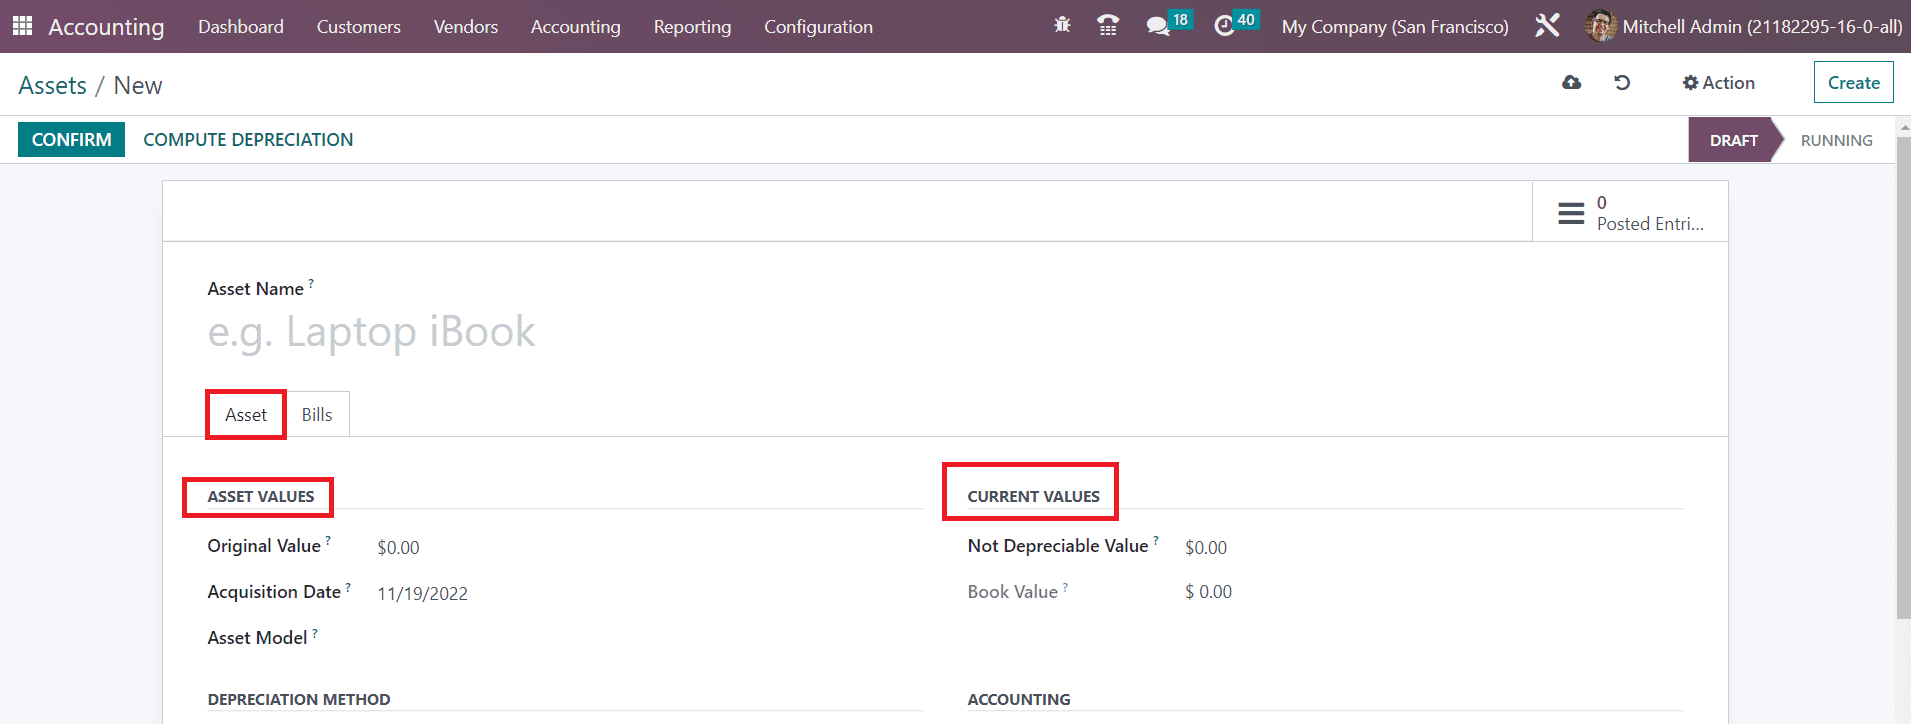
Give a name for your asset in the Asset Name field. Then, you can configure details in the Asset tab. Under the Asset Values section, mention the Original Value, Acquisition Date, and Asset Model of the asset. Under the Current Values section, mention the Not Depreciable Value. It is the amount you plan to have that you can not depreciate. The sum of the depreciable value, the salvage value, and the book value of all value increase items can be seen in the Book Value field.
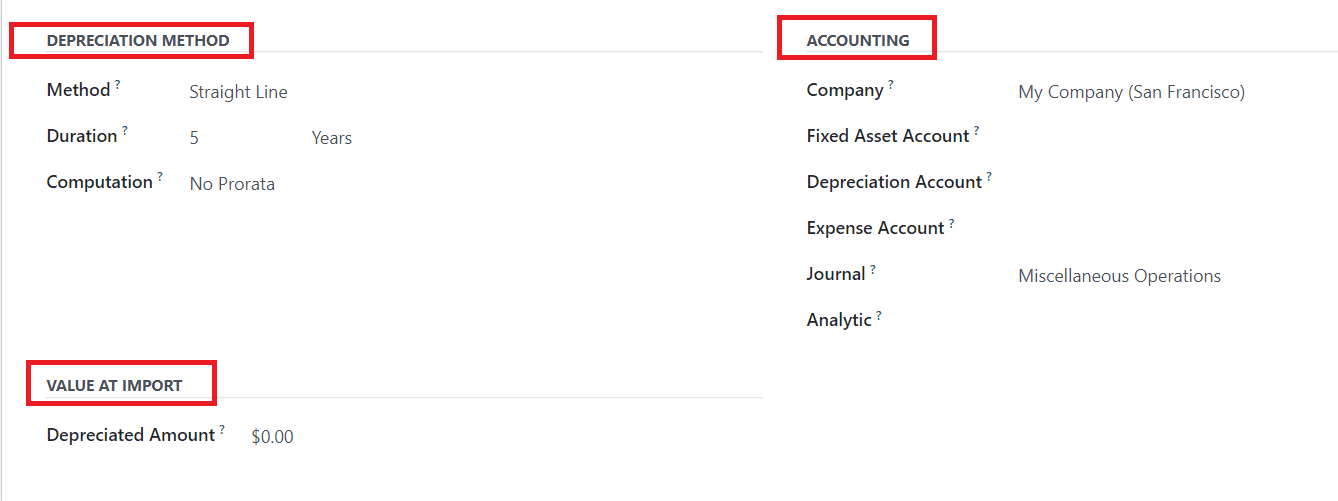
In the Depreciation Method and Accounting sections, the details will be auto-populated based on the asset model you select. Additionally, you will get the Analytic field to specify the analytic distribution. In case of an import from another software, you might need to use the Depreciated Amount field to have the right depreciation table report. This is the value that was already depreciated with entries not computed from this model.

The bills related to this asset can be added one by one using the Add a Line button under the Bills tab.
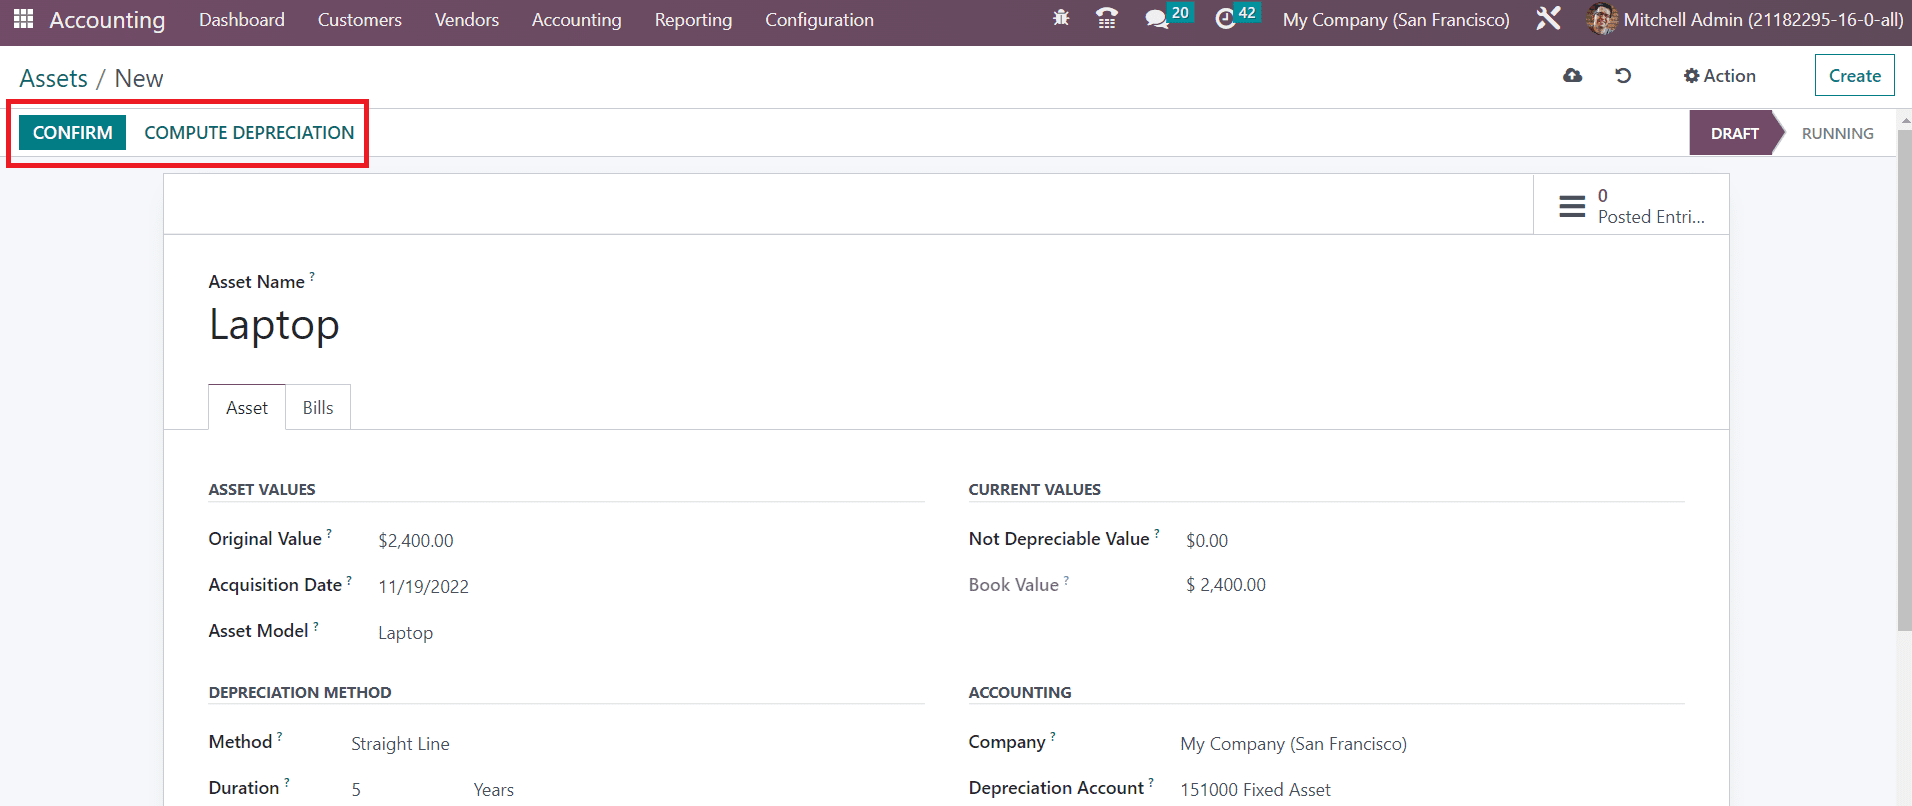
You can click on the Confirm button to confirm the asset. Using the Compute Depreciation button, you can calculate the depreciation and it will be available under the Depreciation Board tab as shown below.
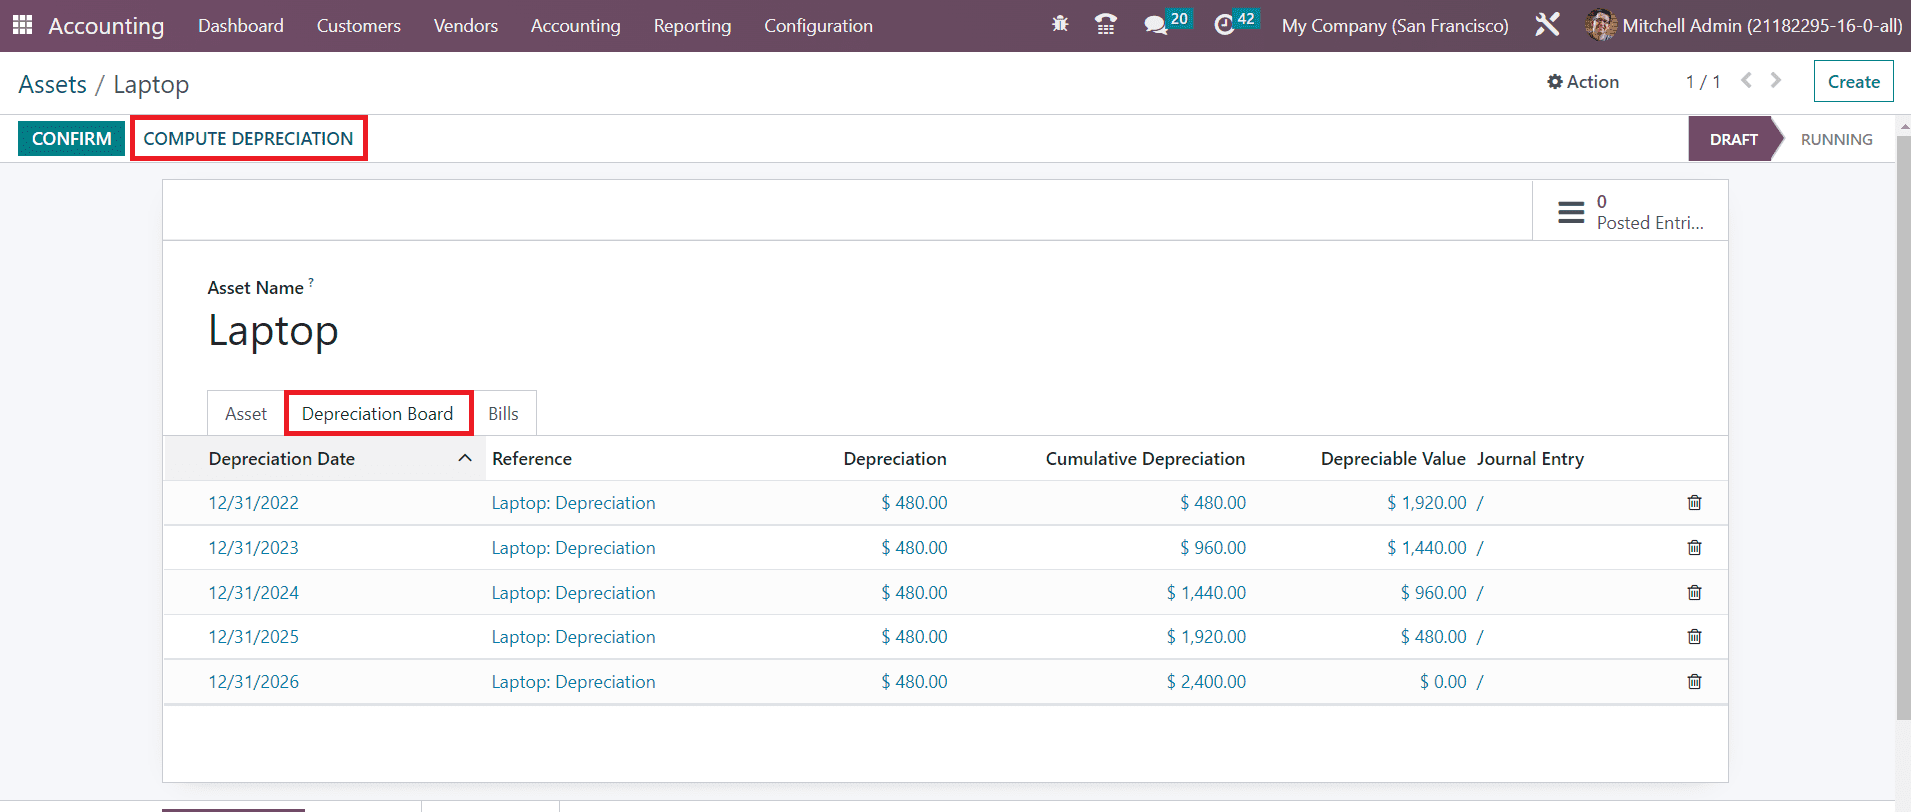
Once you confirm the asset, it will change to the running status.
Last updated