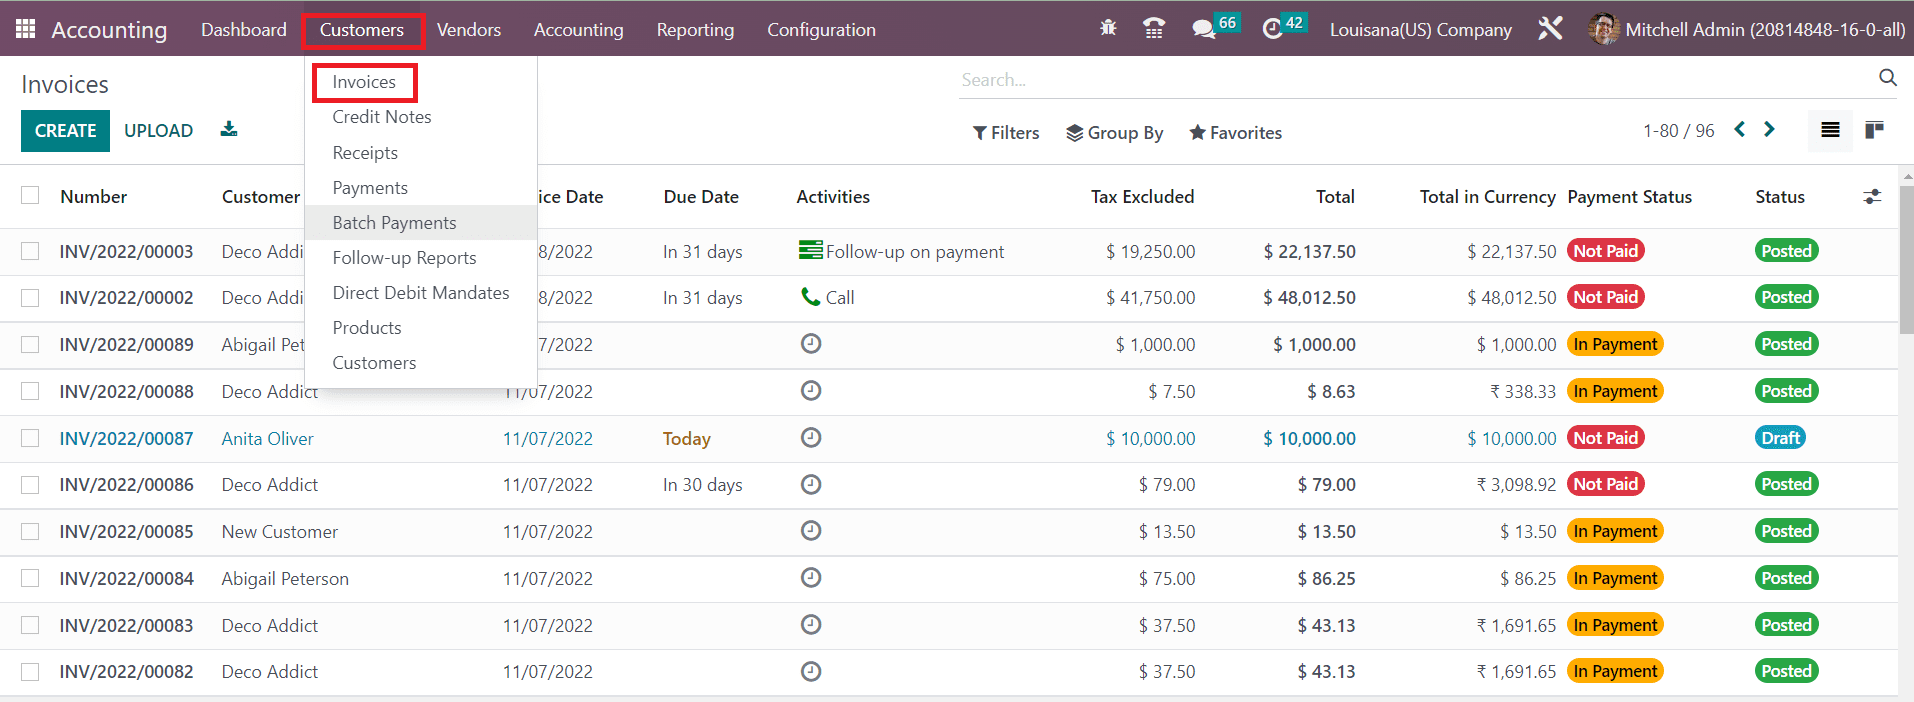
# Customer Invoices
### Customer Invoices
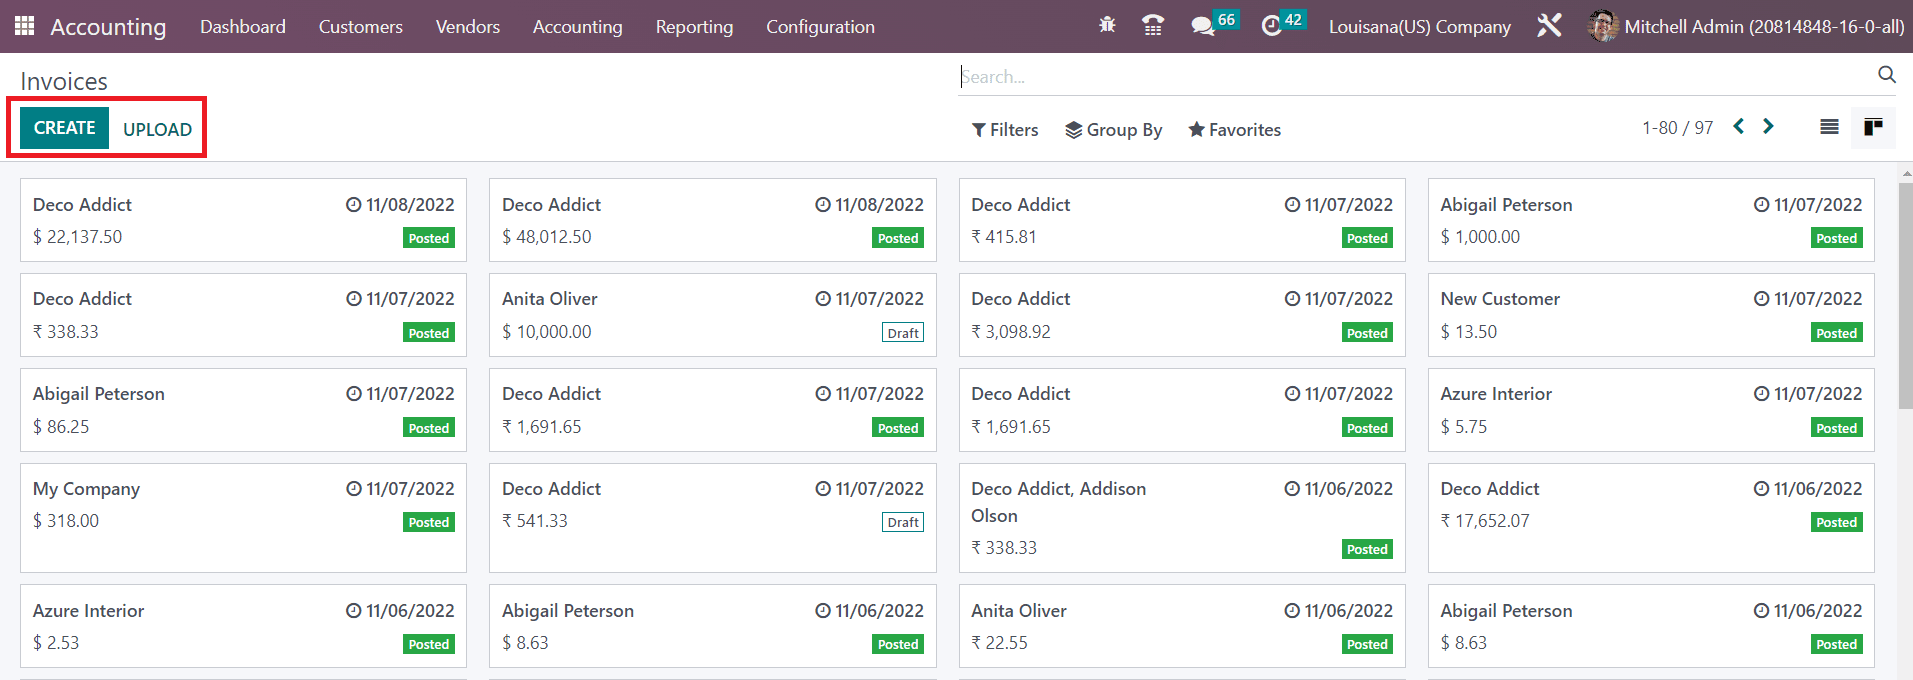
There are several methods available in Odoo that automate customer invoice creation depending on the operation you perform and the module you use. While discussing the Sales module, we mentioned the management of invoices. Once you confirm a sales order, you will get a draft customer invoice in Odoo. You just need to validate the draft invoices and send them to the respective customers. All such automated invoices will be recorded and managed in the **Invoices** platform available under the **Customer** menu of the Accounting module. This platform will allow you to create invoices manually also.
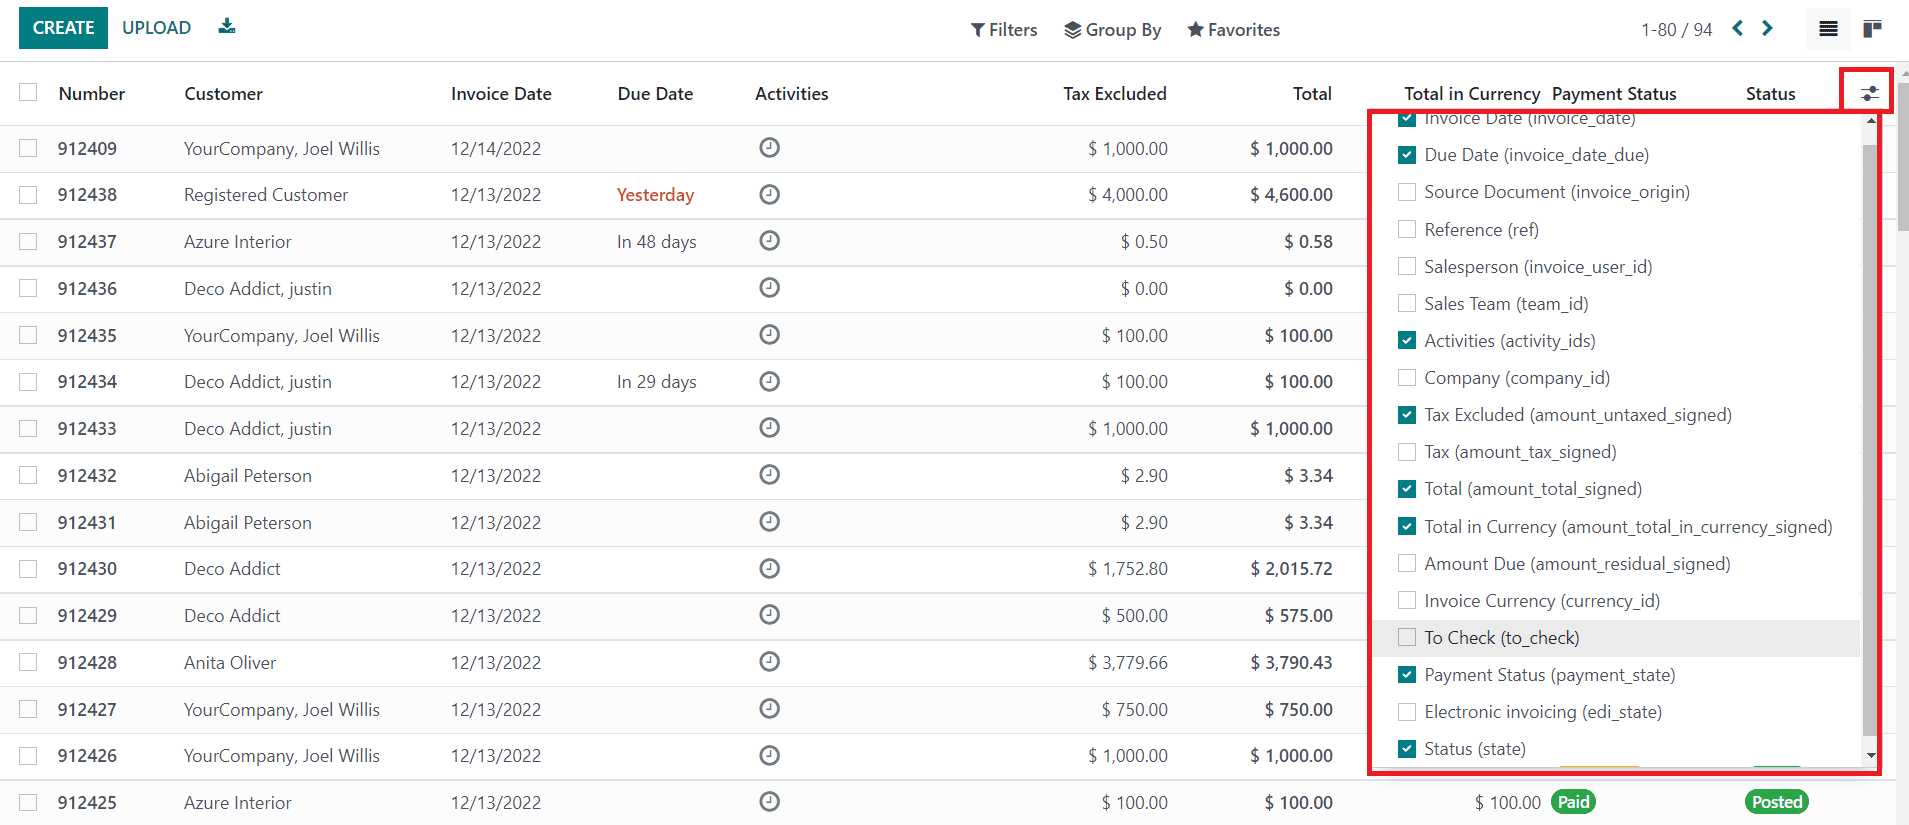
The list of invoices recorded in the Accounting module is shown below. The list view gives the details of the Number, Customer, Invoice Date, Due Date, Activities, Tax Excluded, Total, Total in Currency, Payment Status, and Status. It is possible to expand the list view by adding additional details related to the customer invoice. This can be done by using the small icon given next to the Status field as highlighted in the image below.
From this menu, you can enable or disable required fields for the list view of the customer invoice. It includes the Invoice Date, Due Date, Source Document, Reference, Salesperson, Sales Team, Activities, Company, Tax Excluded, Tax, Total, Total in Currency, Amount Due, Invoice Currency, To Check, Payment Status, Electronic Invoicing, and Status.
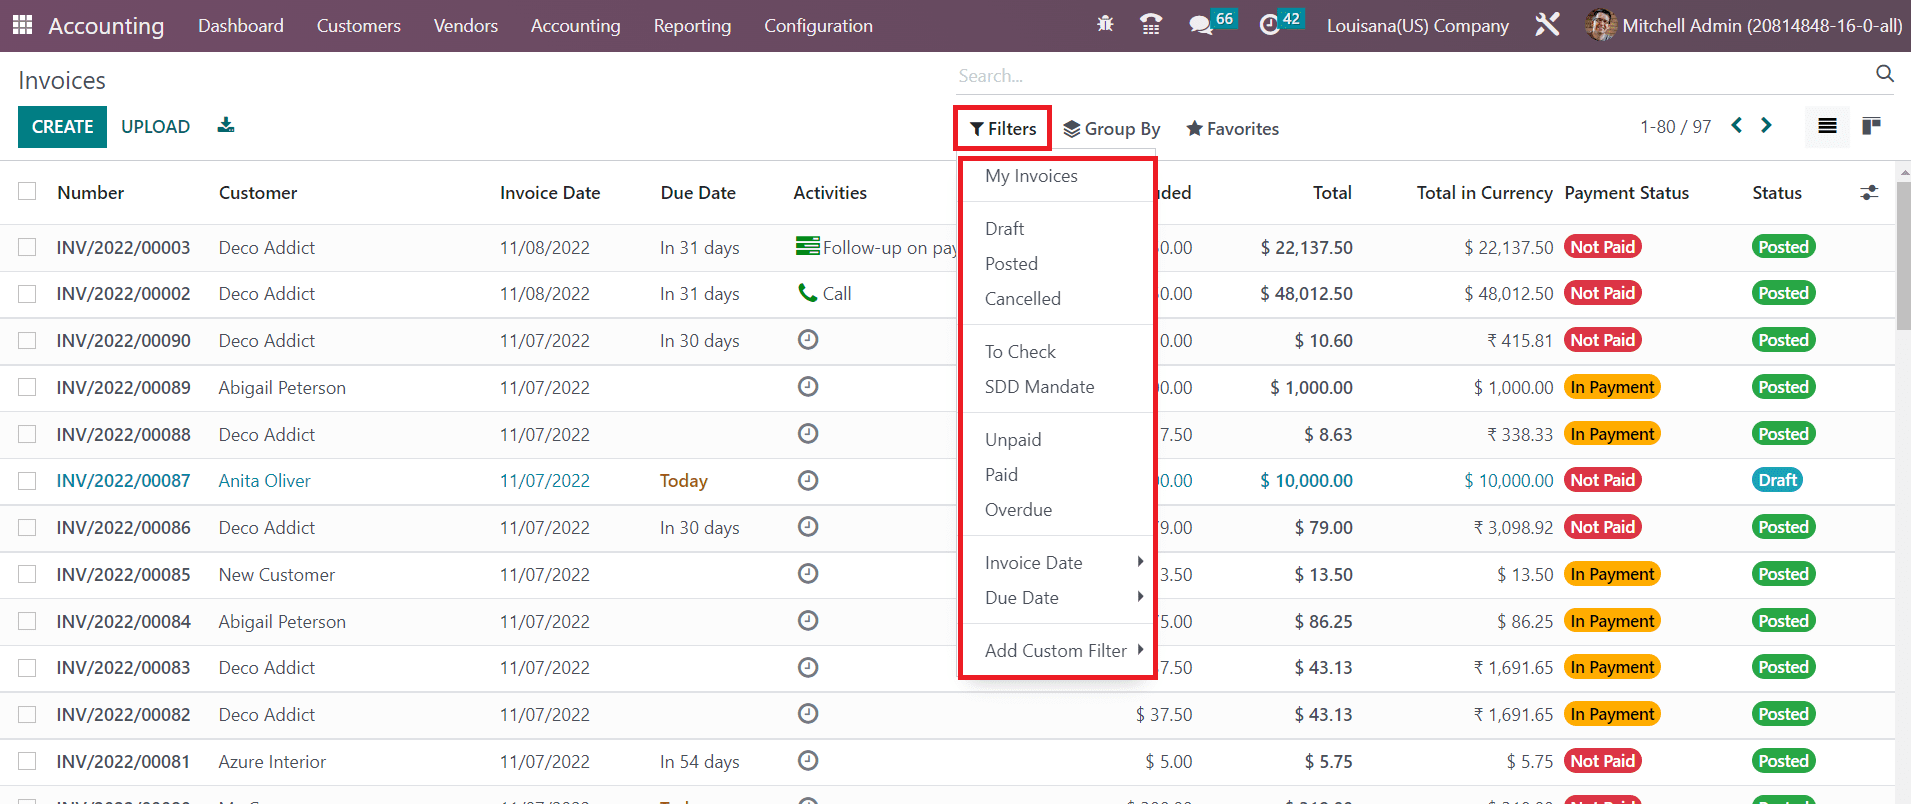
Using the default Filters, you can filter the invoices based on My Invoices, Draft, Posted, Canceled, To Check, Unpaid, Paid, Overdue, Invoice Date, and Due Date. You are allowed to create custom filters for invoices using the **Add Custom Filter** button.
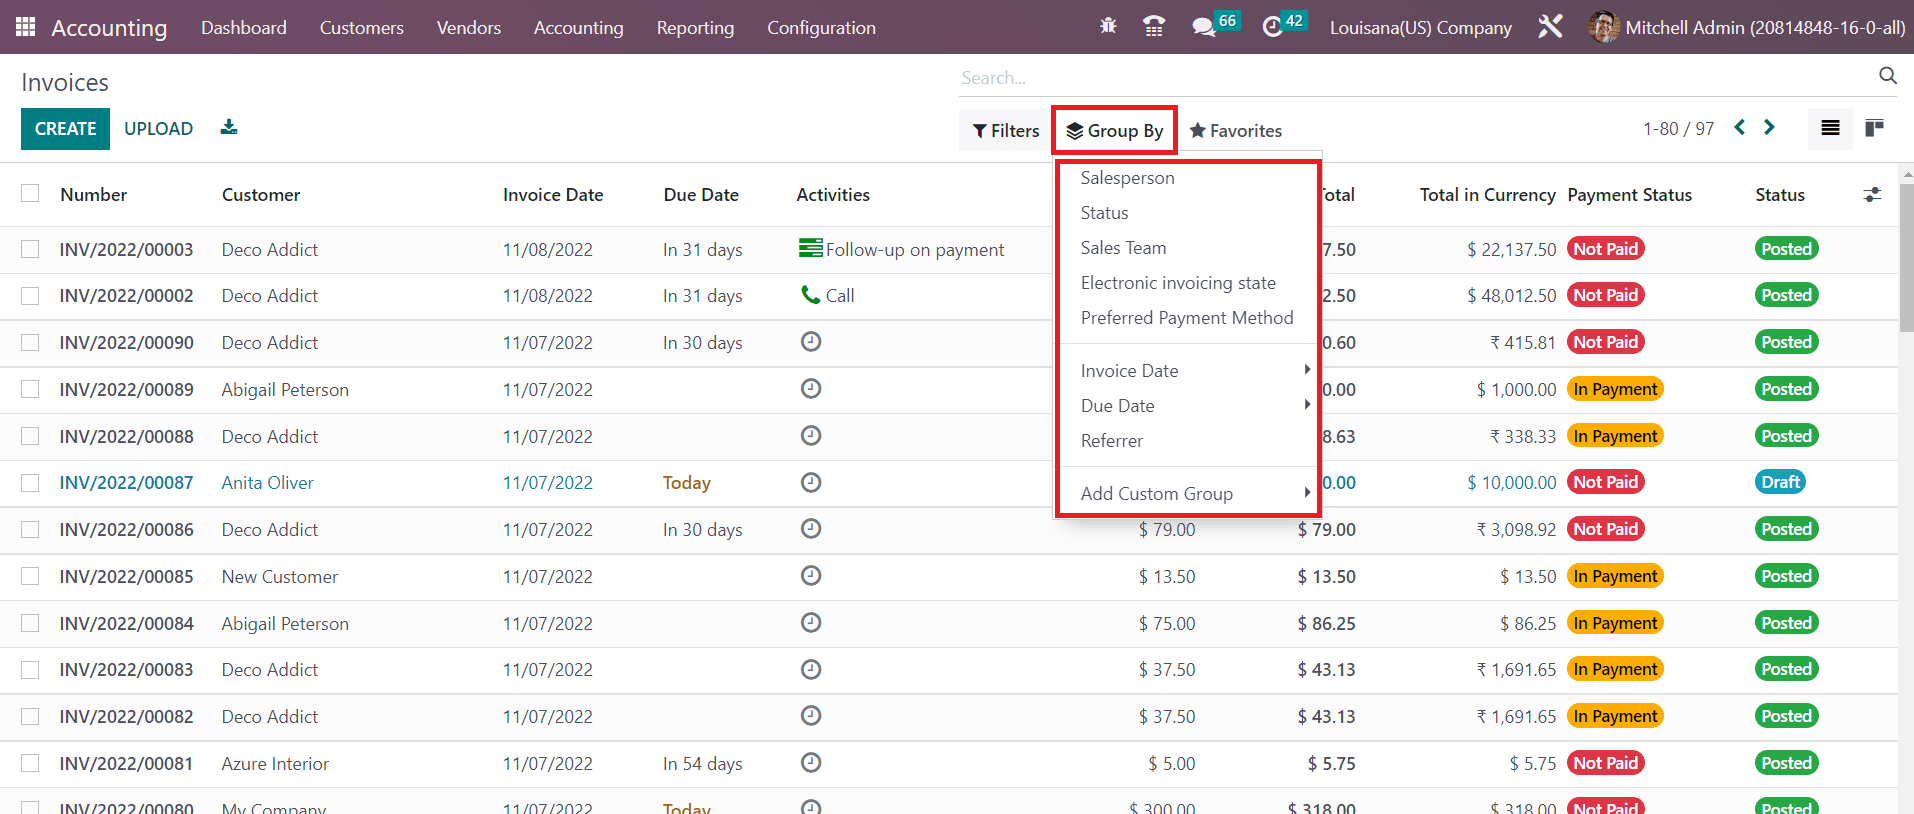
In the Group By option, you can group the available invoices according to the Salesperson, Status, Sales Team, Electronic Invoicing State, Preferred Payment Method, Invoice Date, Due Date, and Referrer. The **Add Custom Group** button helps you to create custom group options.
The screenshot above shows the Kanban view of the Invoice platform. You can use the **Upload** button to upload an invoice to the database. In order to create an invoice manually, you can click on the **Create** button which directs you to the invoice creation window as shown below.
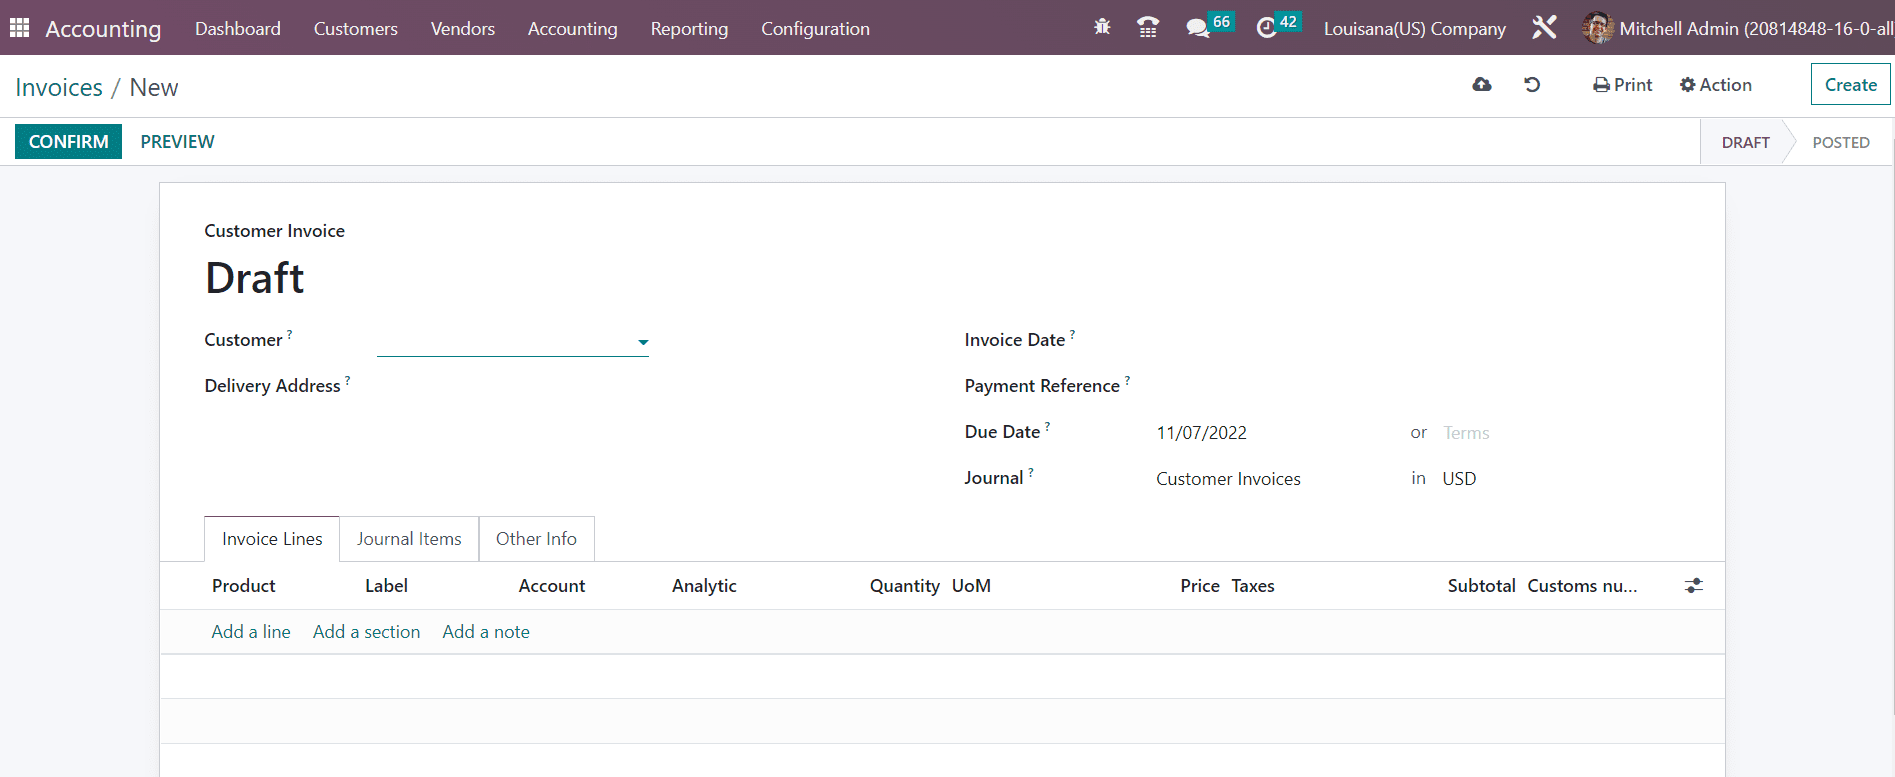
Here, we are going to create a draft invoice. You can mention the customer id in the **Customer** field and their current delivery address in the **Delivery Address** field. Set an **Invoice Date** and mention the **Payment Reference** to set on journal items in the respective fields. Once you mention the customer id in the corresponding field, the respective Payment Term will automatically appear on the invoice based on the configuration. Otherwise, you can set a **Due Date** for the invoice within which the invoice should be paid by the customer. Specify a suitable **Journal** for the invoice.
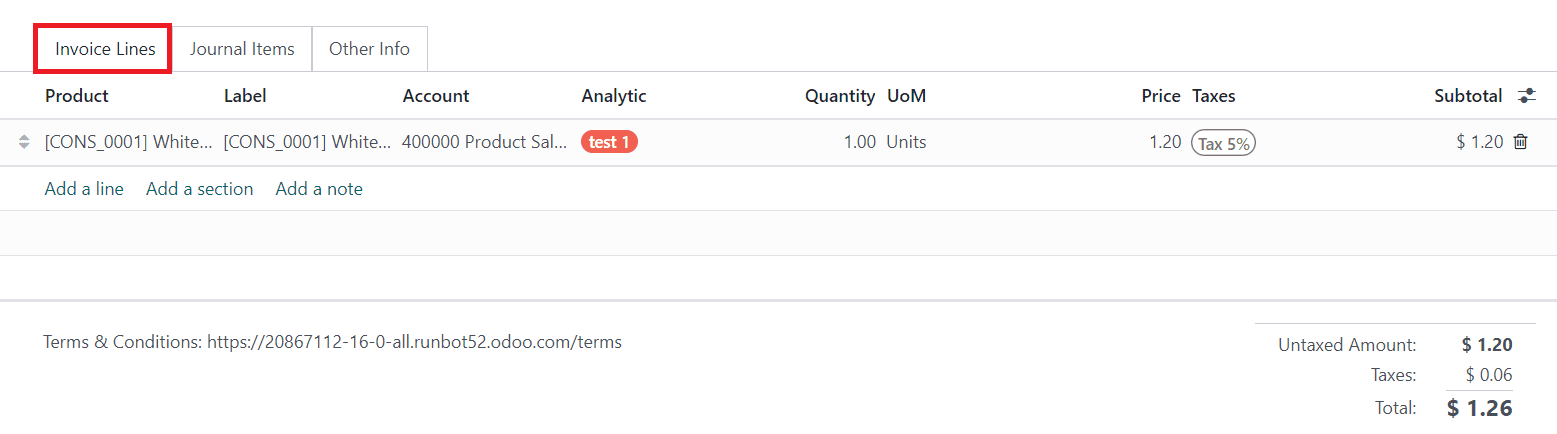
The invoice screen shows three additional tabs such as Invoice Line, Journal Item, and Other Info to complete. Under the **Invoice Lines** tab, you can mention the list of products one by one using the **Add a Line** button. It includes the details of Product, Label, Account, Analytic, Quantity, UoM, Price, Taxes, and Subtotal. If the invoice is generated from a sales order, the Invoice Line will show the products that are described in the Order Line of the sales order.
Use the **Add a Section** and **Add a Note** buttons to add a section and note to the invoice respectively. After adding products, you can observe the Untaxed Amount, Taxes, and Total of the invoice under the Invoice Line.
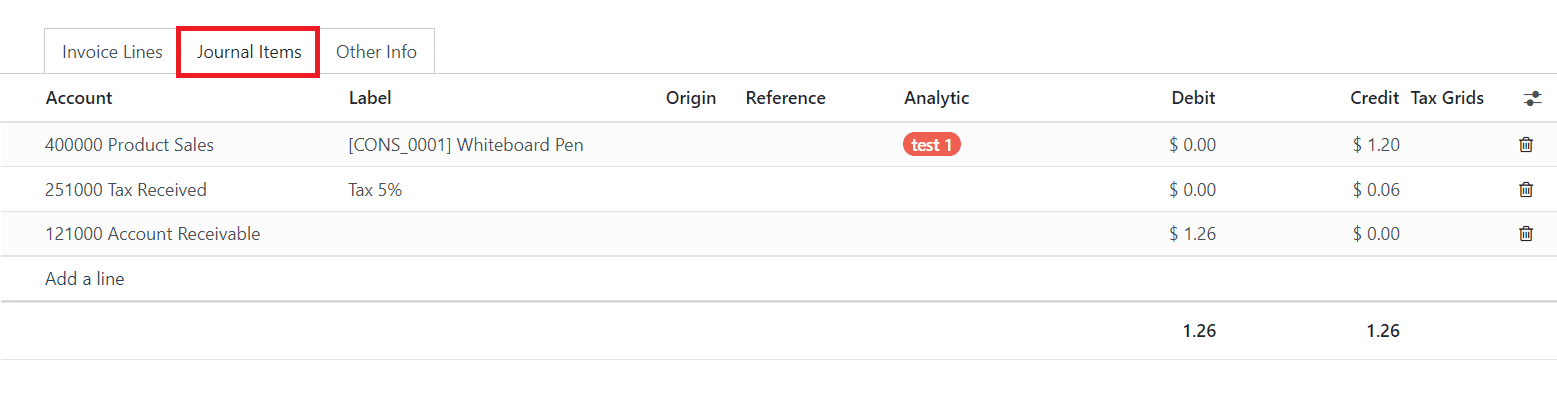
Based on the products you added in the invoice line, corresponding journal items can be seen in the **Journal Items** tab with the details of Account, Label, Origin, Reference, Analytic, Debit, Credit, and Tax Grids.
If you want to delete any of these journal items, you can use the delete icon and add a new one using the **Add a Line** button.
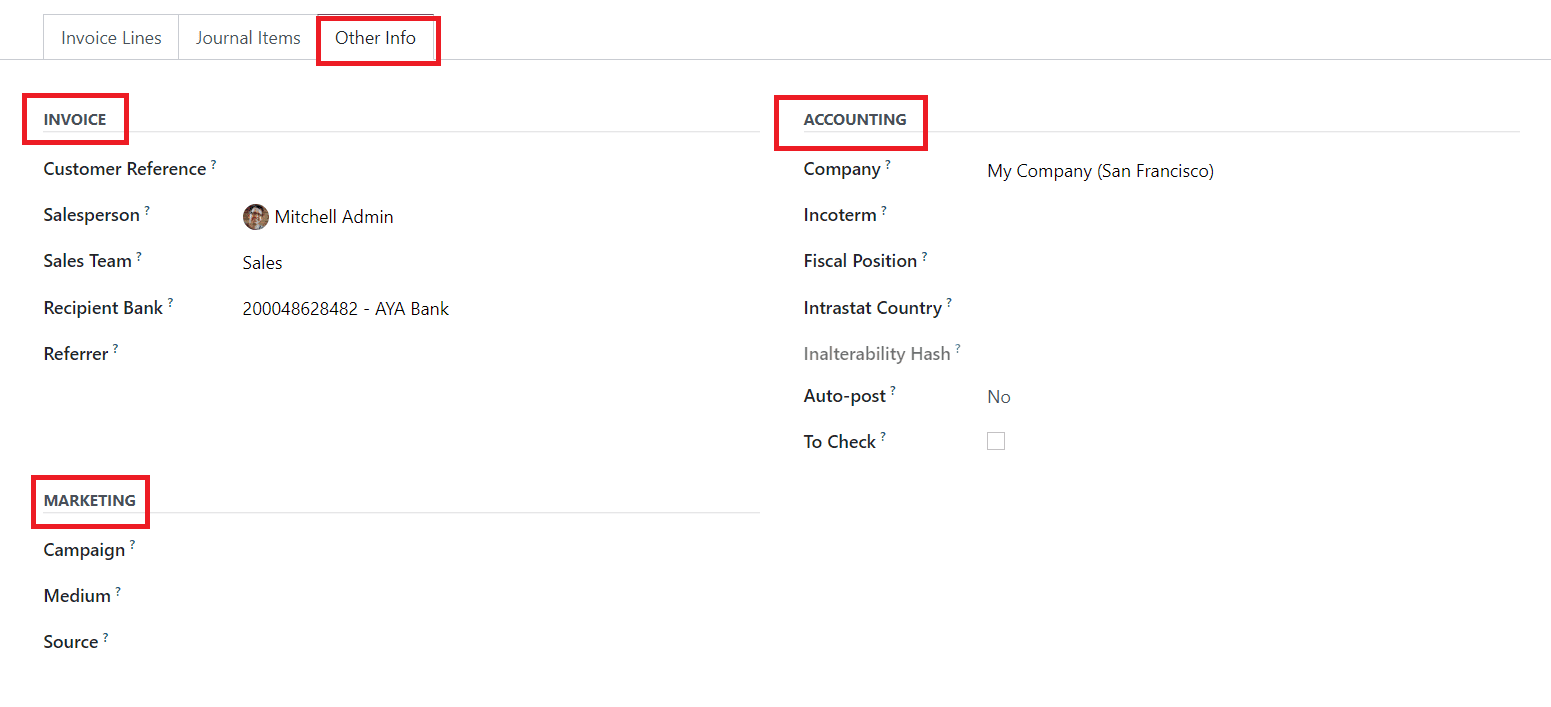
The **Other Info** tab is used to mention the Invoice, Accounting, and Marketing details of an invoice. Under the Invoice field, you can add the **Customer Reference.** This invoice can be assigned to a particular **Salesperson** and **Sales Team** by mentioning their ids in the given spaces. The bank account number to which the invoice will be paid can be defined in the **Recipient Bank** field. If you have any referrer for this sale, you can mention their id in the **Referrer** field.
Use the **Marketing** field to specify the Campaign, Medium, and Source of this invoice. Your company id can be mentioned in the **Company** field available in the Accounting section. Specify the **Incoterms** used for international transactions, **Fiscal Position** to adapt taxes and accounts for particular customers or sales orders/invoices, **Intrastat Country** (Arrival Country), and **Inalterability Hash** in the respective fields. You can post this entry automatically by selecting the period from the **Auto Post** field. This recurring move will be posted up to a particular date and you can set that date in the **Auto Post Until** field. If you want to do it manually, you can select the No option from the Auto Post field.
If you are not sure about the details mentioned in the invoice at the time of creation, you can activate the **To Check** field. Enabling this field indicates that the move needs to be checked again.
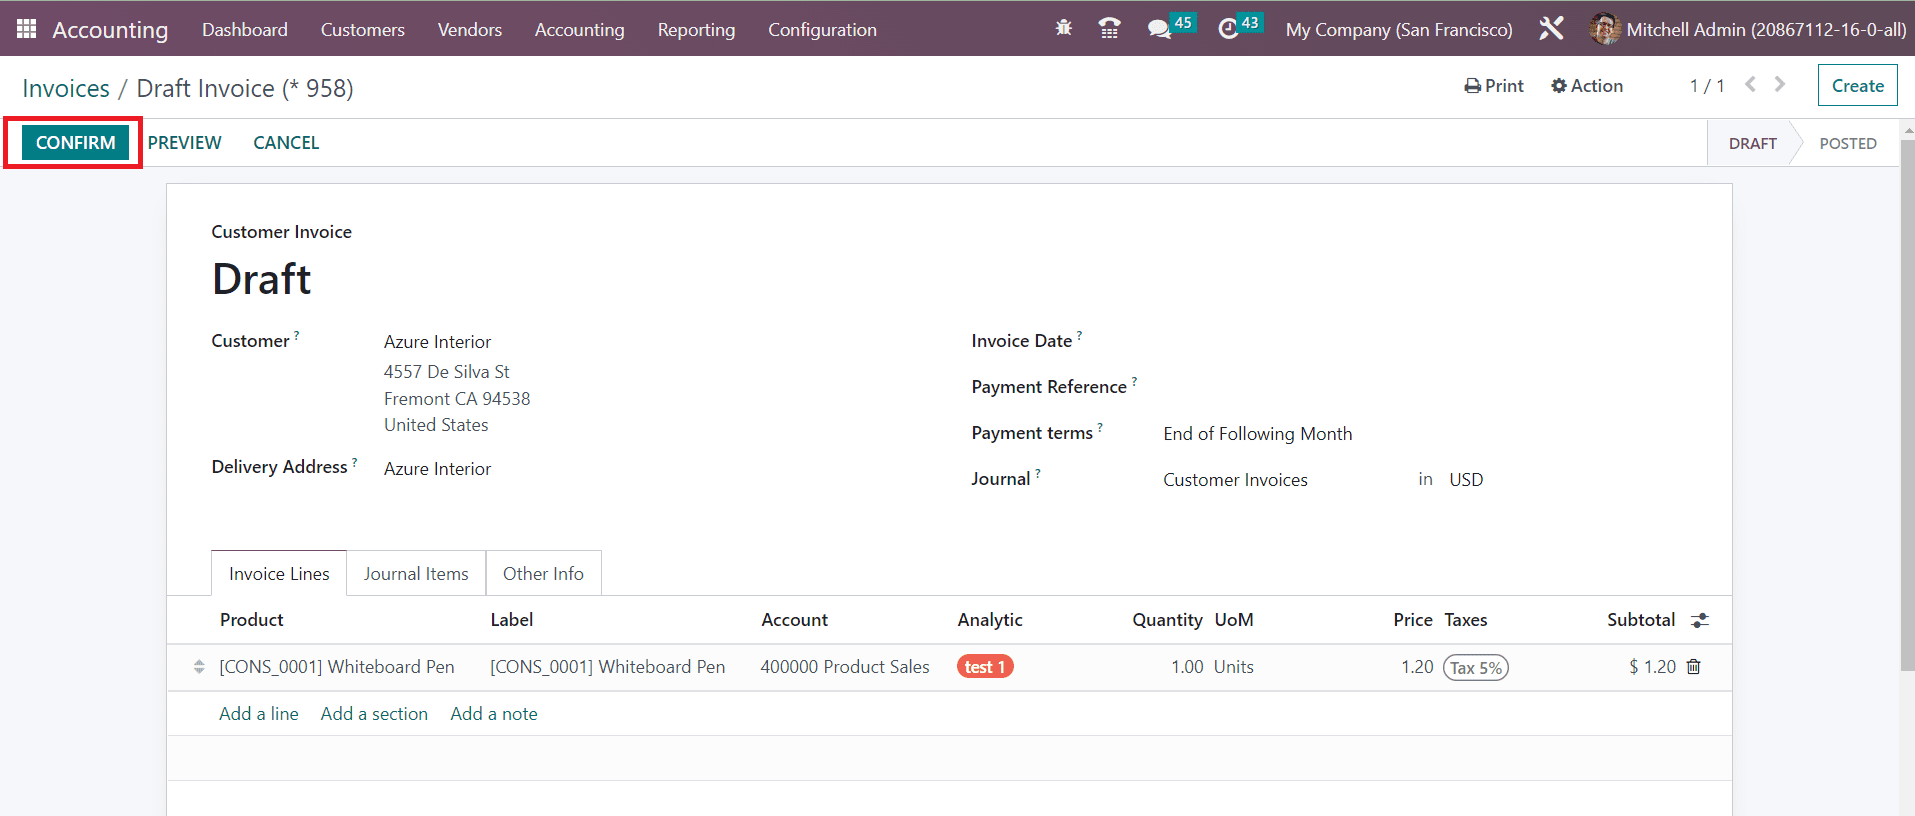
Now, the draft invoice is ready. In order to confirm this invoice, click on the **Confirm** button which will change the status of the invoice from **Draft** to **Posted.**
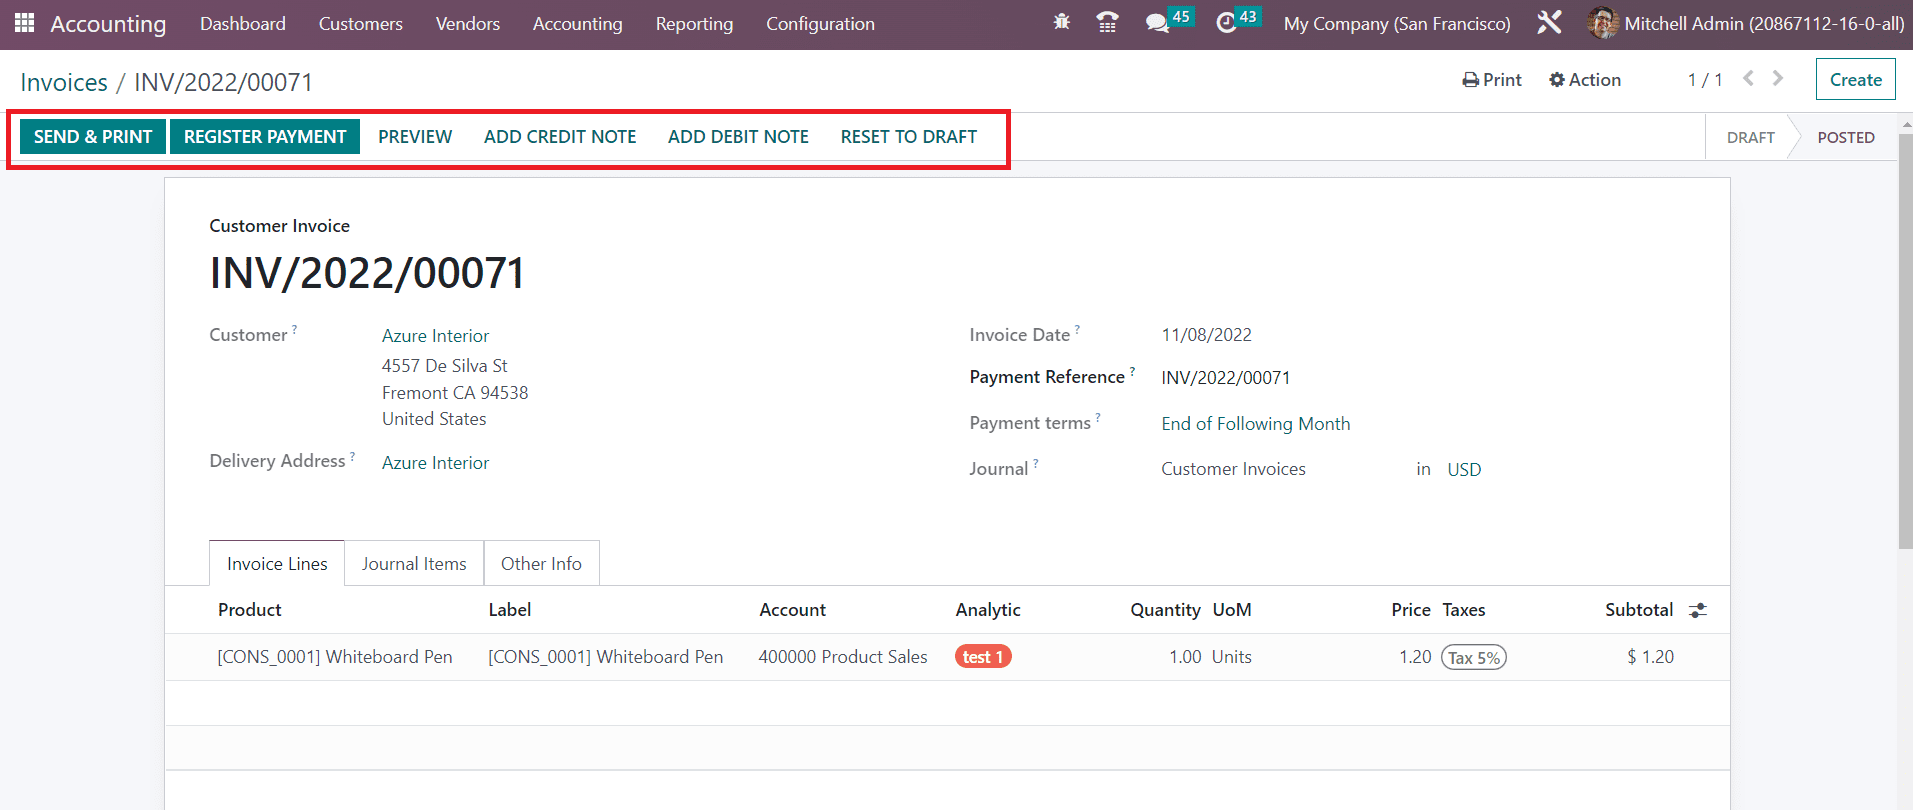
The screenshot shows an example of a confirmed invoice. You can reset a confirmed invoice to draft using the **Reset To Draft** button. If you want to get a customer preview of the invoice, use the **Preview** button.
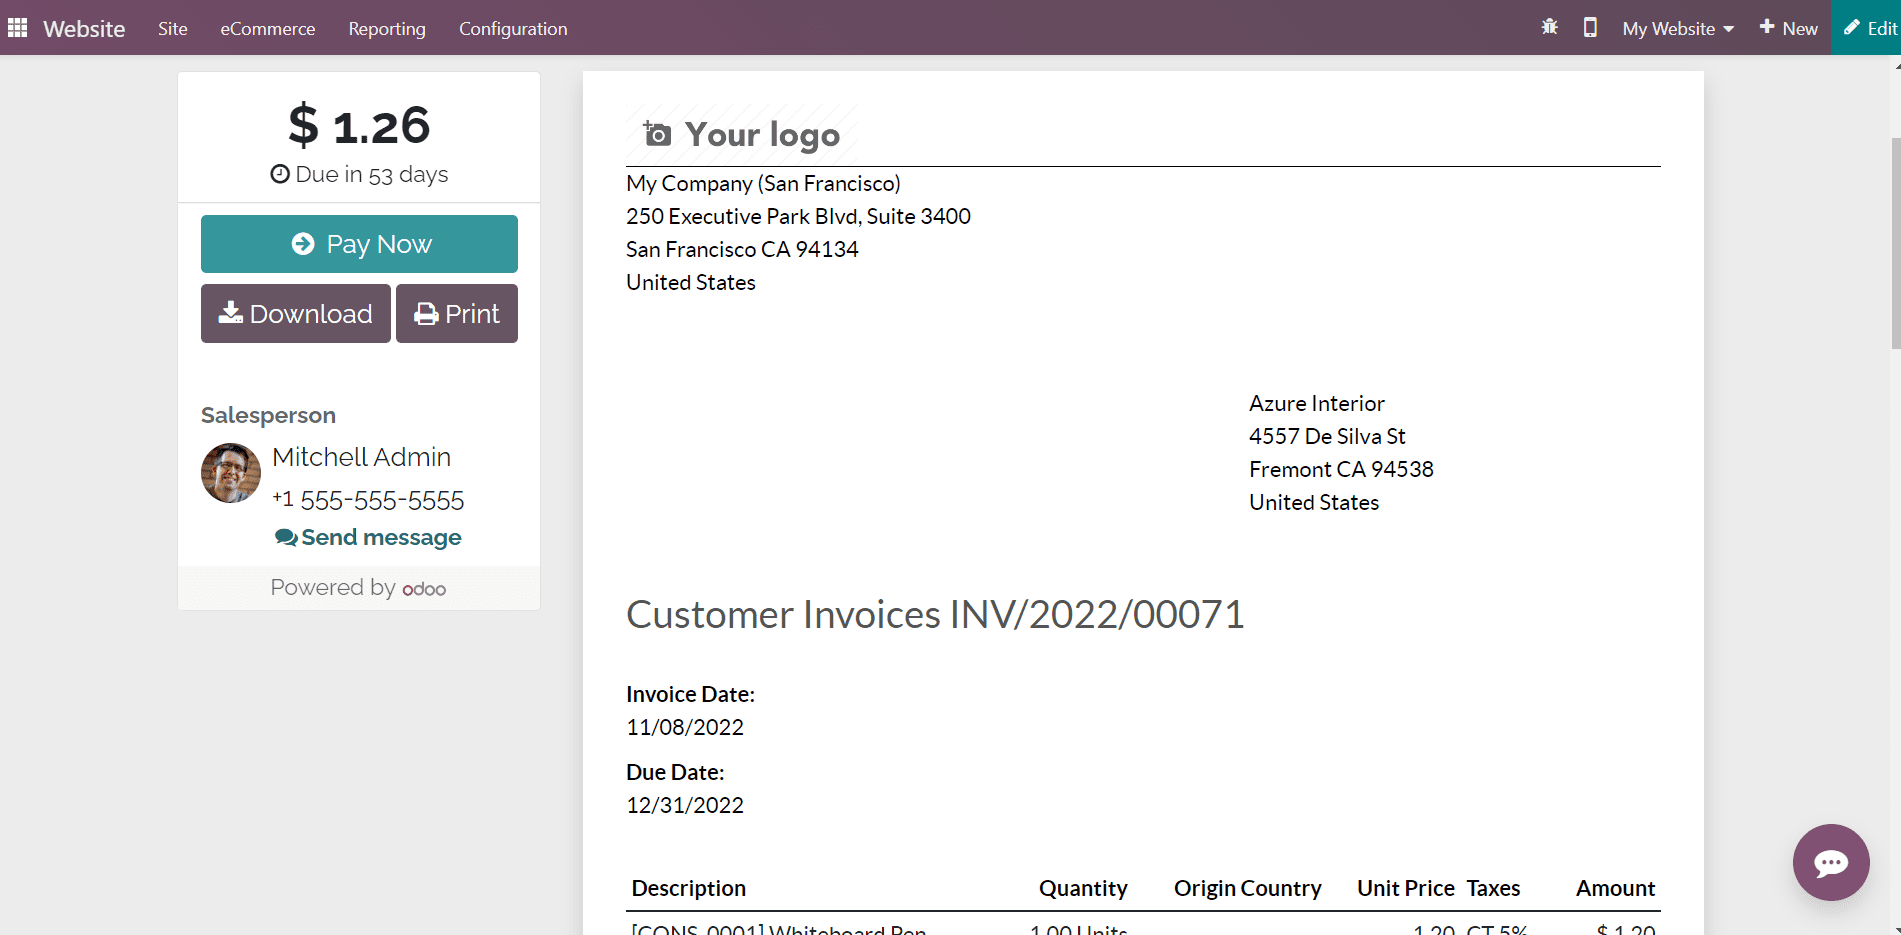
This is the customer preview of the invoice from the customer portal where the customer can check the invoice and pay the amount using a suitable payment method. The customer will get options to Download, and Print the invoice and send a message to the respective salesperson.
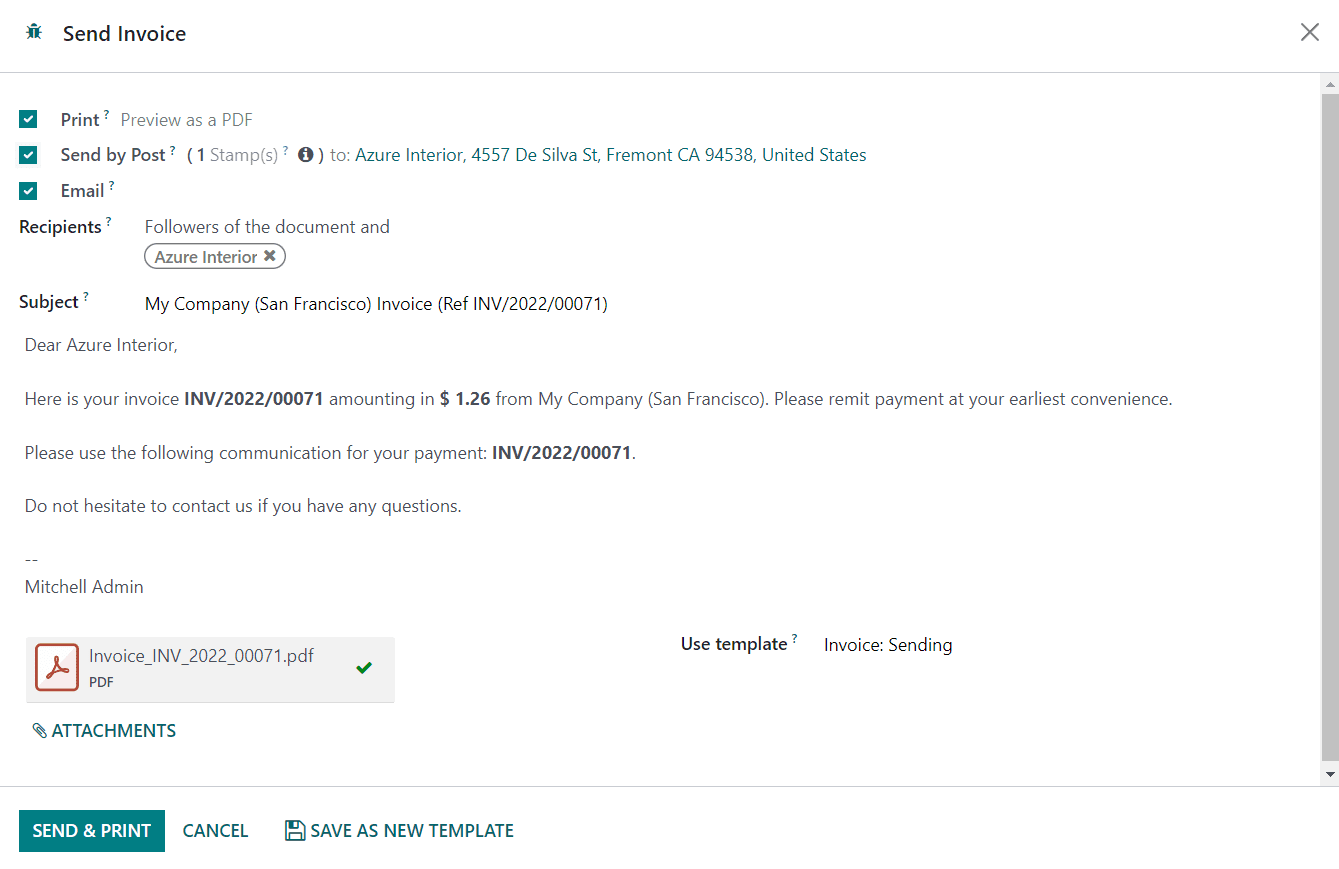
Using the **Send & Print** button, you can send the invoice to the customer via mail. An automated mail will be generated as shown below where you can add the recipient’s list and change the subject according to your requirements.
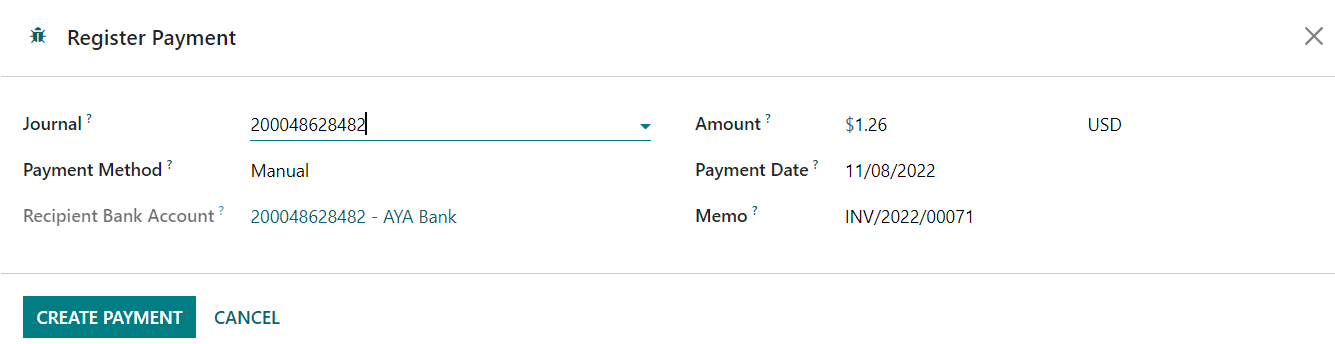
The invoice will be added to the mail as an attachment and you can click the **Send** button. Once the customer gets this mail, they can check the details and pay the invoice. After completing the payment procedures, you can record their payment using the **Register Payment** button. Odoo generates a pop-up window to confirm the details of the payment registration.
The window will show the Journal, Payment Method, Recipient Bank Account, Amount, Payment Date, and Memo as shown in the image above. You can make changes to the available details if needed. Now, click the **Create Payment** button. The payment registration can be completed by this step. Once the customer pays the invoice, the status of the invoice can be observed as Paid.
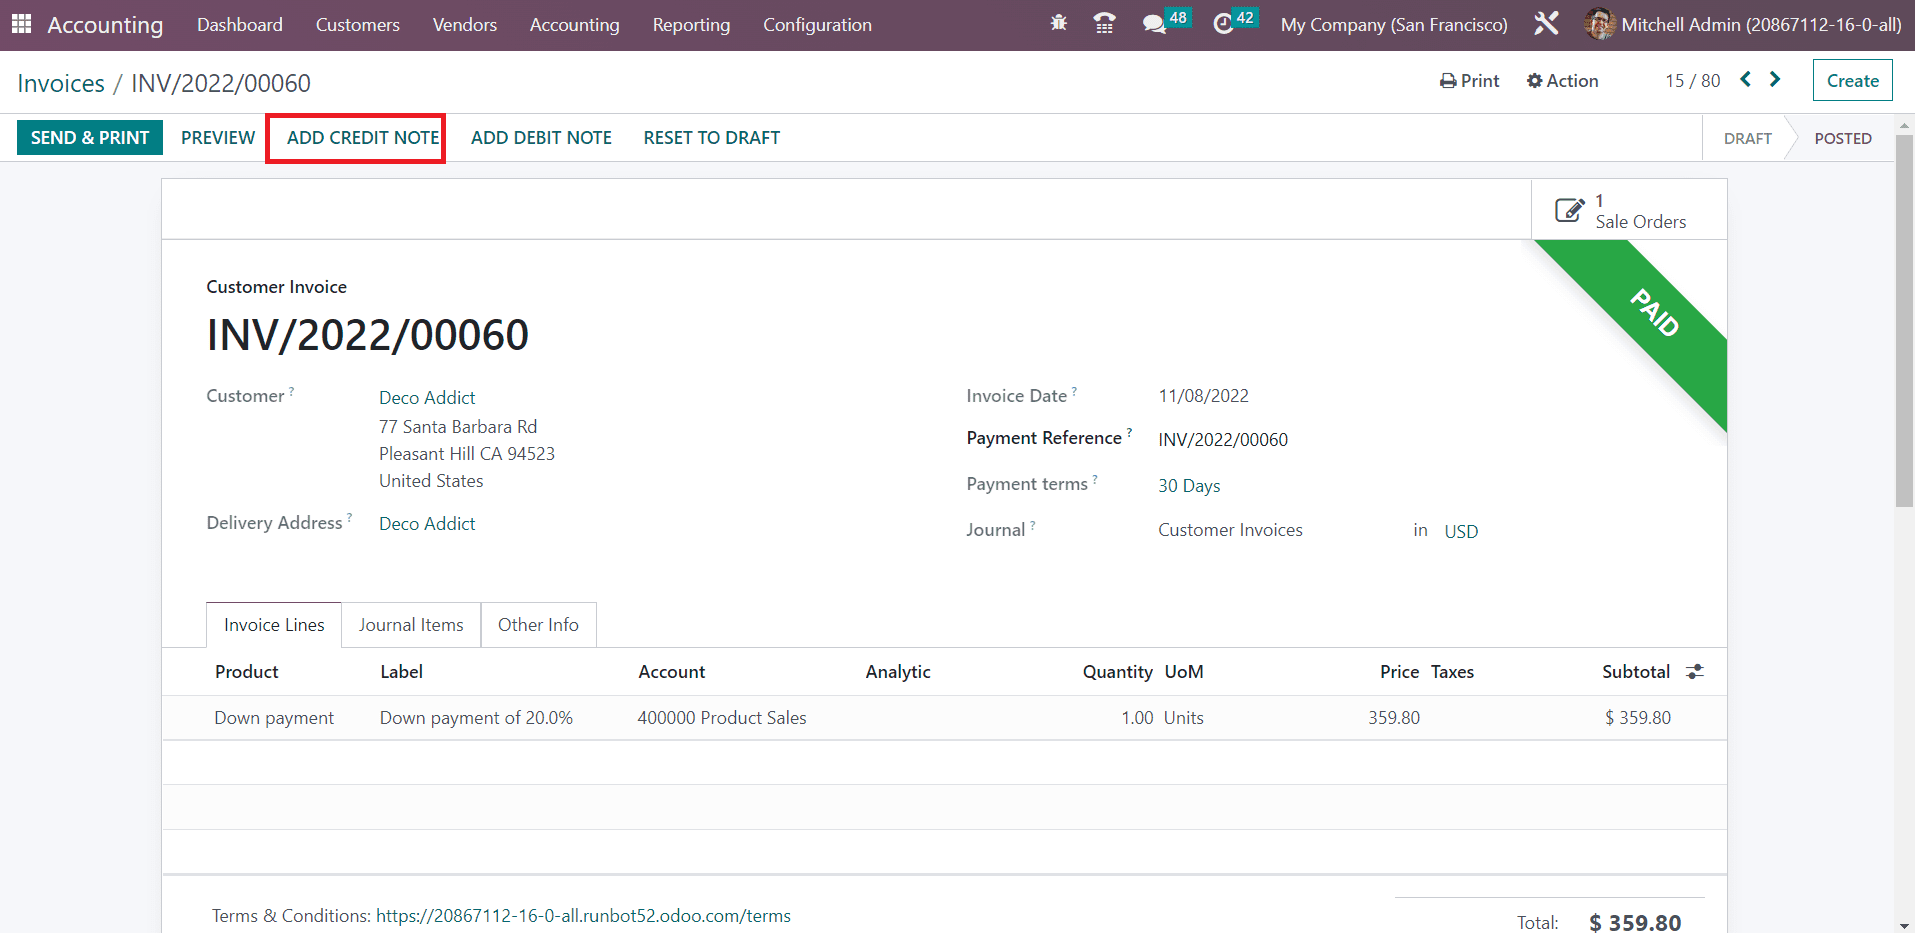
In the case of any mistakes in the invoice, wrong delivery of products, damaged goods, or rejection of service, you can trigger a credit note to your customer. This can be done by using the **Add Credit Note** button.
As soon as you click on this button, a new wizard will appear to define the credit note.
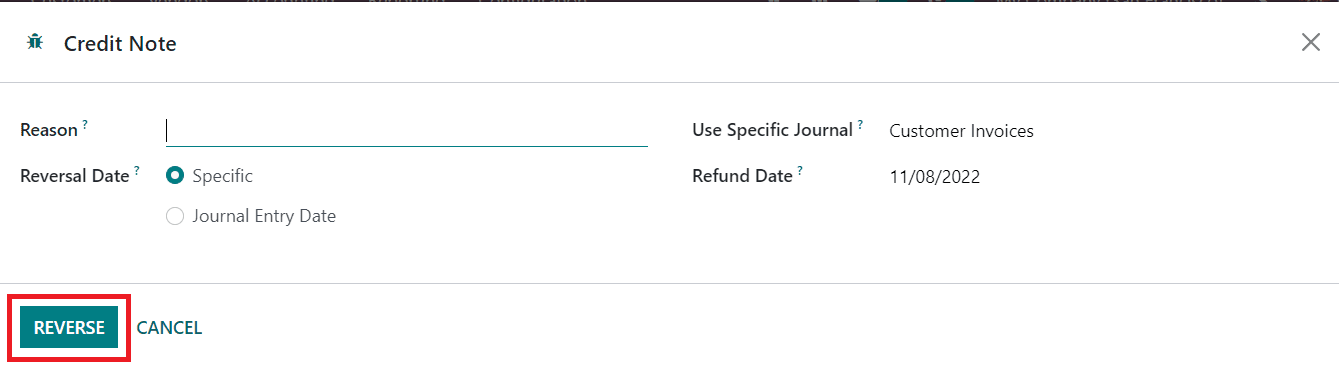
You can mention the reason to generate this credit note in the **Reason** field. The **Reversal Date** can be set as a Specific Date or the Journal Entry Date. The journal entry used to record the credit note can be specified in the **Use Specific Journal** field. The **Refund Date** will be available on the screen and you can click the **Reverse** button to reverse the payment.
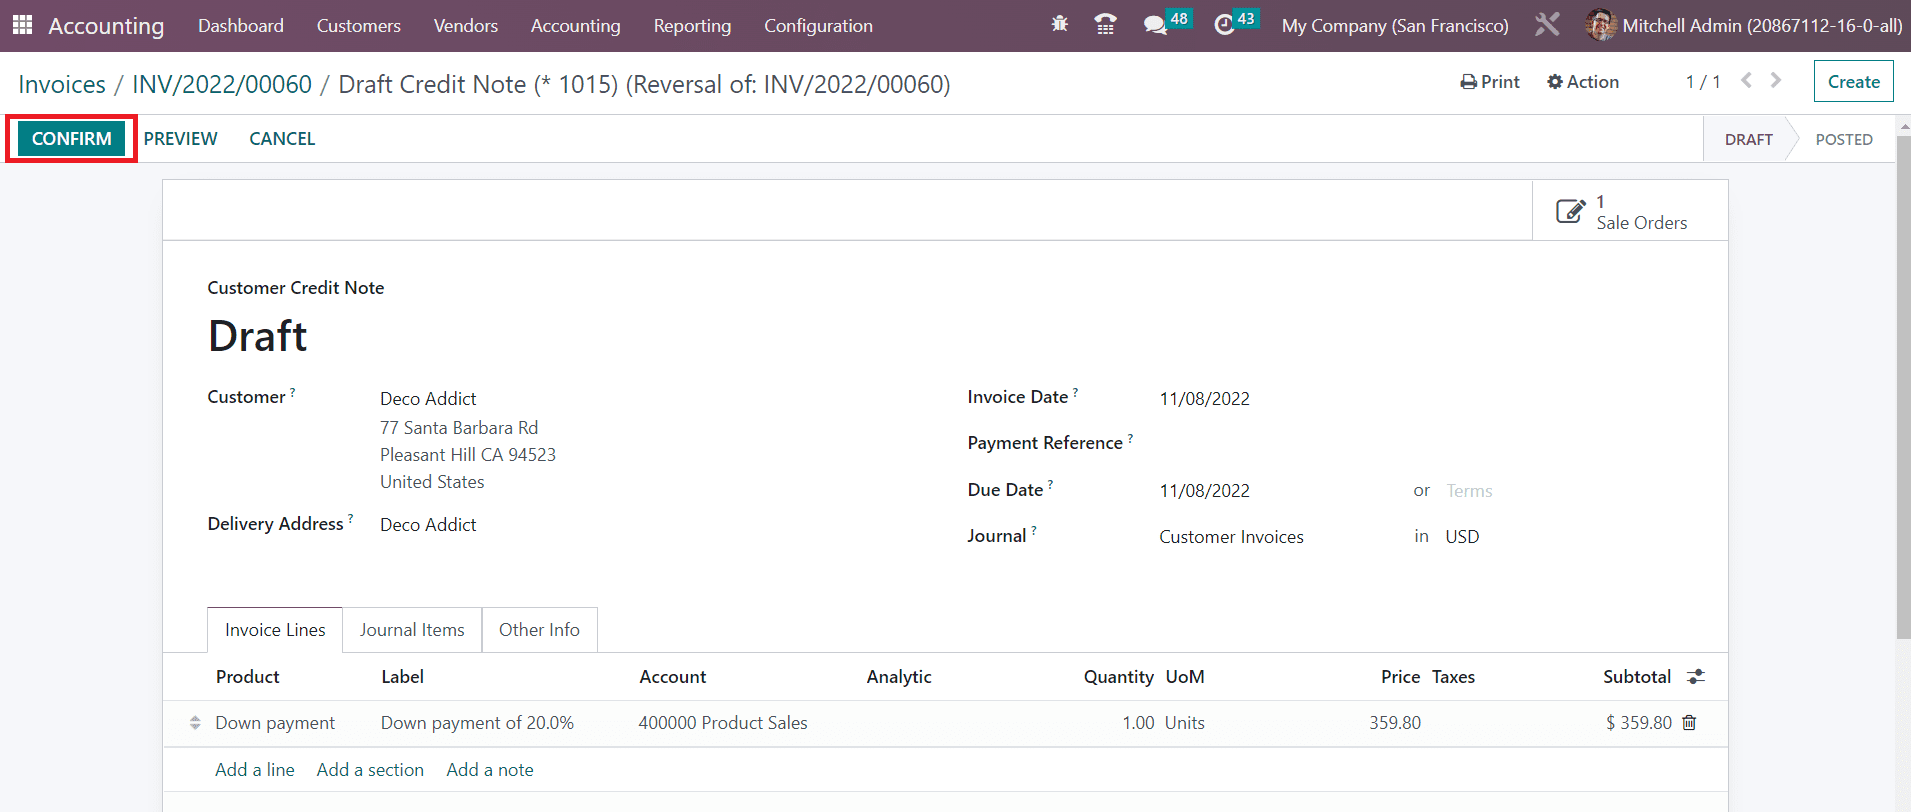
Odoo leads you to a new window where you can observe the draft customer credit note.
You can click on the **Confirm** button to confirm the customer credit note. Later the payment can be recorded using the Register Payment button.
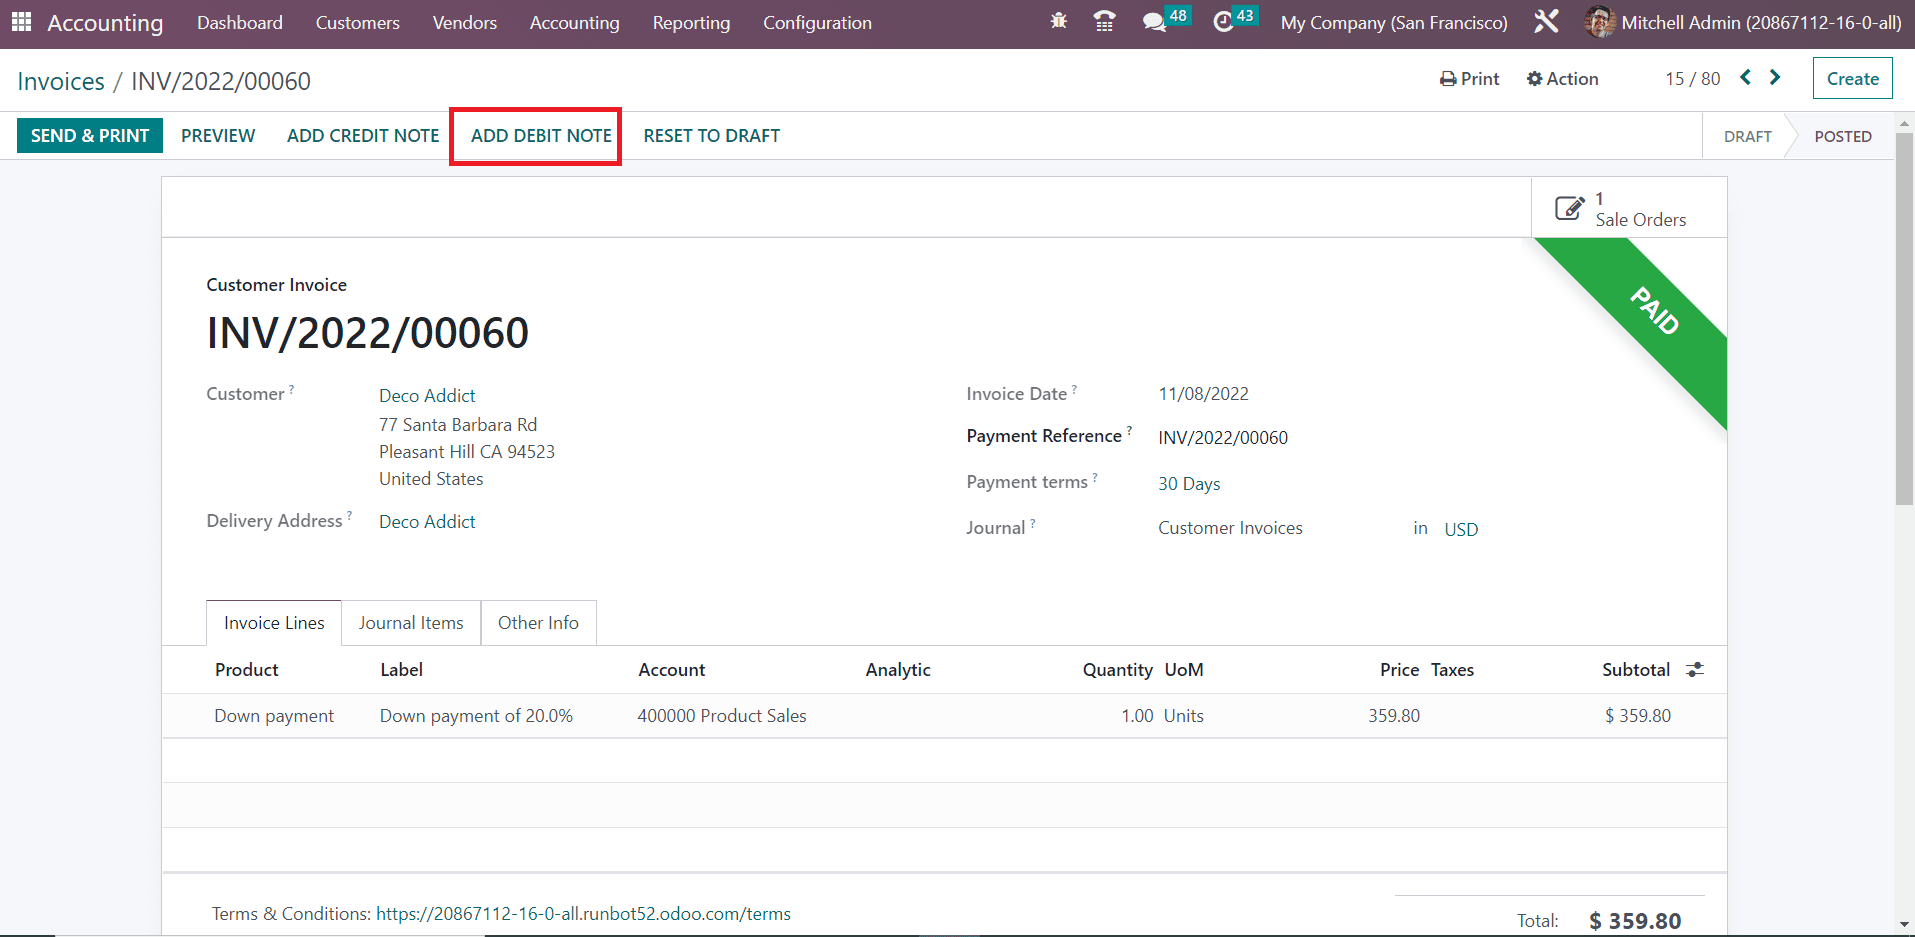
In Odoo, Debit Notes are used to generate bills or invoices. By generating the Debit Notes, Odoo will automatically reverse the respective bill and invoice.
To generate a debit note, you can click on the **Add Debit Note** button.
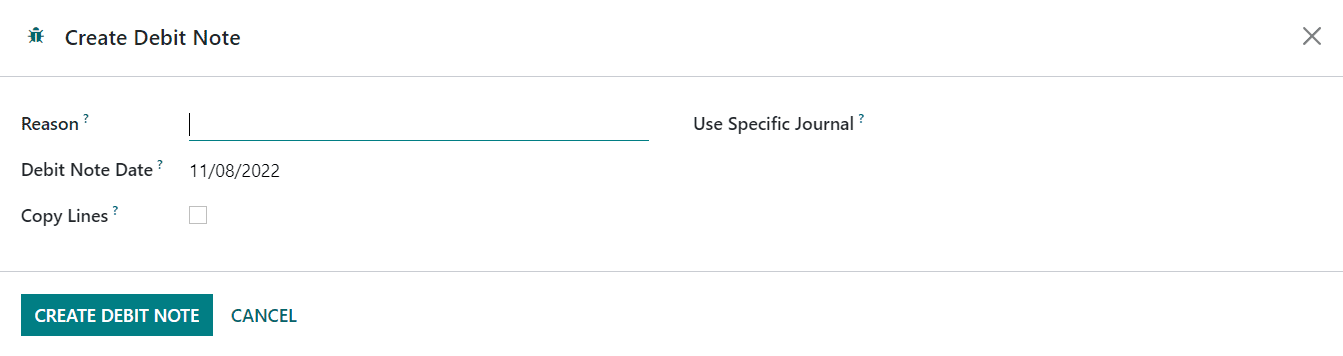
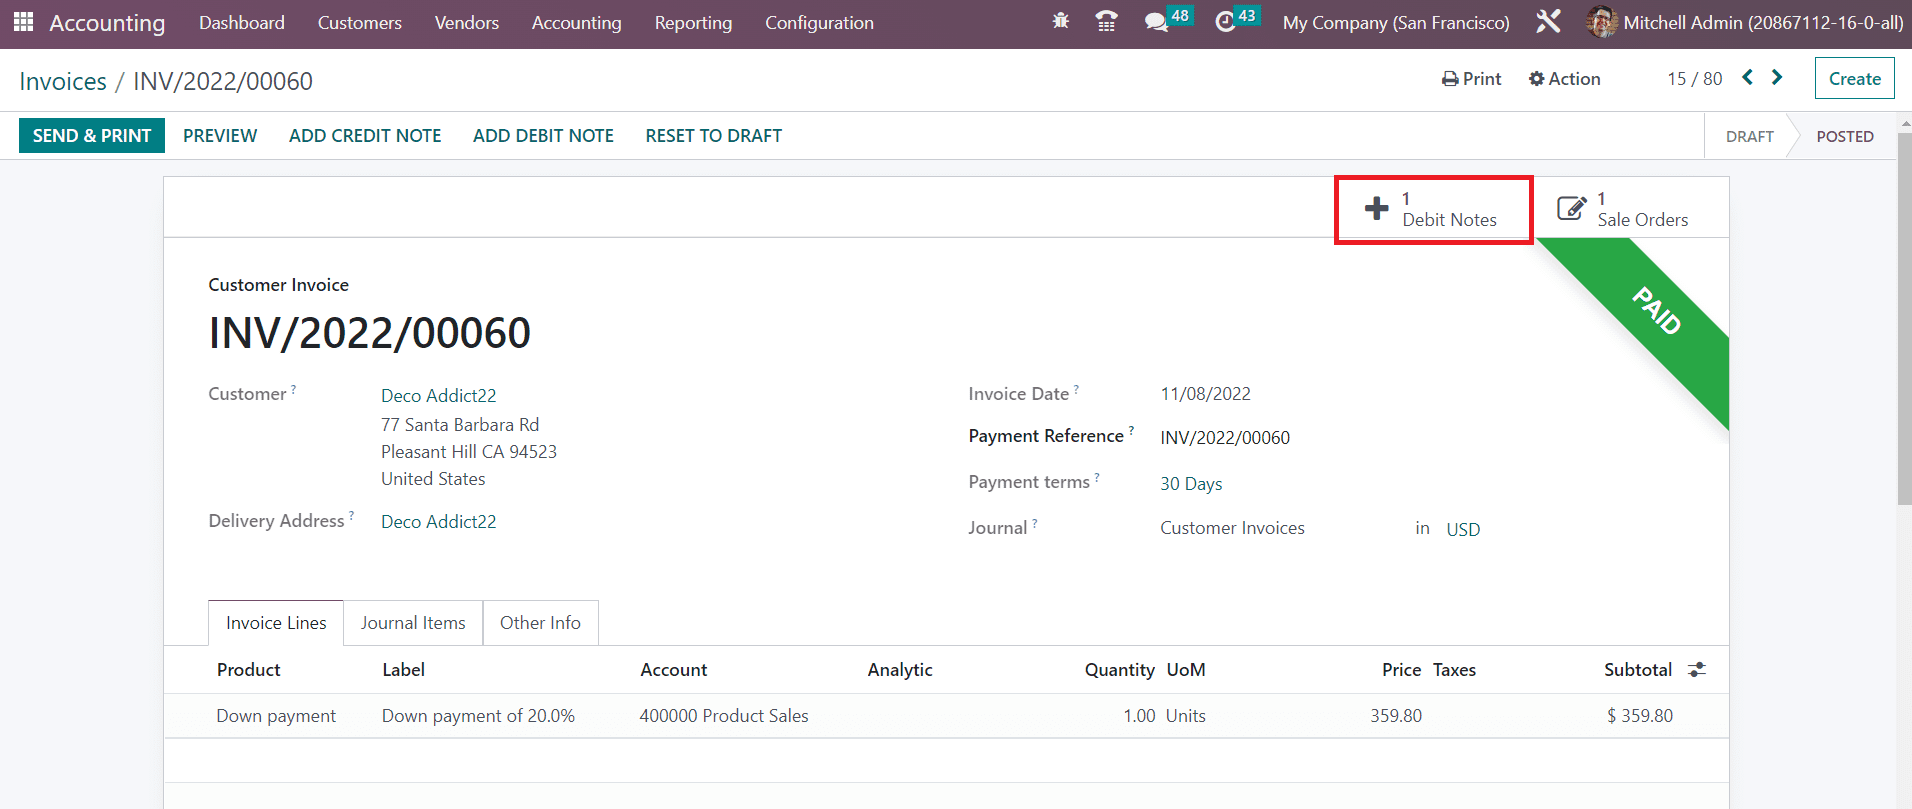
In the new wizard, define the Reason, Debit Note Date, Copy Lines, and Use Specific Journal to add the debit note. Click the **Create Debit Note** button. You can observe the debit notes generated on an invoice using the smart button available on the window.
This is how Odoo manages Customer Invoices in the Accounting module. Next, let’s move to the Credit Note platform available in the module.
---
# Agent Instructions: Querying This Documentation
If you need additional information that is not directly available in this page, you can query the documentation dynamically by asking a question.
Perform an HTTP GET request on the current page URL with the `ask` query parameter:
```
GET https://docs.wafra.sa/accounting/customer-invoices.md?ask=
```
The question should be specific, self-contained, and written in natural language.
The response will contain a direct answer to the question and relevant excerpts and sources from the documentation.
Use this mechanism when the answer is not explicitly present in the current page, you need clarification or additional context, or you want to retrieve related documentation sections.