# Batch Payments
### Batch Payments
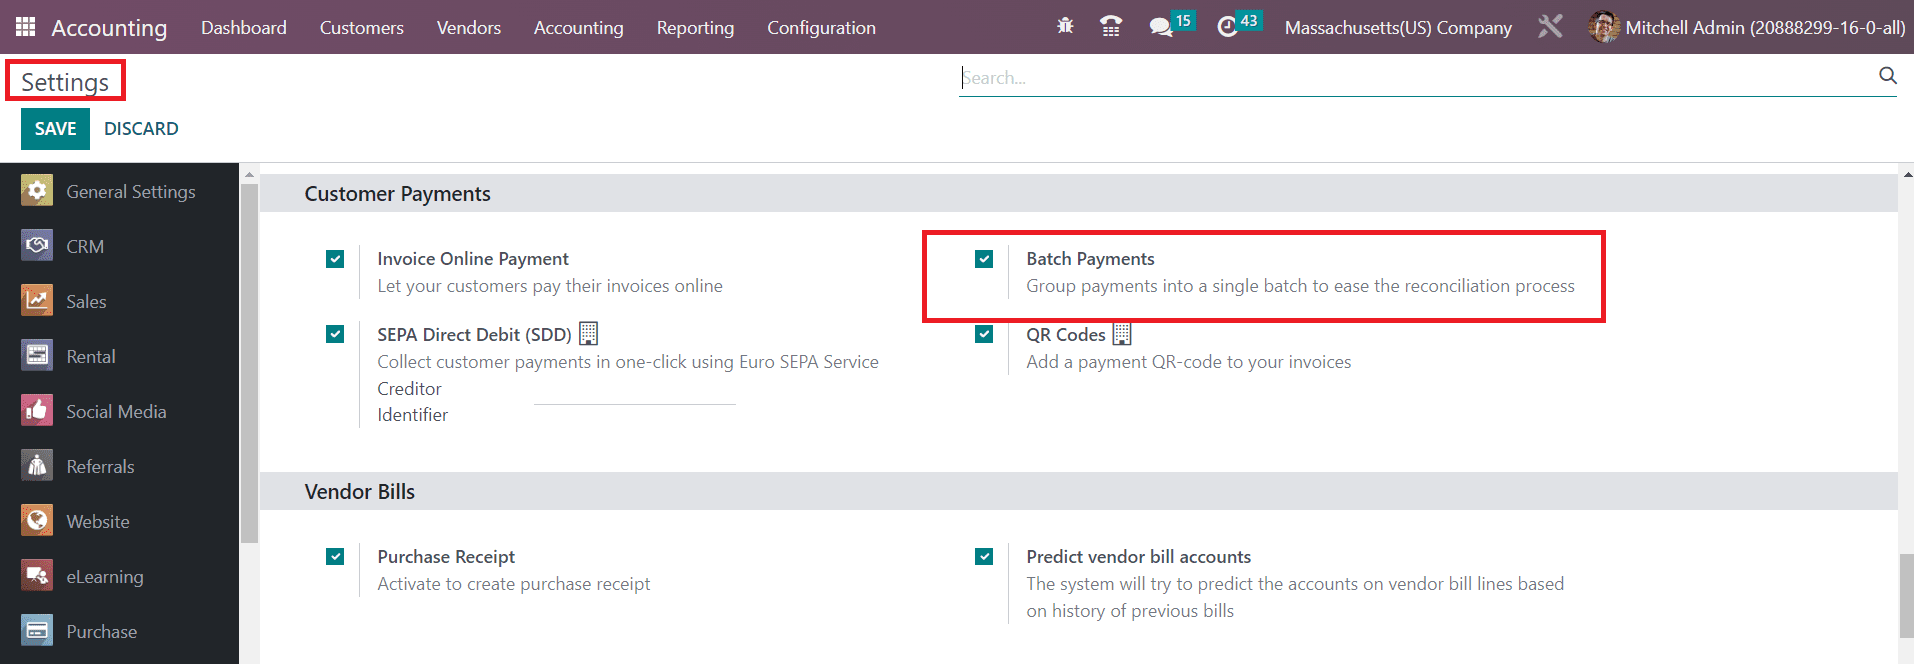
The batch payment feature in Odoo allows you to group different payments in order to simplify the reconciliation. Matching bank statements with batch payments is a crucial task in accounting management. Odoo provides support to reconcile multiple payments with bank statements in simple methods. With the assistance of the batch payment feature, you can process a group of payments in a single step. This will record the batch payment as a single entry in the bank statement. In order to get this feature in the Odoo Accounting module, you have to activate the **Batch Payments** option from the **Settings** menu as shown below.
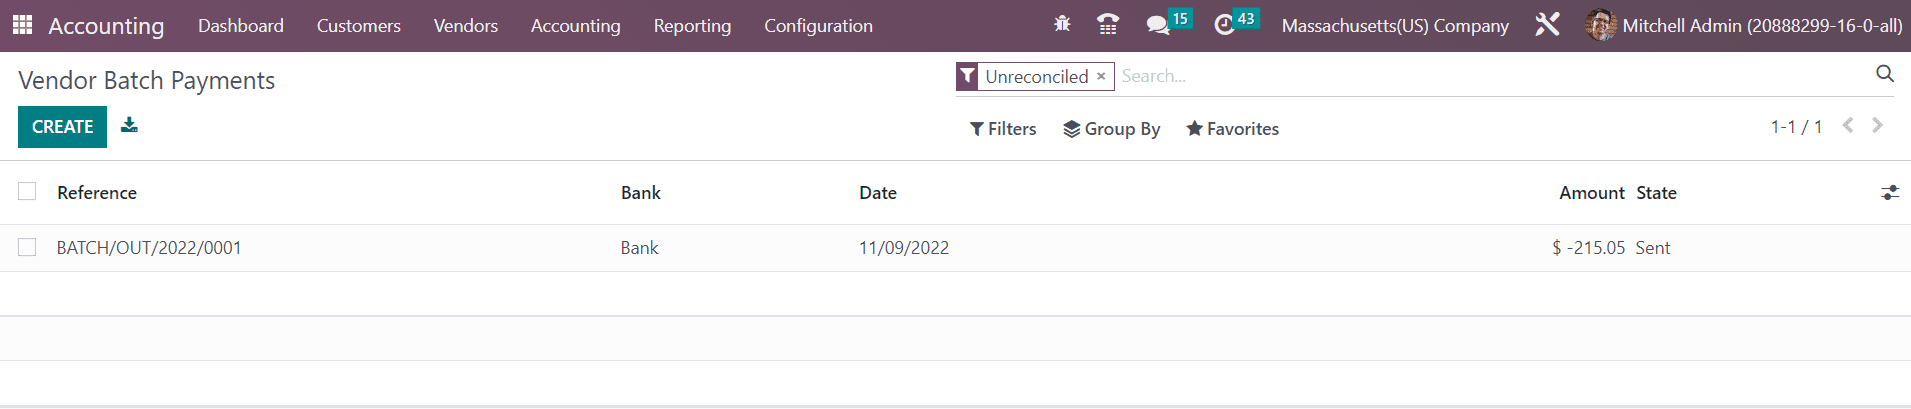
Once you activate this option, you will get the option **Batch Payments** under the **Customers** as well as **Vendors** menus. You can batch different customer payments using the **Batch Payments** option available in the **Customers** menu. The **Batch Payments** option under the **Vendors** menu will assist you to batch the vendor payments. The method of creating a new batch payment is similar in both cases.
The list view of the Batch Payment window is shown above. Here, you can observe the Reference, Bank, Date, Amount, and State of the batch payments. Clicking on the **Create** button will lead you to a new window where you can configure a new batch payment.
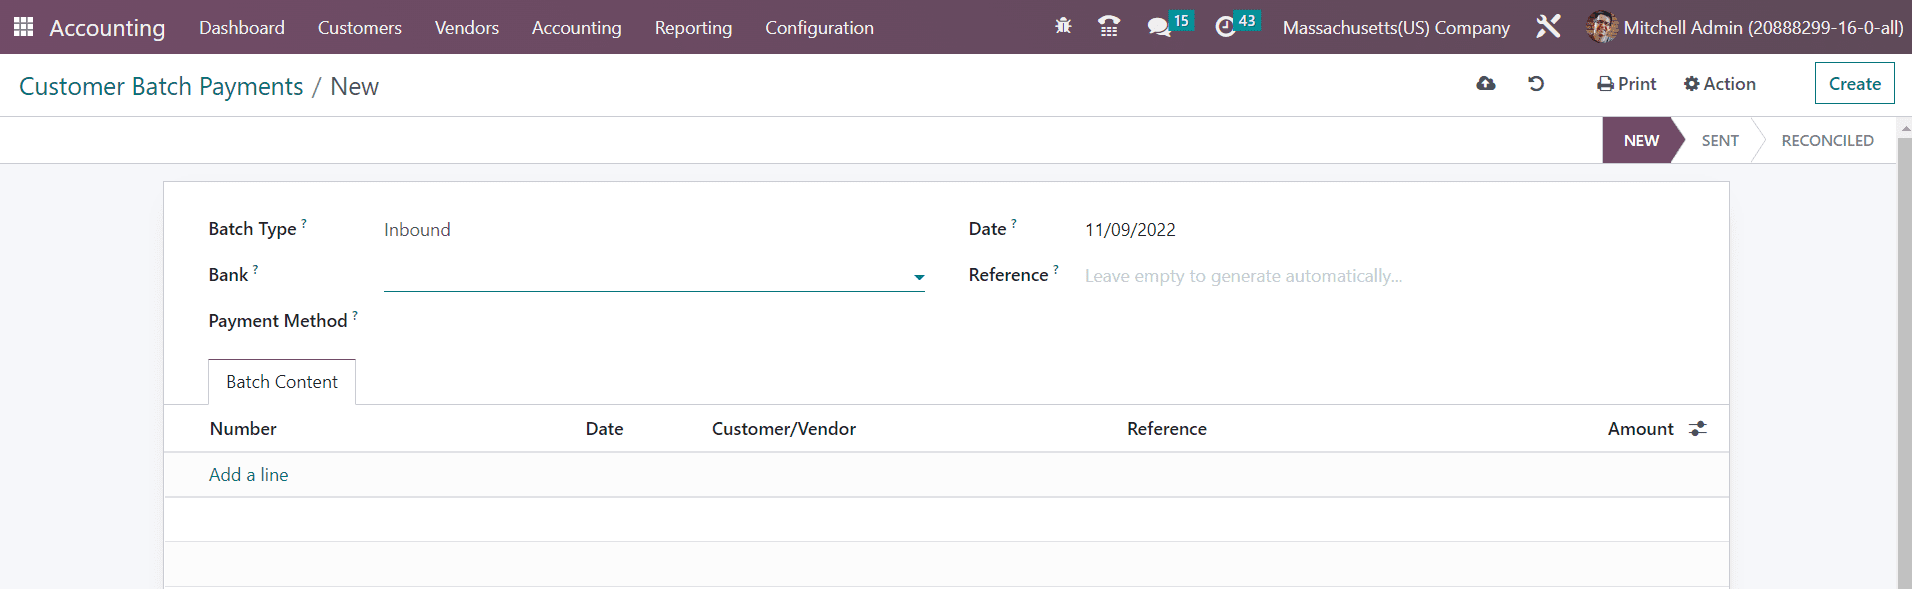
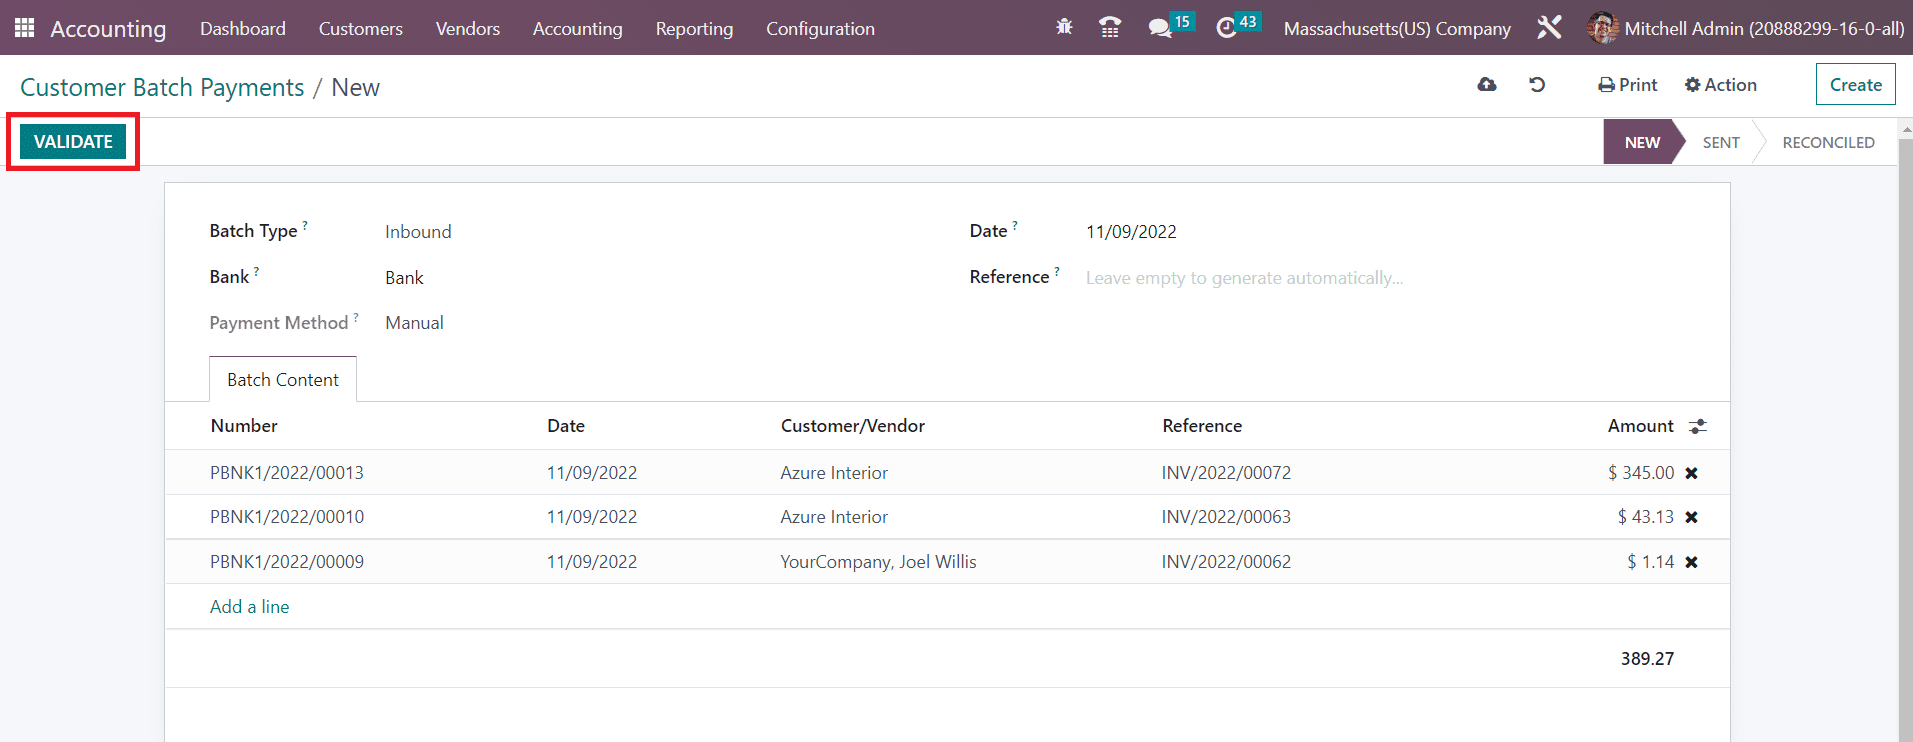
There are two types of batch payments available in Odoo, Inbound, and Outbound. The **Inbound** batch payment is used when batching customer payments. If you want to batch multiple numbers of vendor payments you can use the **Outbound** batch payment. After defining the **Batch Type,** you can select the **Bank** from the dropdown. In the corresponding fields, you can add the **Payment Method** used for payment registration, **Date,** and **Reference.** Now, add the payments that you want to batch under the **Batch Content** tab.
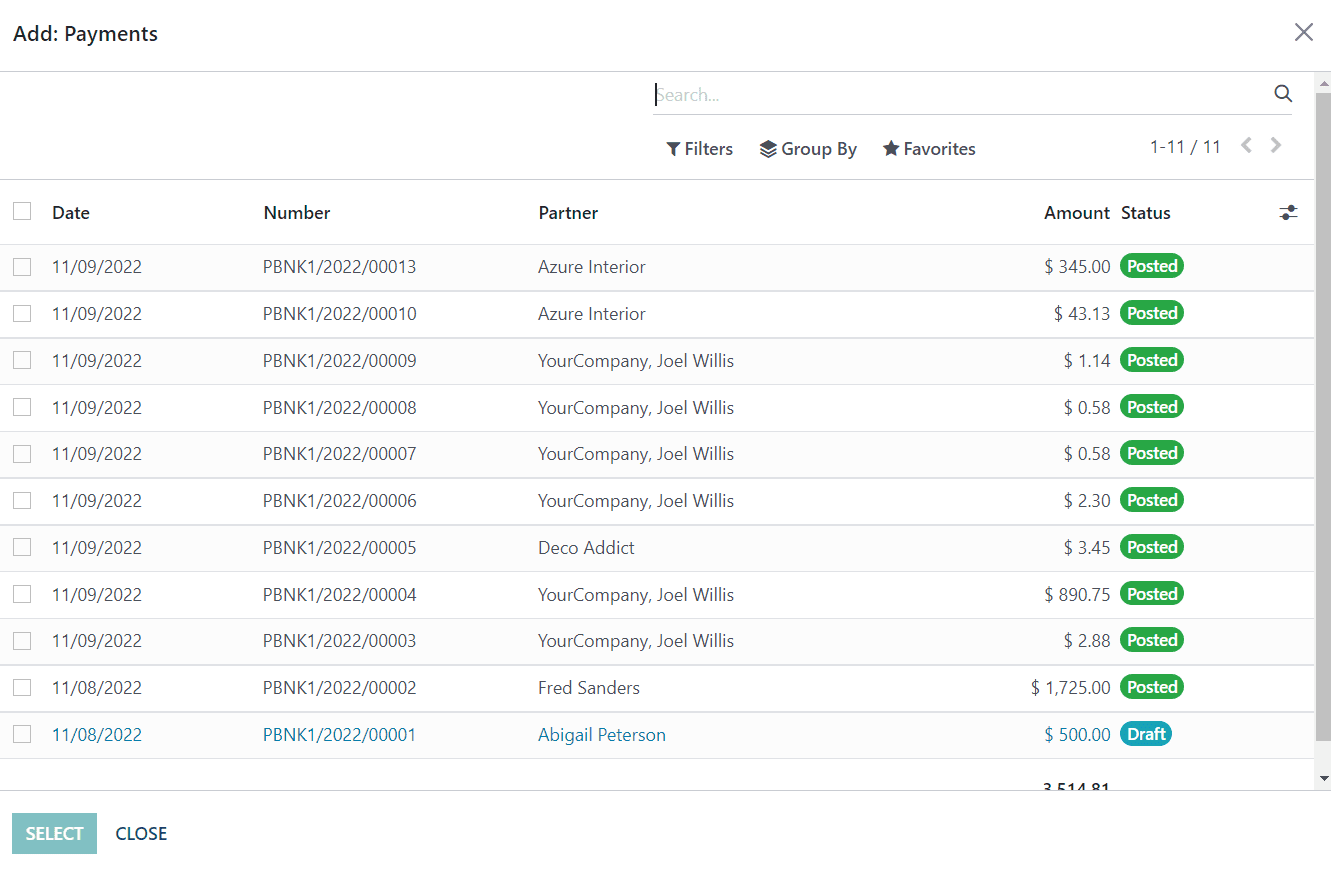
When you click on the **Add a Line** button, a pop-up will appear from where you can select payments.
In the case of Inbound batch payment, this list will show customer payments. You will get the list of vendor payments in the pop-up window in the case of Outbound batch payment.
After adding a list of payments to the batch, you can click on the **Validate** button.
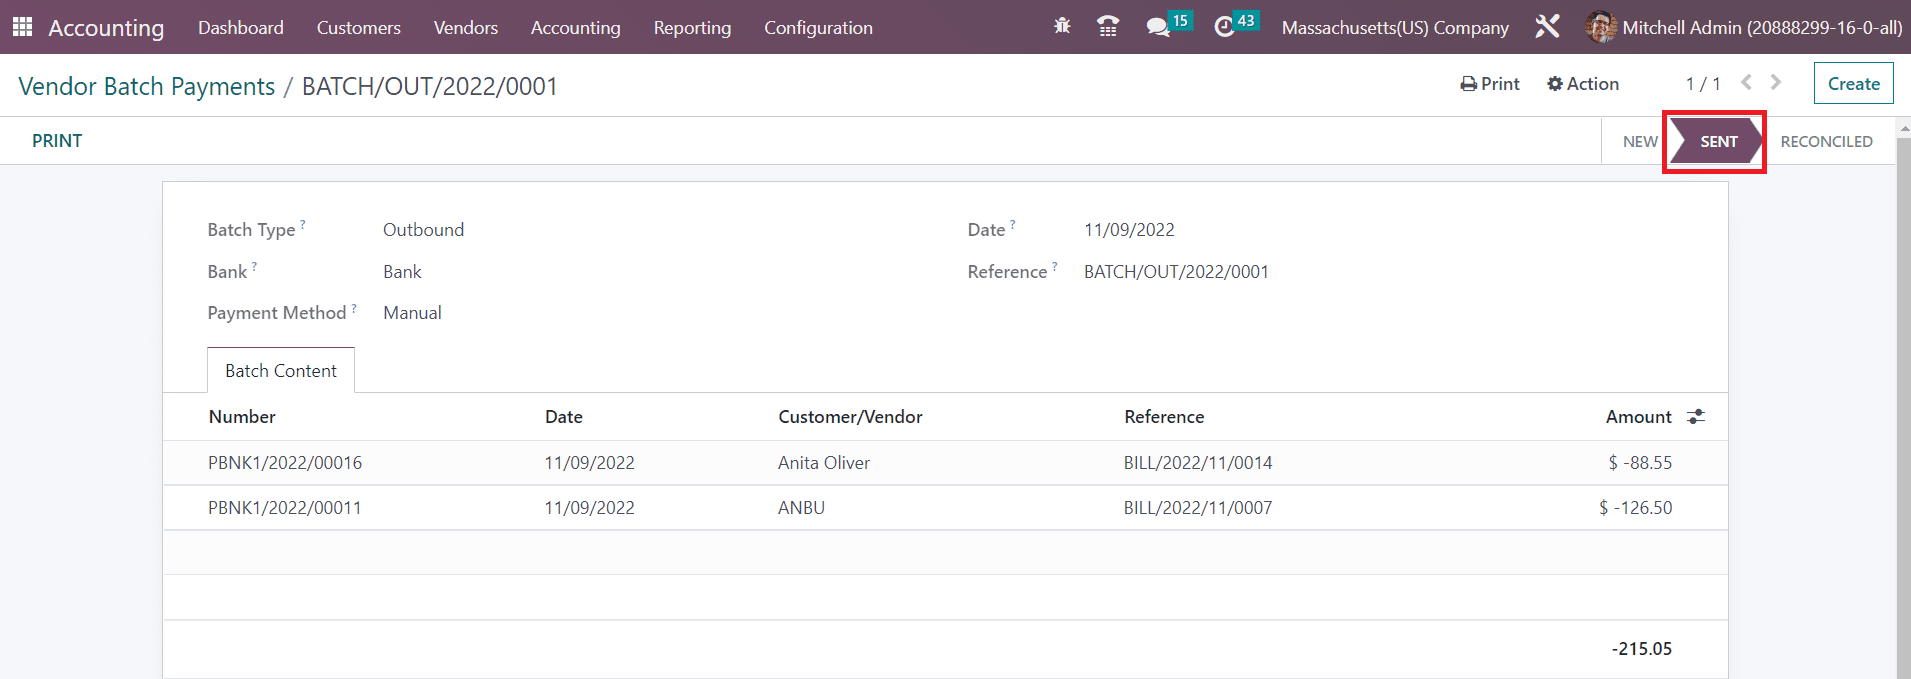
The stage of the validated batch payment can be seen as **Sent** as shown in the image above which indicates that the payment needs to be reconciled with the bank statement.