
Purchase Order
Purchase Order
Once you complete the creation of the request for quotation, you can send it to the respective vendor to get their approval. After sending RFQ to the vendor, the next step is the confirmation of the purchase order. In Odoo, you will get a dedicated platform in the Orders menu of the Purchase module for the management of the Purchase Orders.
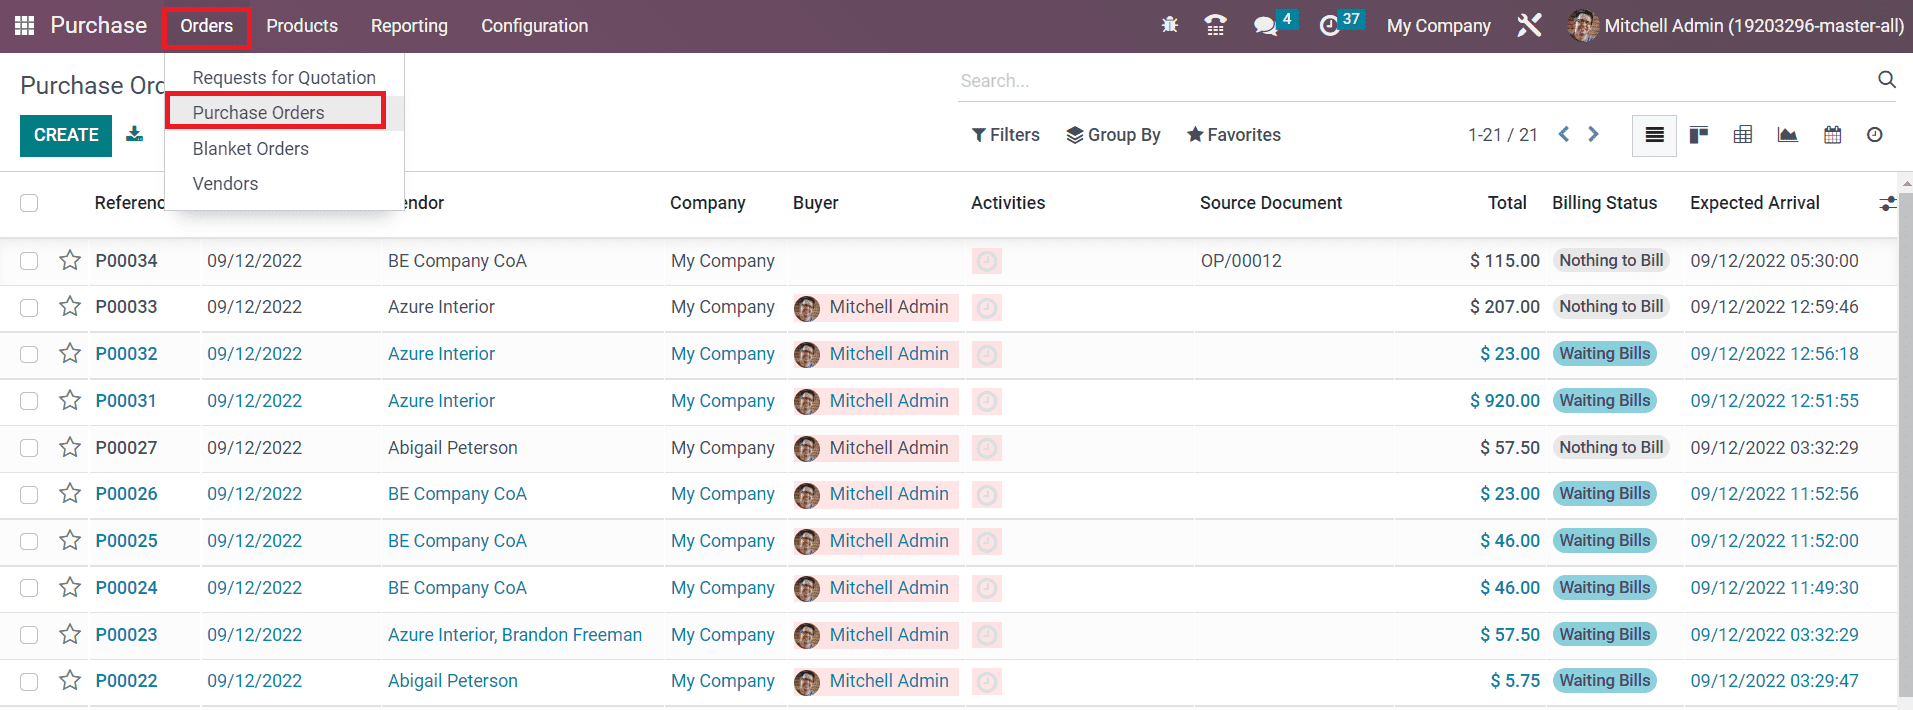
This window is similar to that of the Request for Quotation management window. You will get the details of the Reference, Confirmation Date, Vendor, Company, Buyer, Activities, Source Document, Total, Billing Status, and Expected Arrival date. The Create button can help you to create a new purchase order.
If both parties are satisfied with the terms and conditions mentioned in the request for quotation, the RFQ can be converted into a Purchase Order using the Confirm button.
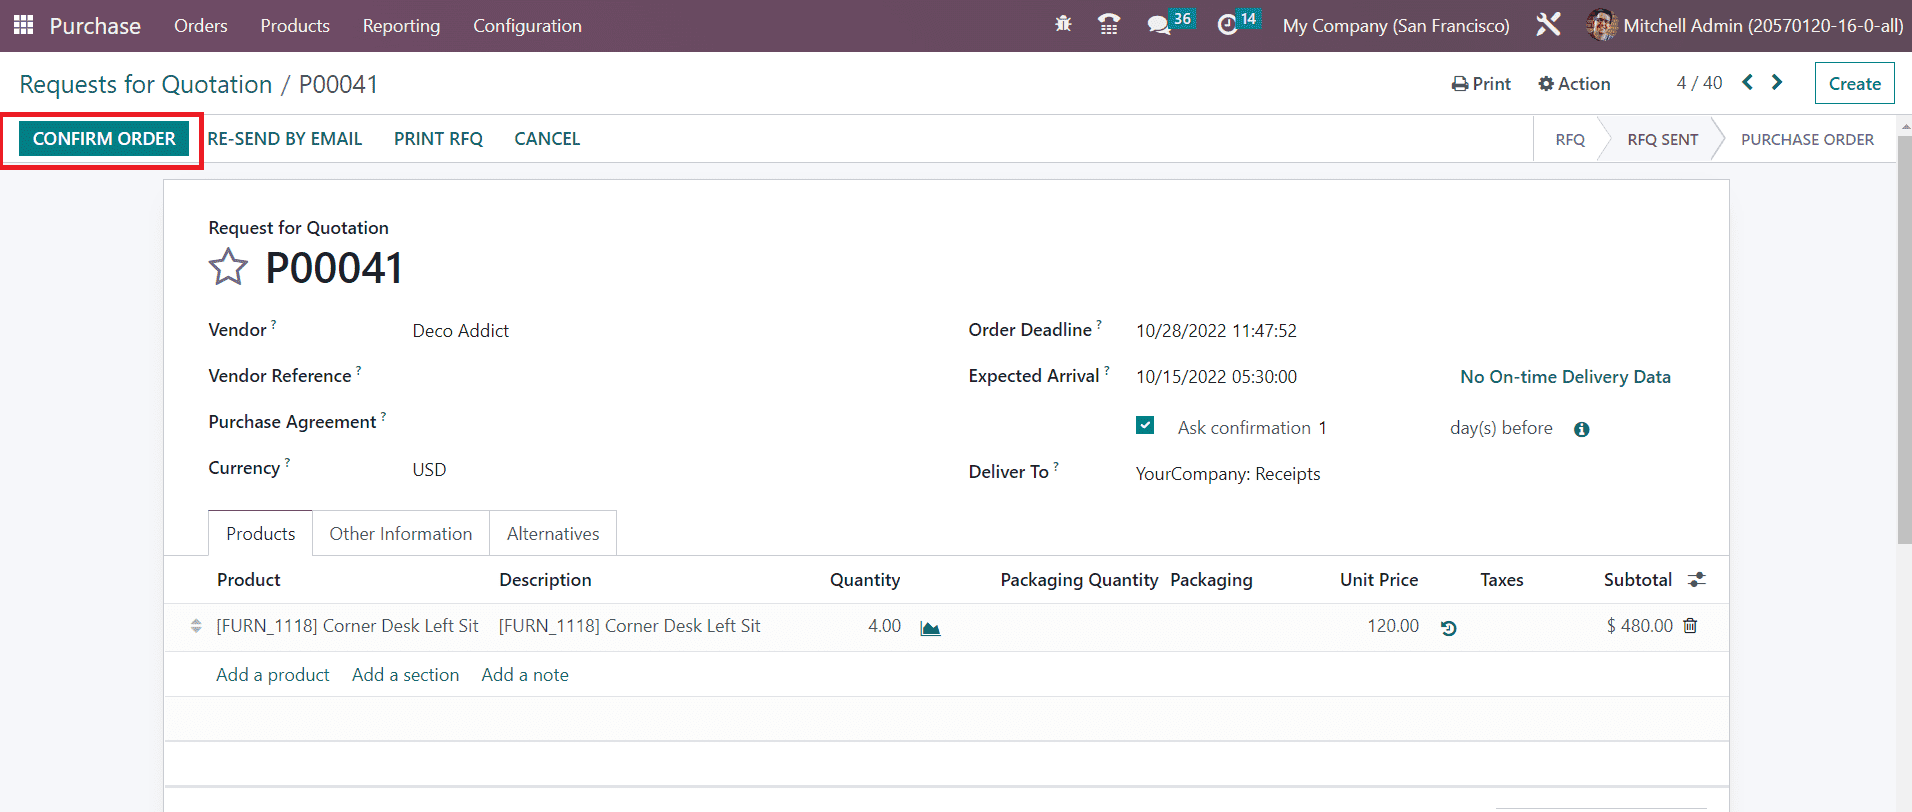
The status of the RFQ can be observed as Purchase Order once you click on the Confirm button.
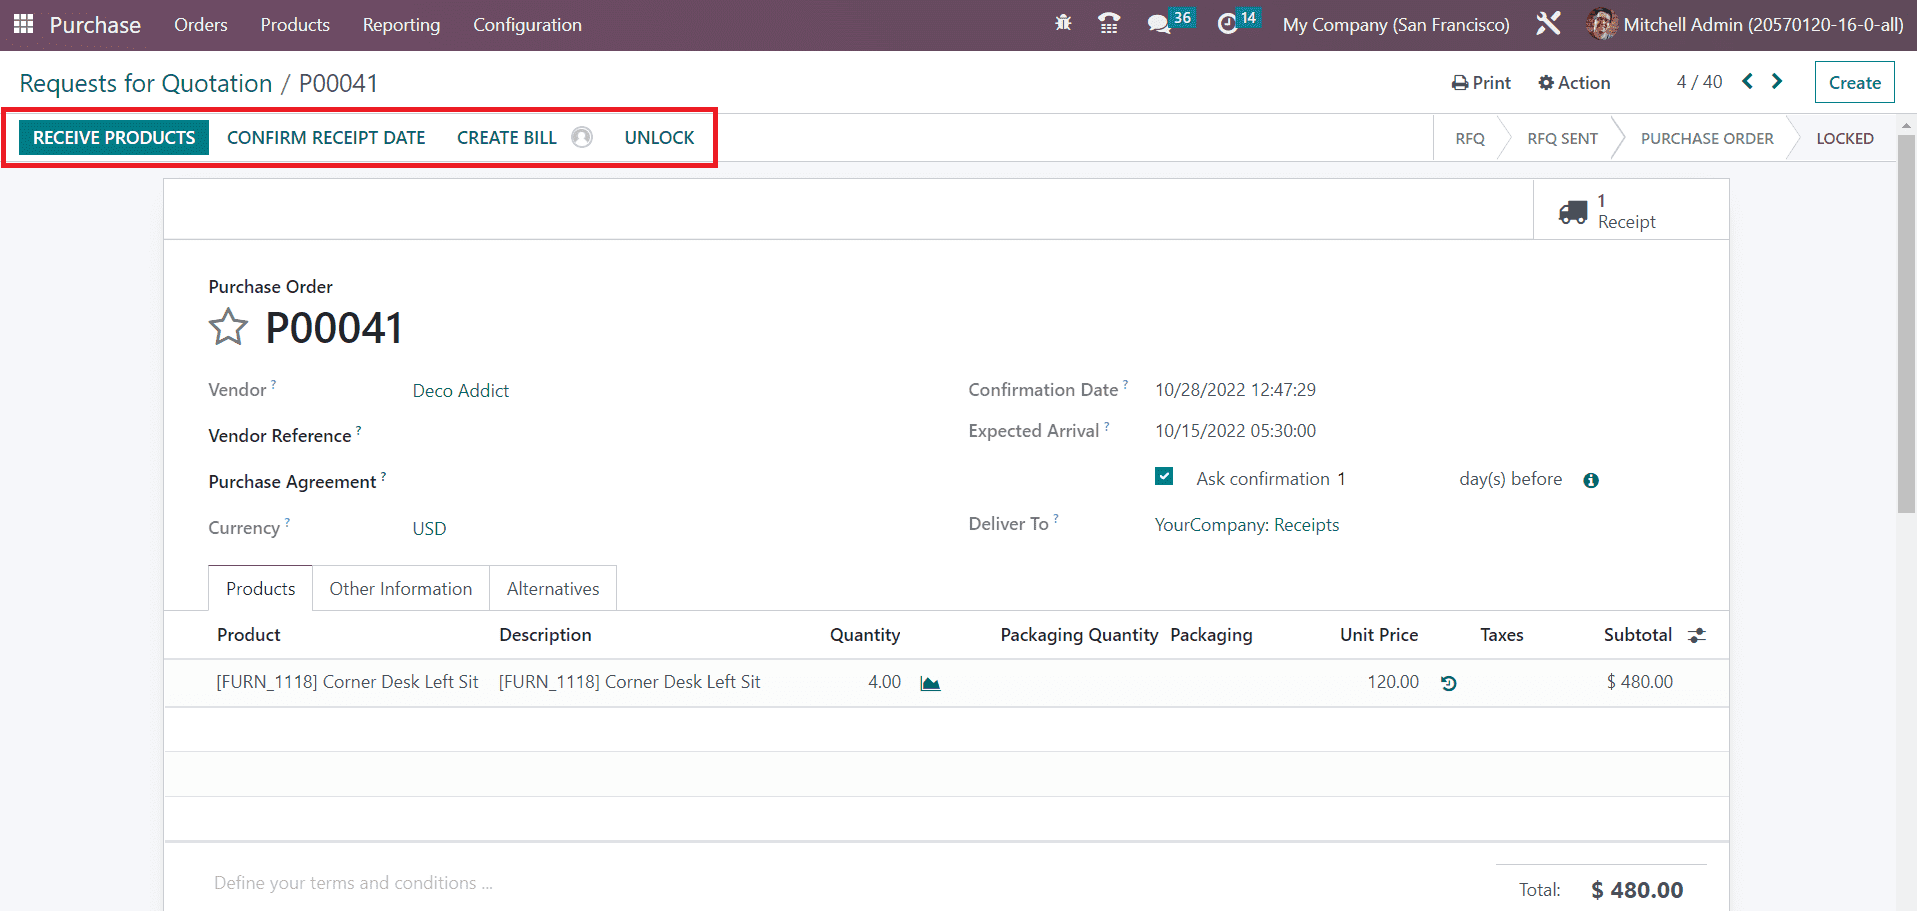
In the Purchase Order window, you will get options such as Receive Products to manage received products, Confirm Receipt Date to confirm the date of the receipt, Create Bill to generate vendor bill, and Cancel to cancel the purchase order.
In Odoo, it is possible to automatically lock purchase orders to prevent editing. This can be done by activating the Lock Confirmed Orders from the Settings menu of the module.
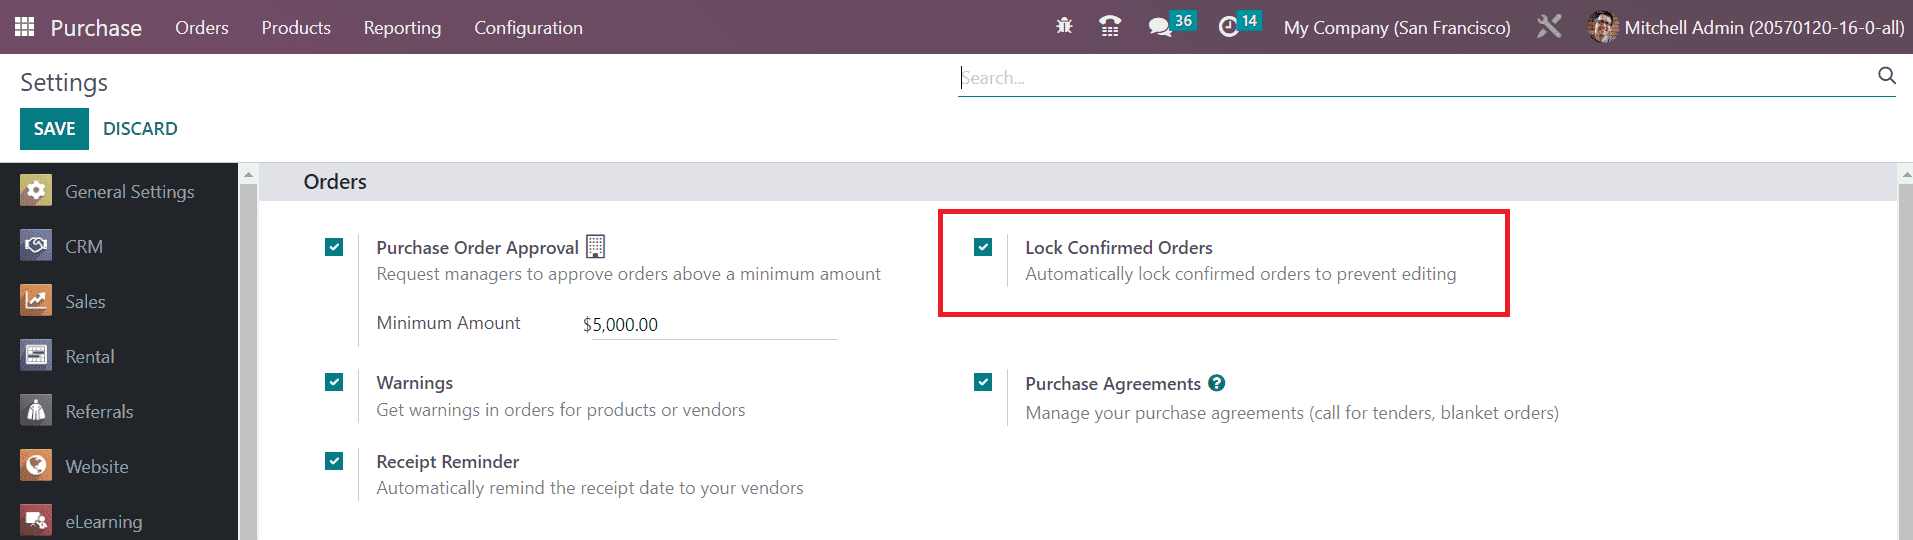
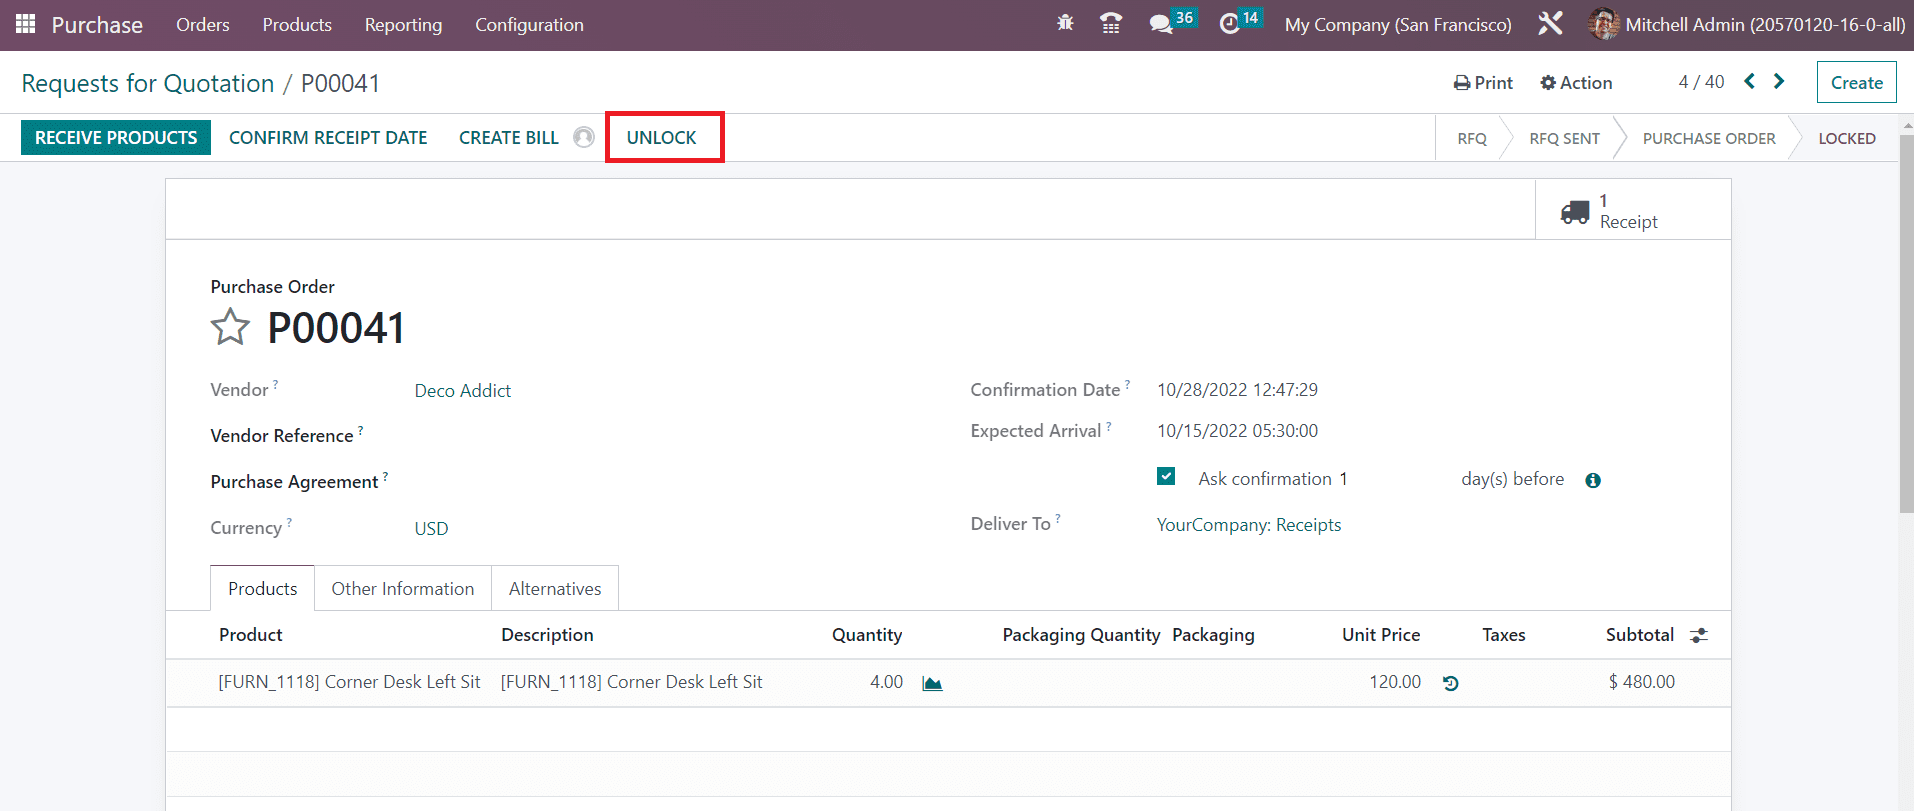
Once you activate this feature, the confirmed orders will be automatically locked. If you want to make any changes to a purchase order, you can click on the Unlock button.
Receive Products
The vendor will send products to your location mentioned in the purchase order after confirming the order. Odoo will assist you in the procedures of receiving products as well. When the vendor sends the products to your company, you can click on the Receive Products button while receiving the products.
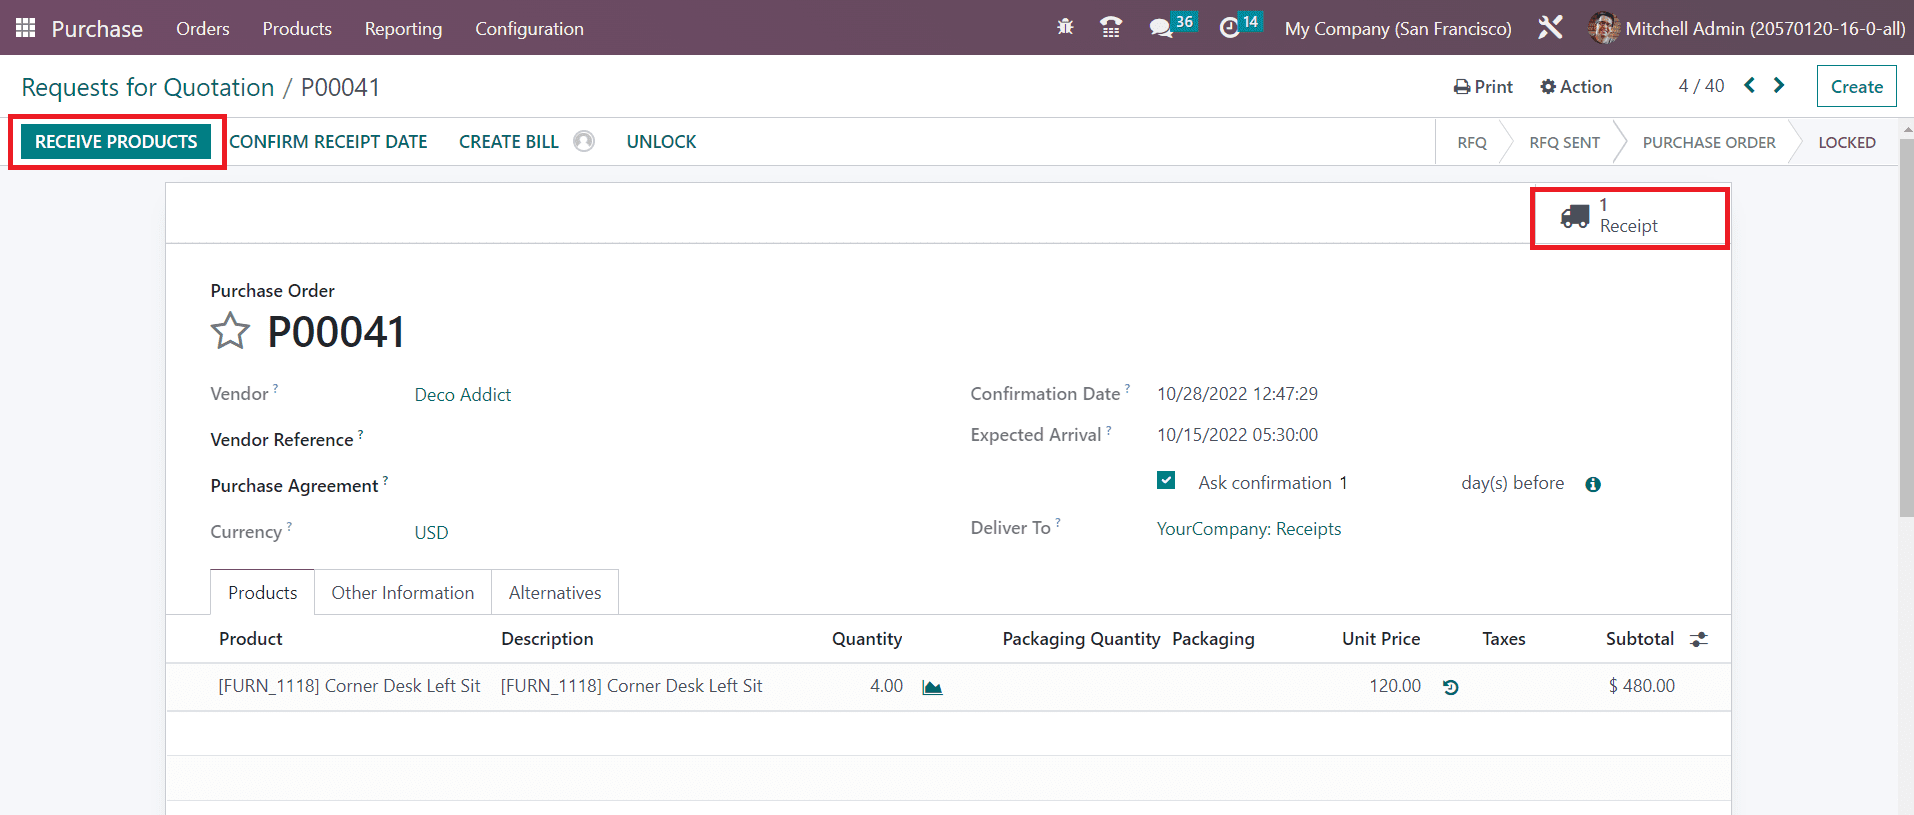
This will lead you to a new window with details of the incoming shipments. You will get access to this window using the smart button Receipt available on the respective purchase order window.
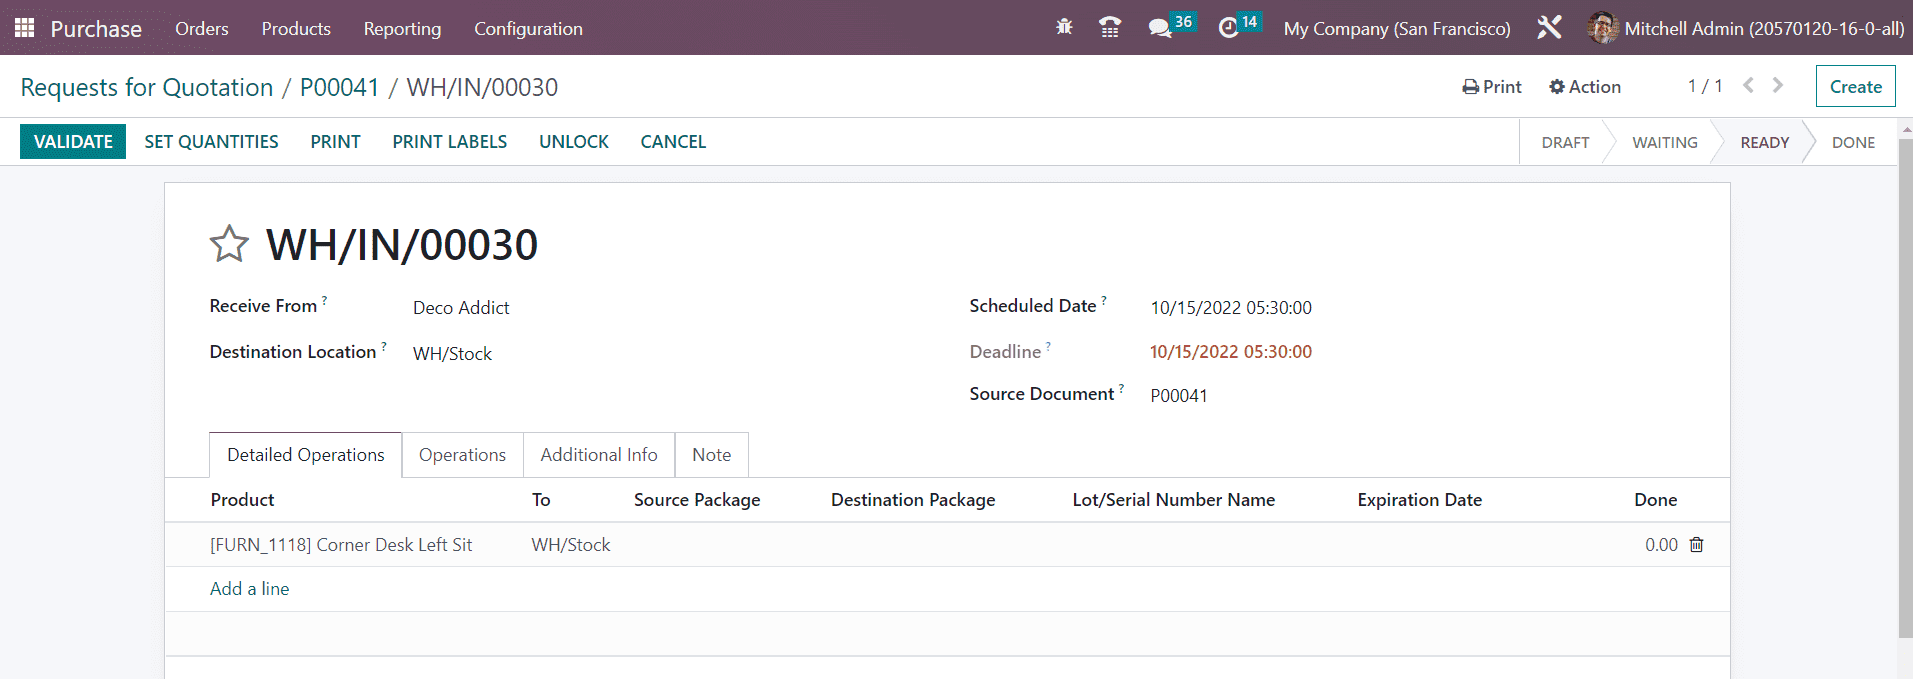
You can validate the delivery receipt using the Validate button after checking the details. The Receive From field will show the name of the supplier of the products. The Destination Location will show the delivery location mentioned by you while creating the purchase order. In the corresponding fields, you will get the Scheduled Date, Deadline, and Source Document of the delivery receipt.
Details such as Product, Demand, Done, and Unit of Measure can be seen under the Operations tab.
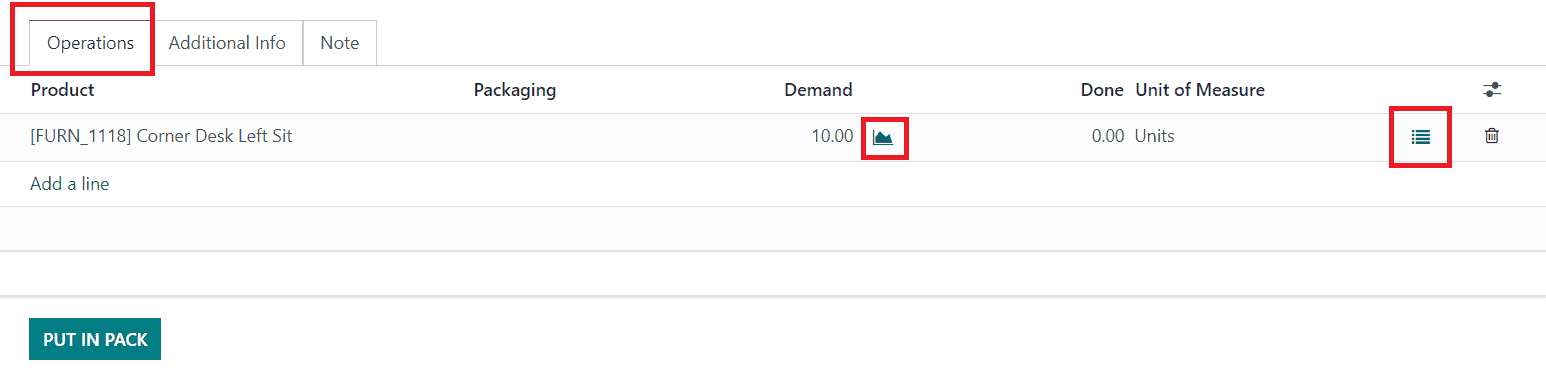
The Demand field will show the quantity of the products from an inventory point of view. Near this field, you will get a button to observe the Forecast Report of the product.
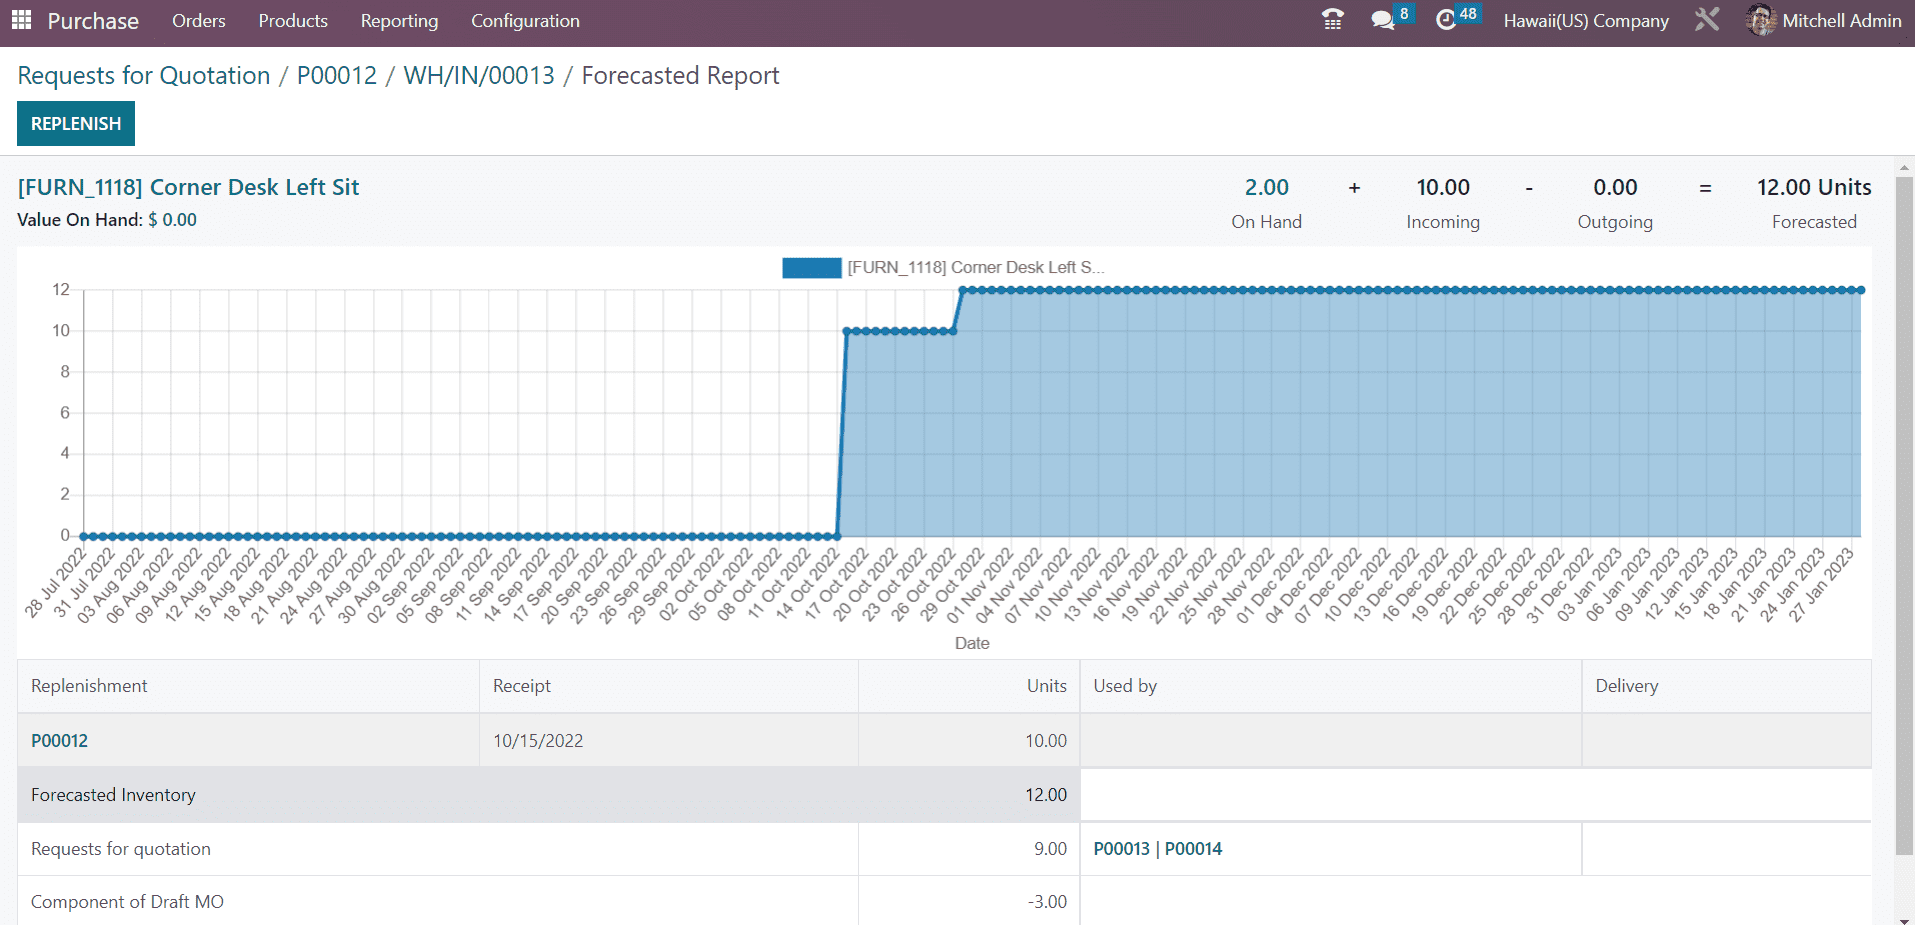
Similarly, you will get an additional button near the Unit of Measure field that will show the detailed operations view.
The Additional Information tab will help you to get the Shipping Information and Other Information related to the delivery of the product.
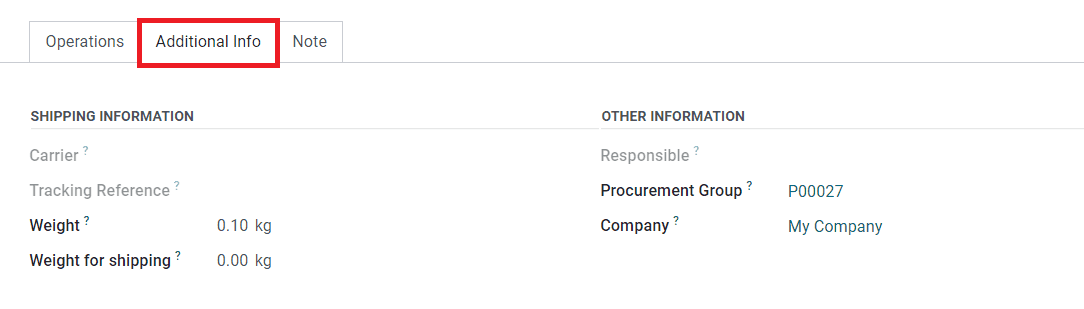
In the Shipping Information section, you will get the details of the Carrier, Tracking Reference, Weight, and Weight for Shipping. The Other Information section will show the name of the Responsible employee, Procurement Group, and Company in the respective fields. The Note tab will show the related notes of the incoming shipment.
After checking all details, you can confirm the delivery by clicking on the Validate button.
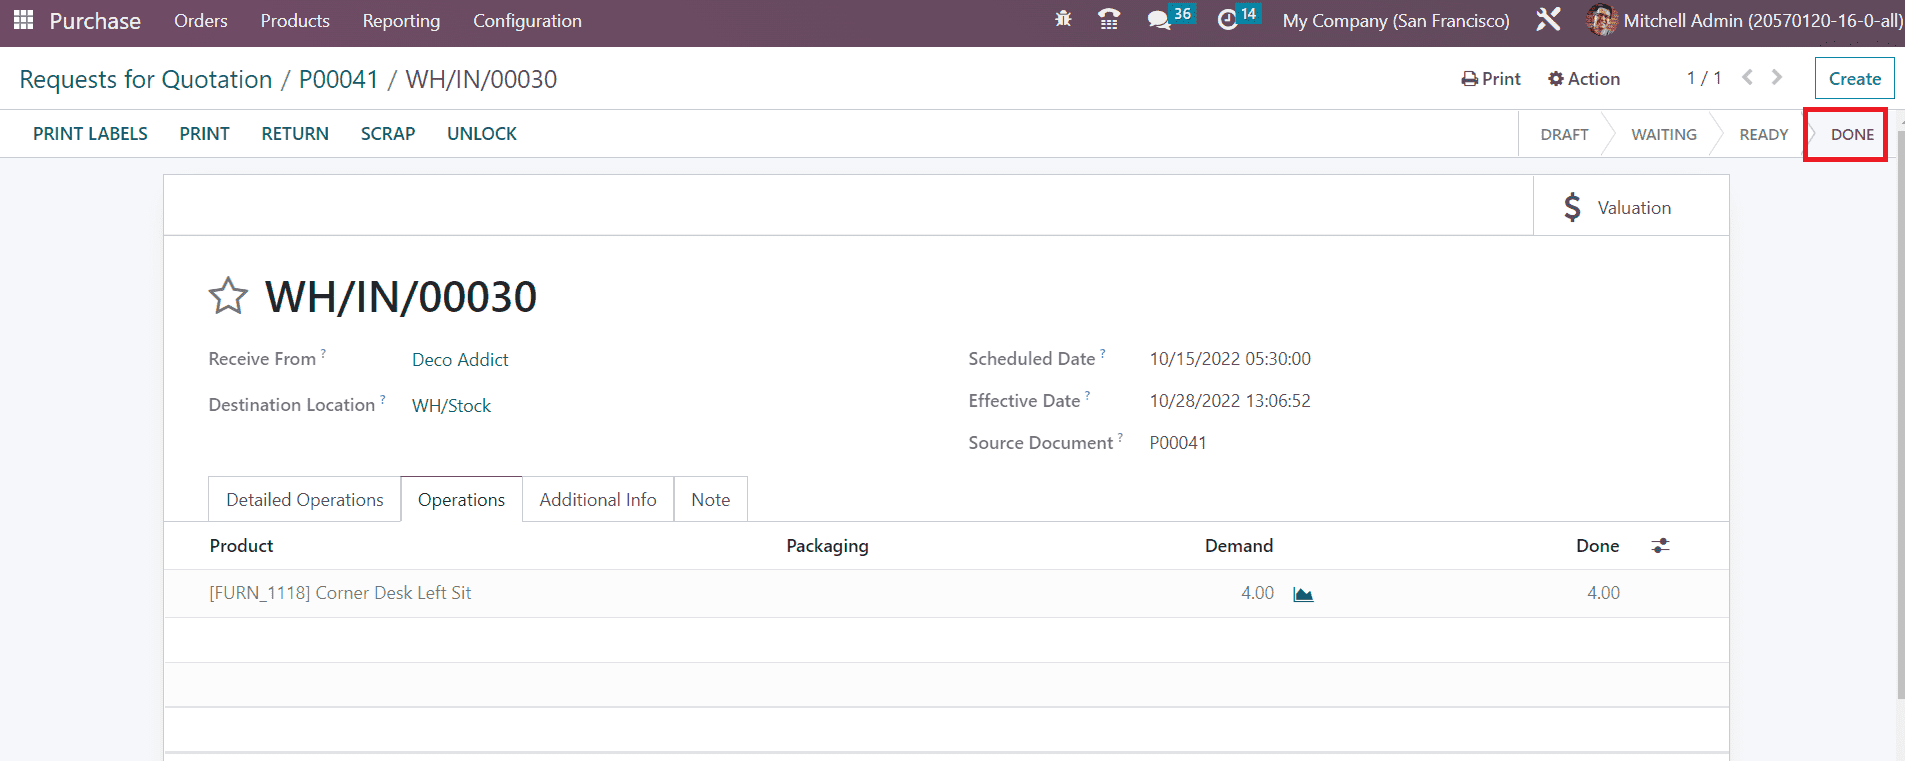
The status of the receipt has changed to Done which indicates that the transfer has been processed.
Last updated