Employee Expenses
Employee Expenses
There may be situations where the employee has to spend money from their personal fund to perform a project or task or complete purchases on behalf of the company. In such cases, the company is responsible for returning the money to the respective employee. An employee can record these expenses with the assistance of the Odoo Accounting module. The Employee Expenses option can be seen under the Vendors menu. Here, you can record your expenses and submit them to the manager for approval. Once you get approval from the manager, the amount mentioned in the Expense will be returned to your account.

The Employee, Expense Report, Company, Activities, Total Amount, Status, and Payment Status can be seen in the list view of the Employee Expenses. The Scan option allows you to scan and upload expense reports. To create a new report, click the Create button.

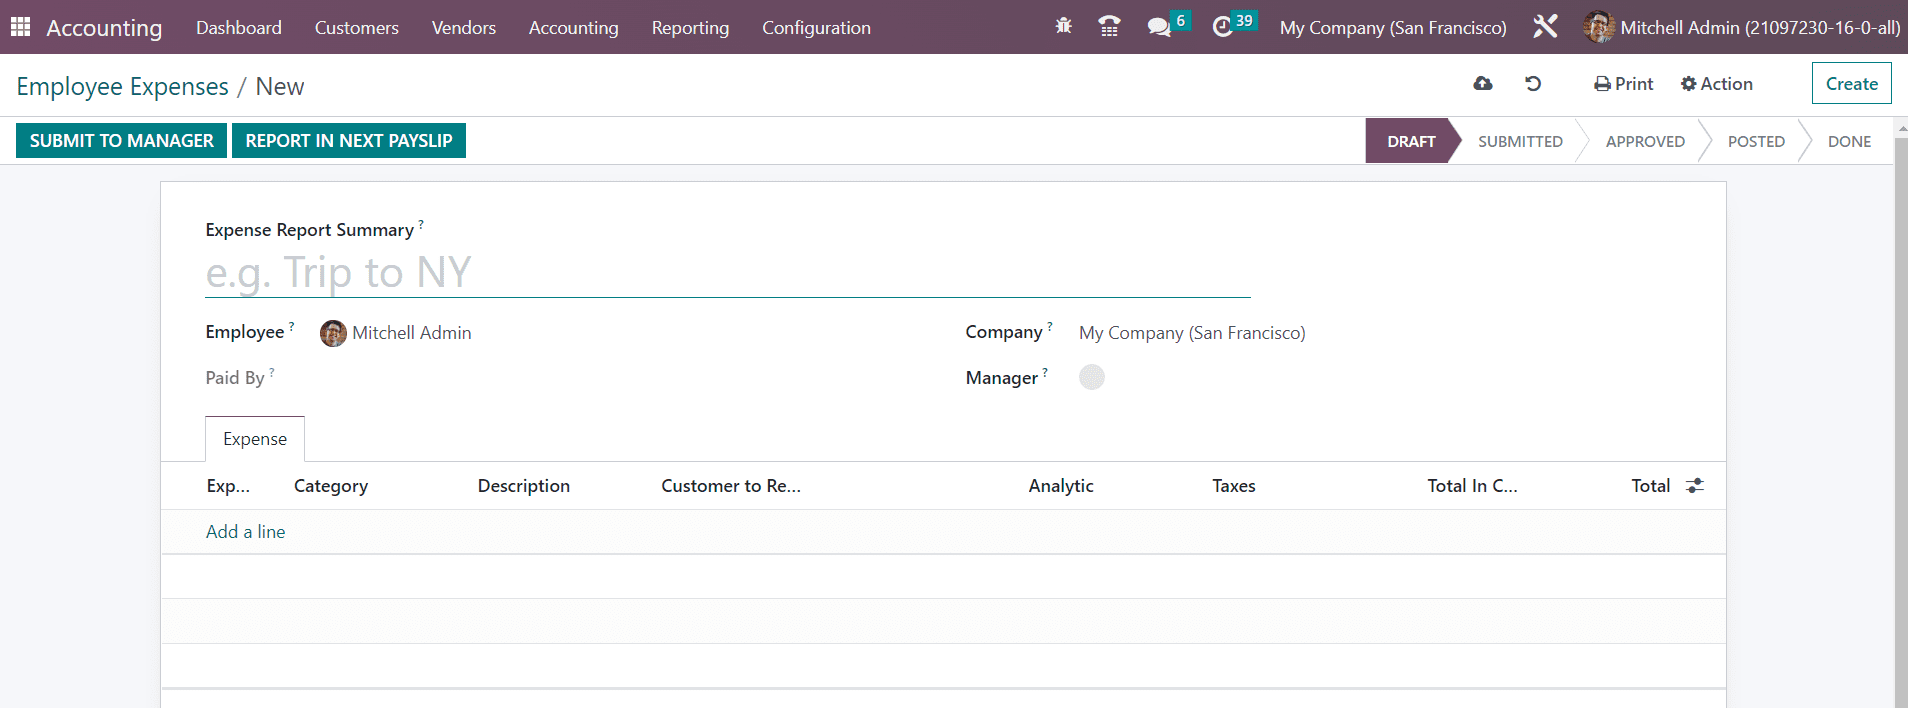
You can add a title for the report as Expense Report Summary in the given field. In the Employee field, your employee id will be auto-populated. In the Paid By field, you can specify whether you used your own account or a company account. The name of the Company can be seen in the corresponding field and you can mention the Manager whose approval is required for getting your money back. Under the Expense tab, you can add the expenses one by one using the Add a Line button.
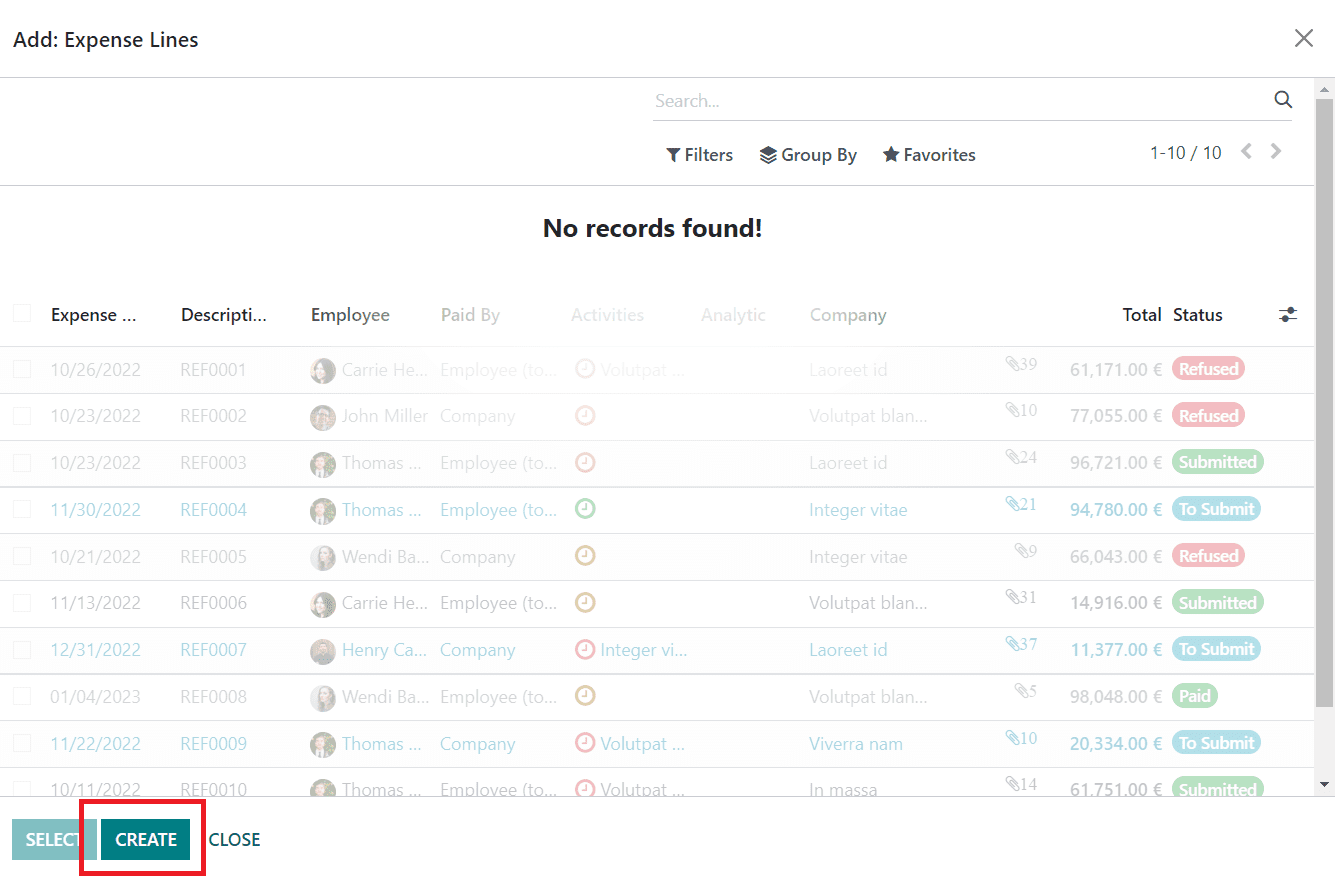
A pop-up will appear to select the expenses.

If you haven’t recorded your expenses yet, you can click on the Create button to create a new expense line.

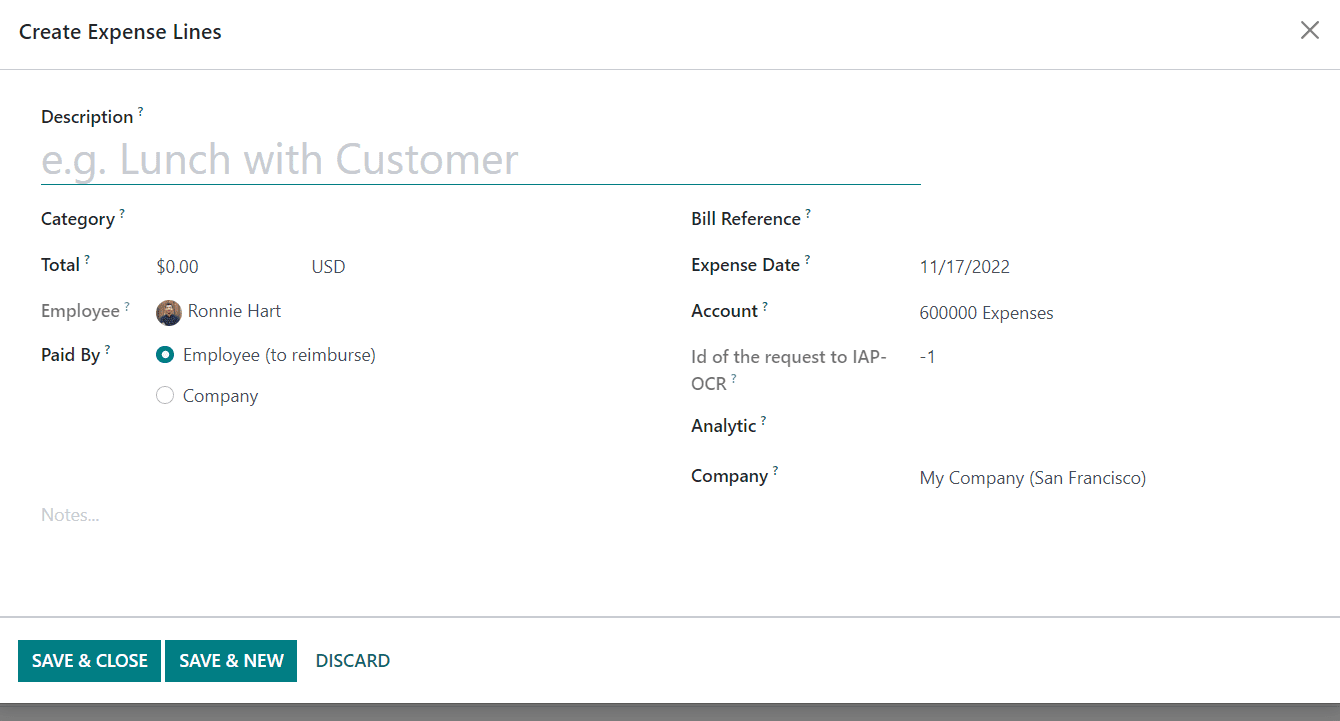
Add a Description for the expense line and specify the Category of the expense. In the Total field, you can mention the total expense in the selected currency. In the respective fields, you can define data related to Employee, Paid By, Bill Reference, Expense Date, Account, Analytic, and Company.
After adding the expense lines, you can click on the Submit To Manager button. Clicking on this button will submit the expense report to the mentioned manager for approval.

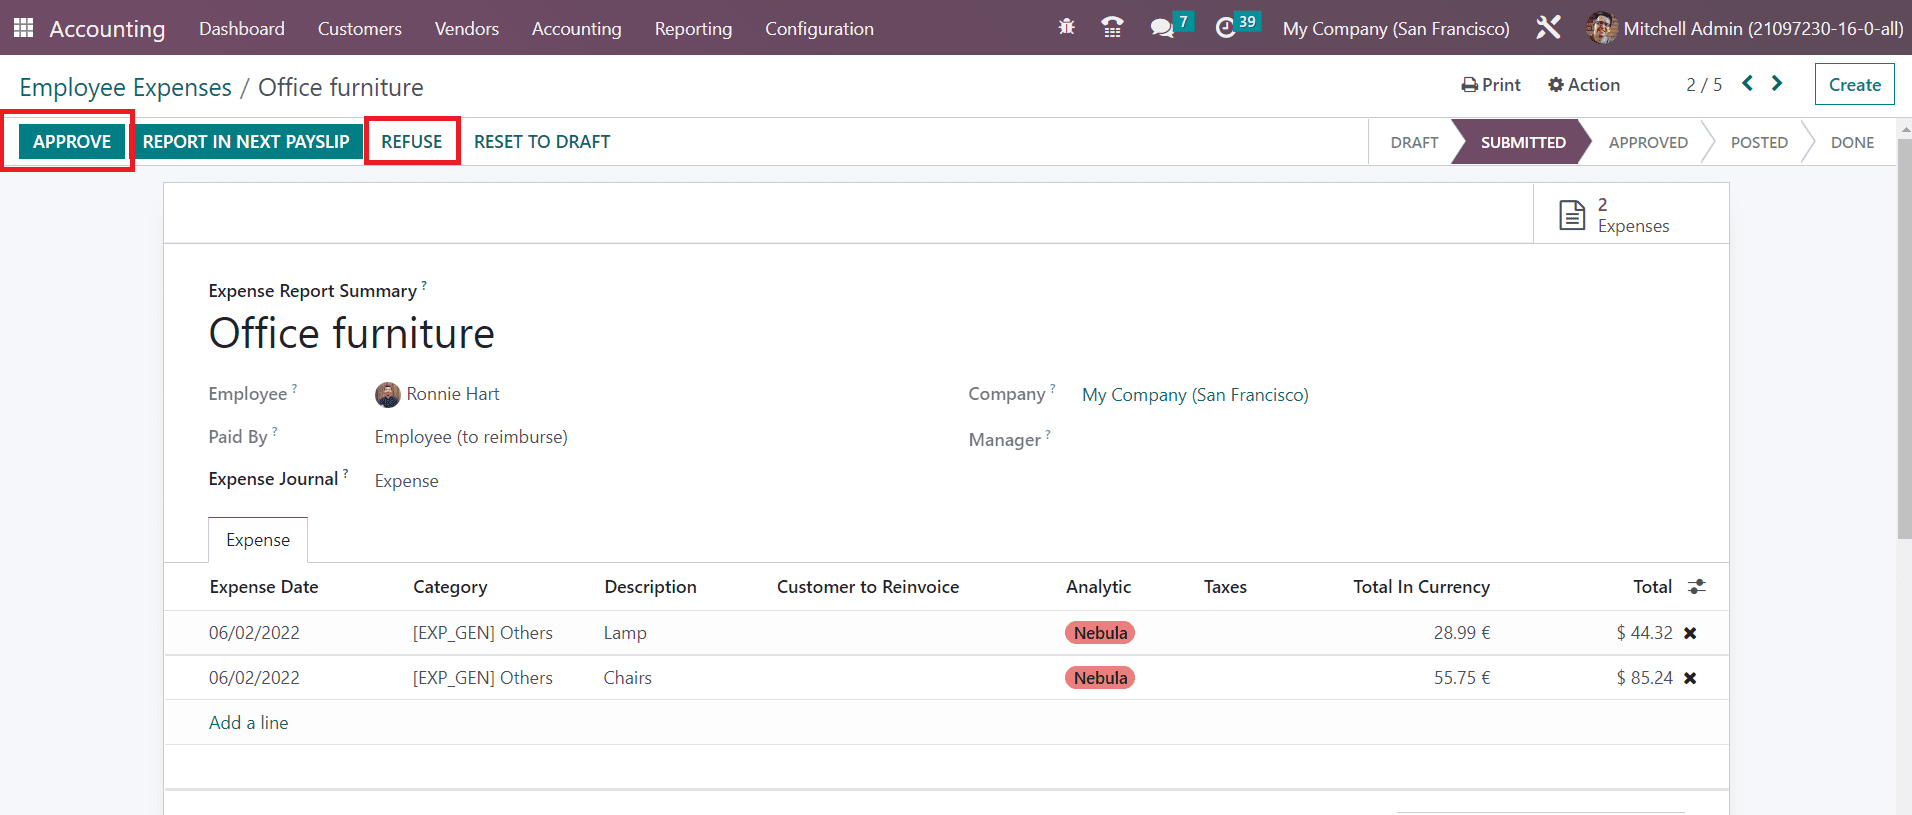
You can report the payment in the next payslip by clicking on the Report in Next Payslip button. Once the submission is completed, the manager can approve or refuse the report by checking the submitted report.

The manager can reset the expense report to draft if it requires clarifications. If any obligations are found in the report, the manager can refuse the expense using the Refuse button. The approved expense will be added to your next payslip.
Last updated