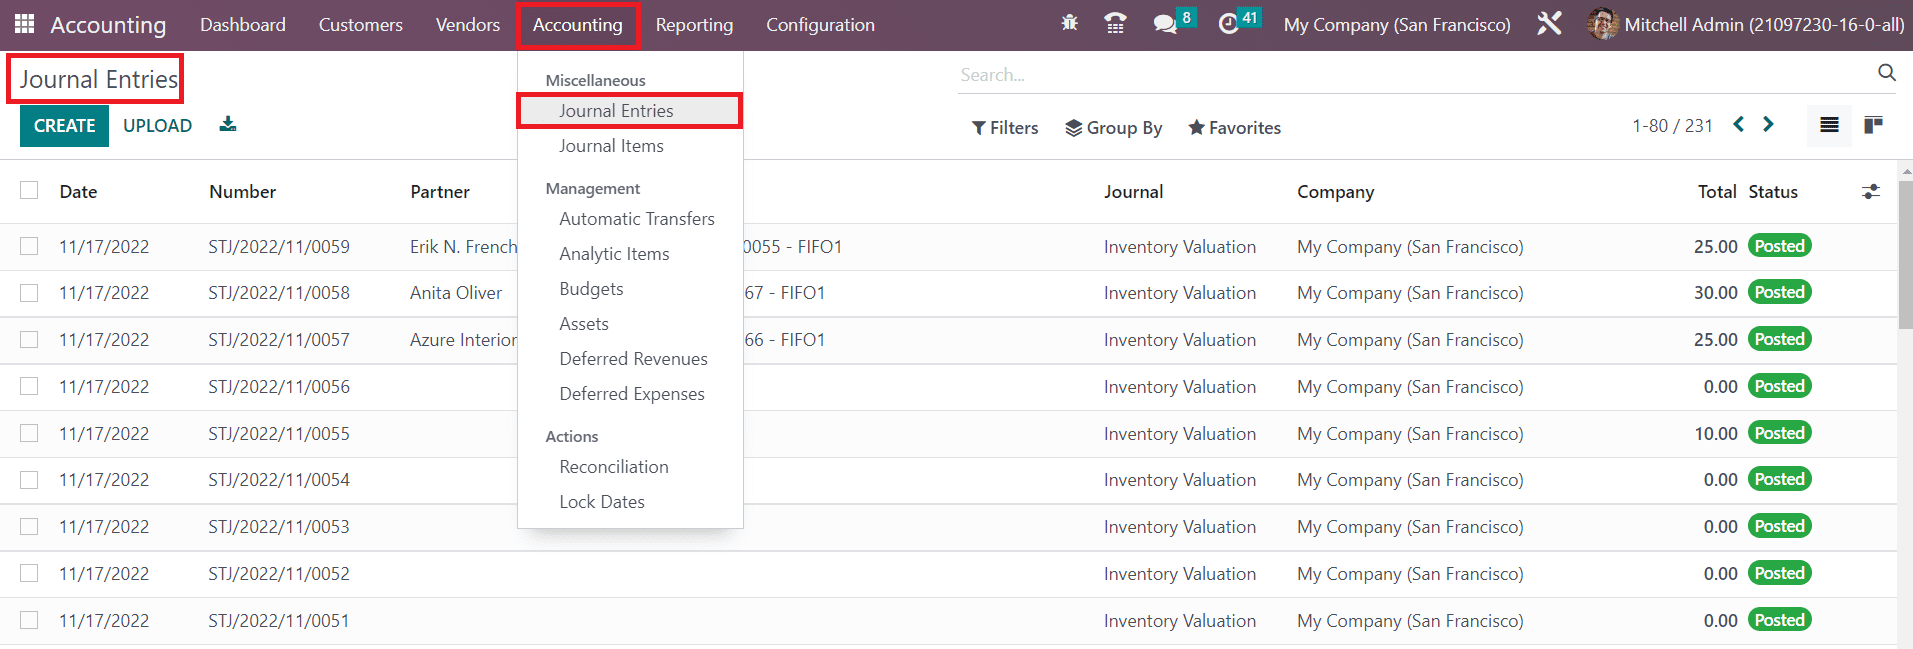
# Journal Entries
### Journal Entries
You can record a transaction in a journal in the form of a journal entry. A proper journal entry records the details of the accounting date, amount to be debited and credited, reference details, and description of transactions. In Odoo, at least one debit line and one credit line are demanded by the Double Entry Bookkeeping System. A journal entry must have equal debit and credit amounts. The lines that make up a journal entry are called Journal Items. You will get access to the **Journal Entries** platform from the **Accounting** menu of the module.
The list view provides the Date, Number, Partner, Reference, Journal, Company, Total, and Status details of each journal entry. In order to create a new journal entry and record it in a particular journal, you can click on the **Create** button.
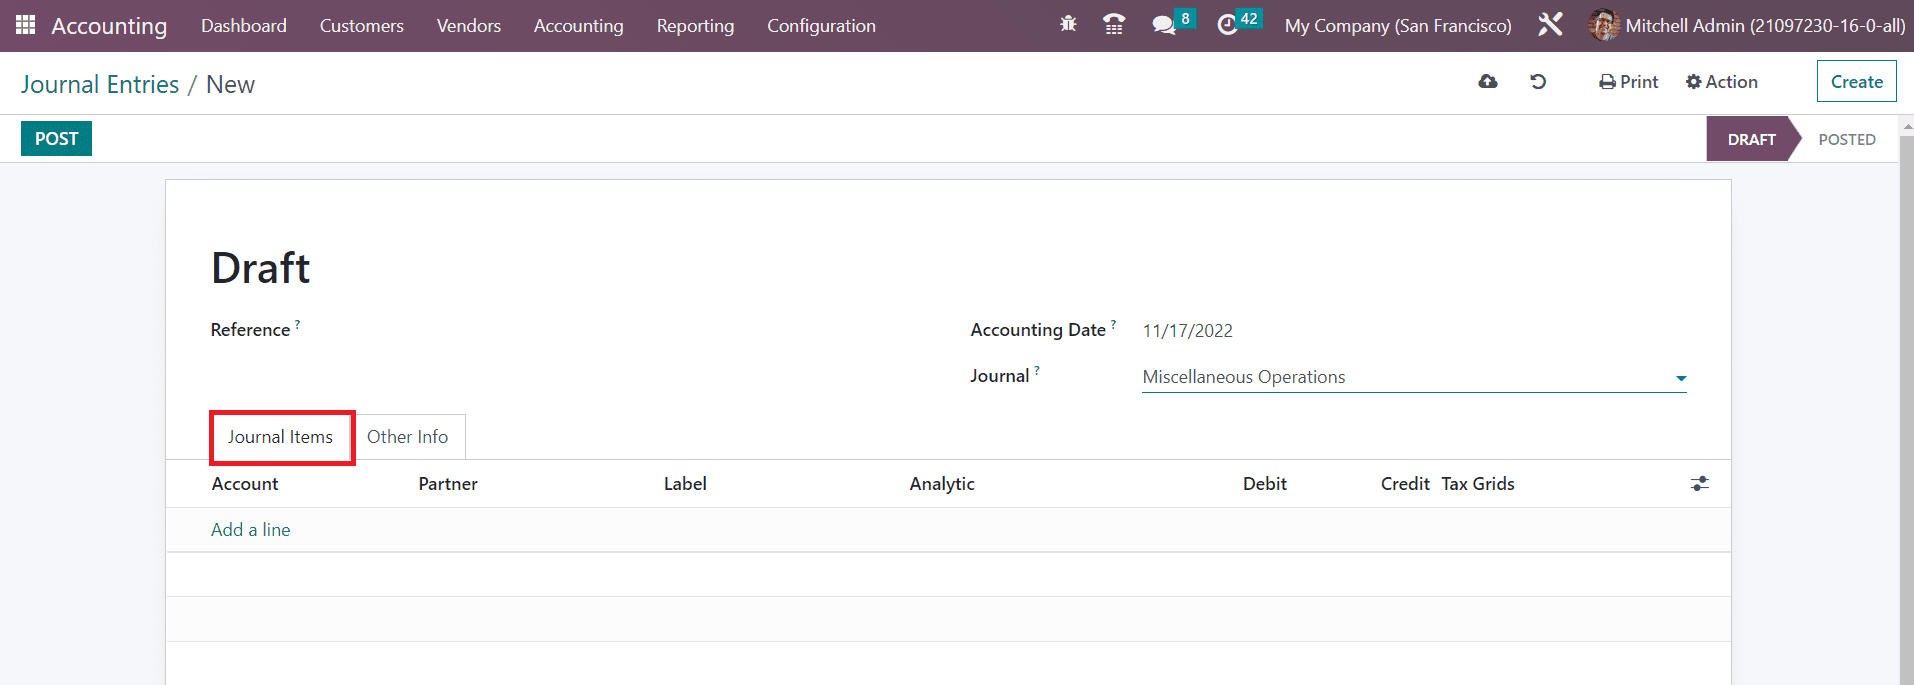
Any reference related to this journal entry can be mentioned in the **Reference** section. The **Accounting Date** of the entry will be visible in the respective field. You can select a suitable **Journal** from the given list to record this journal entry. Under the **Journal Items** tab, you can add journal items one by one using the **Add a Line** button. These are the lines of a single journal entry. You can specify the Account, Partner, Label, Analytic, Debit, Credit, and TaxCloud details in this tab.
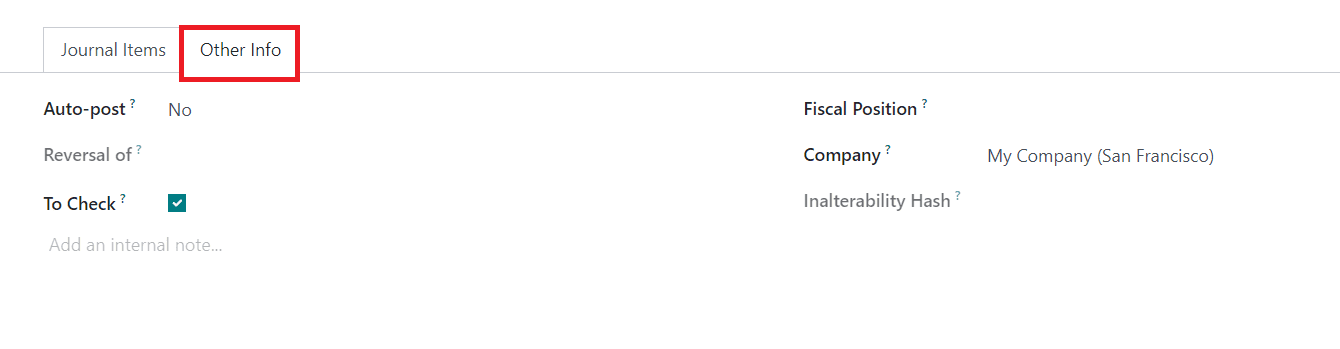
Under the **Other Information** tab, you will get the Auto-post option to activate which will automatically post the entry on the respective accounting date. If the entry needs to be checked again, you can enable the **To Check** field. After specifying the **Fiscal Position** and **Company,** you can click on the **Post** button to post the entry in the corresponding journal.
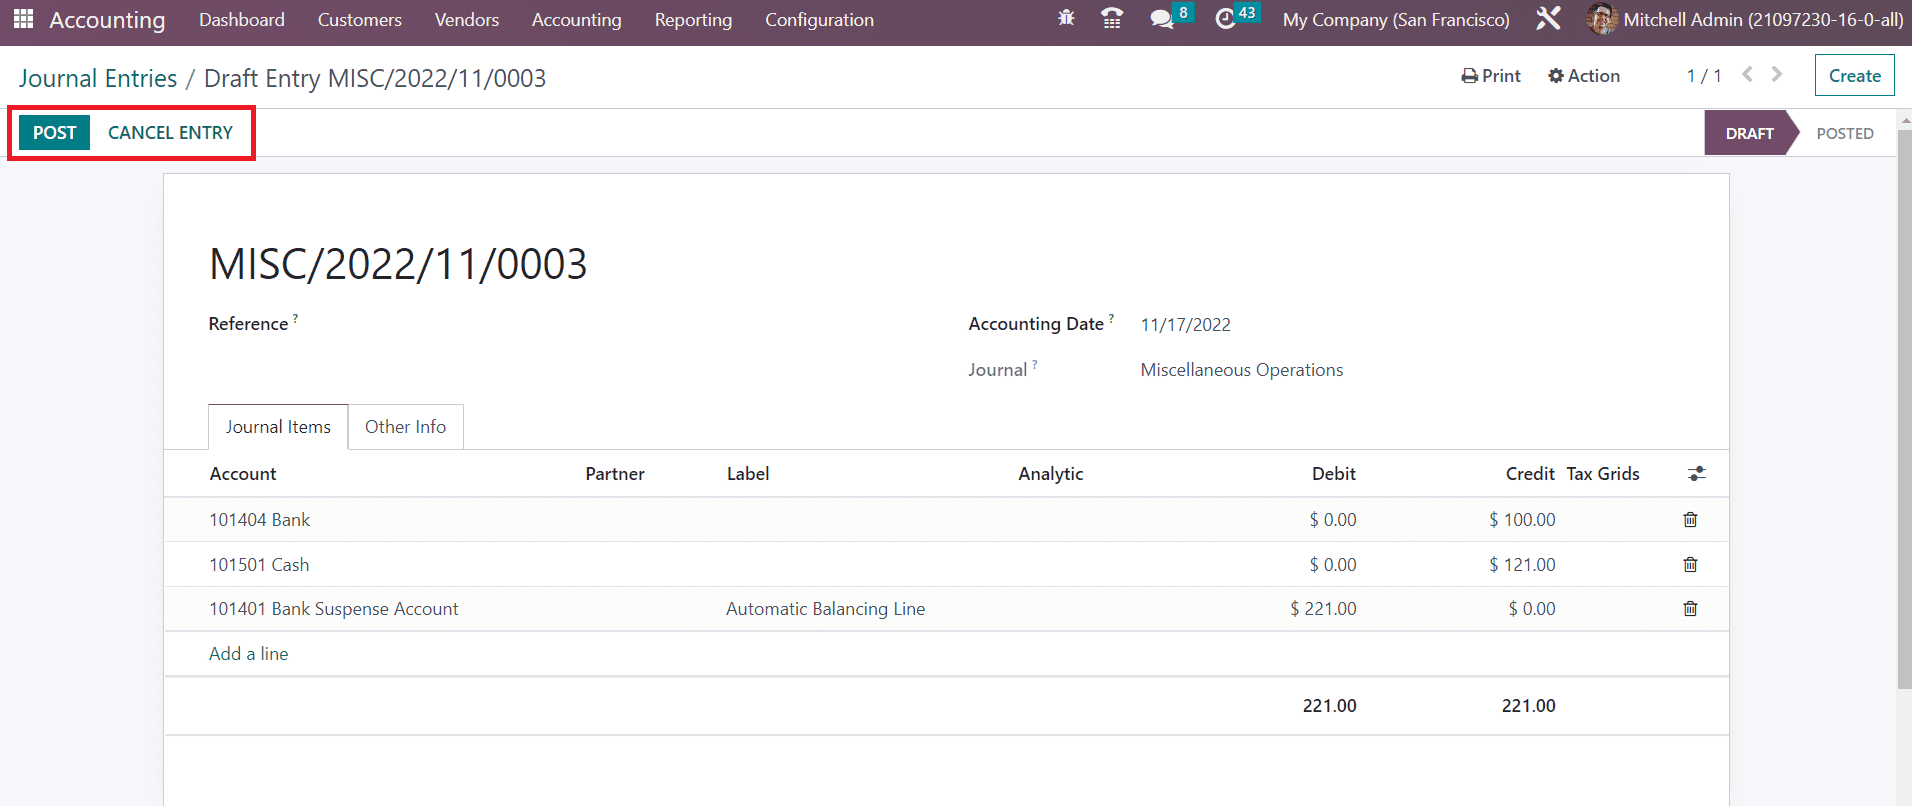
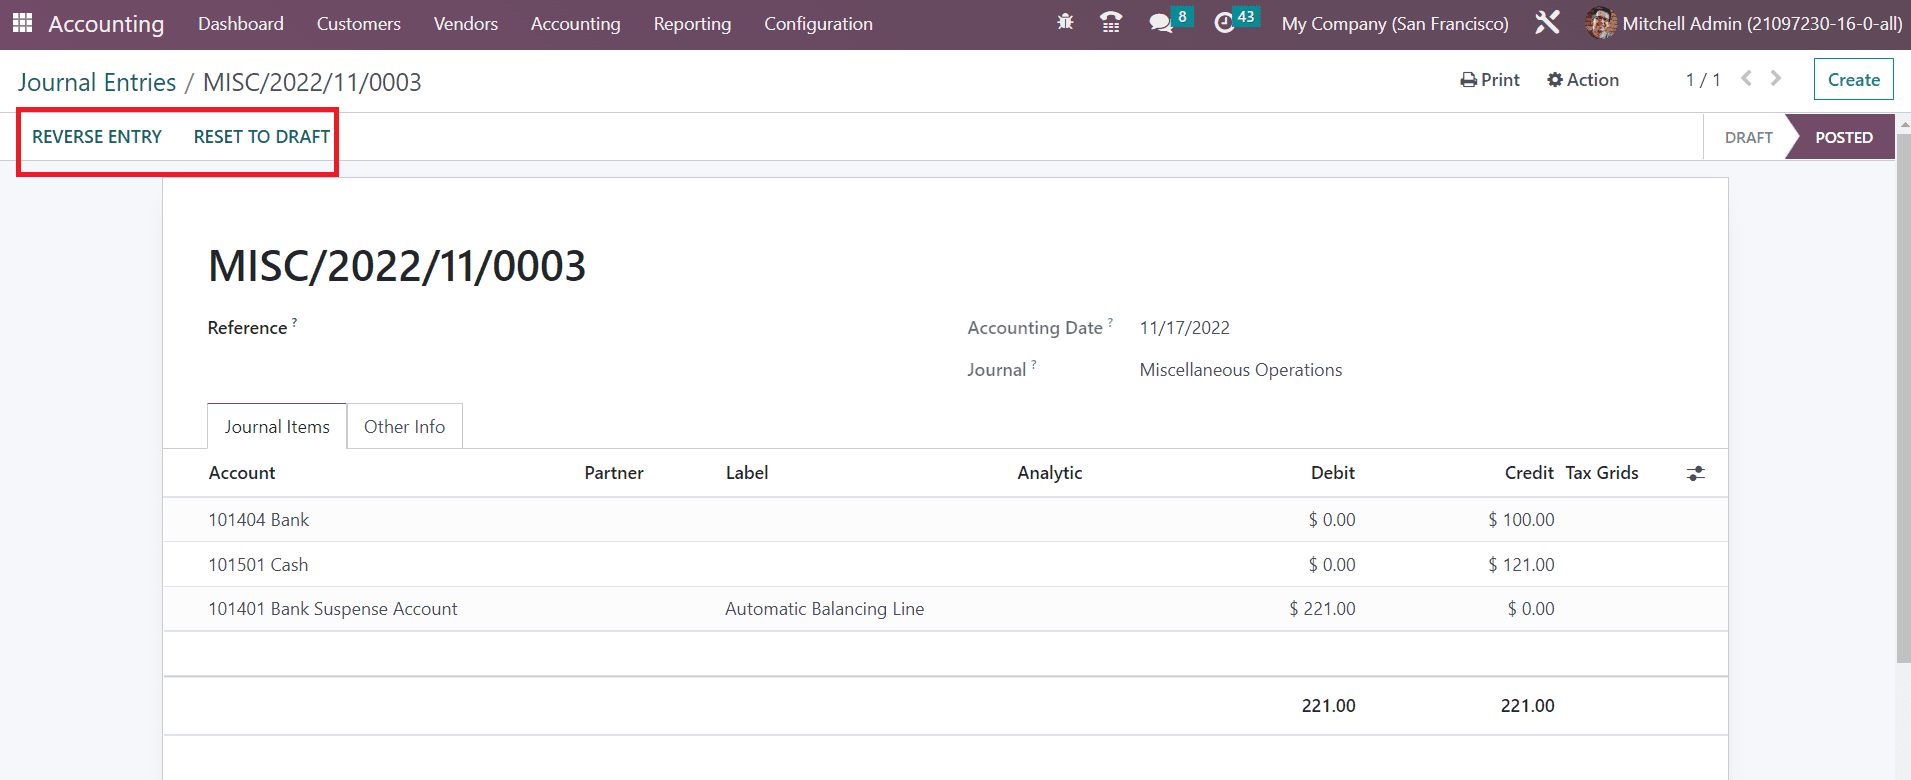
The entry can be canceled before posting it on the journal using the **Cancel Entry** button.
After posting the journal entry, you will get the option for **Reverse Entry.**
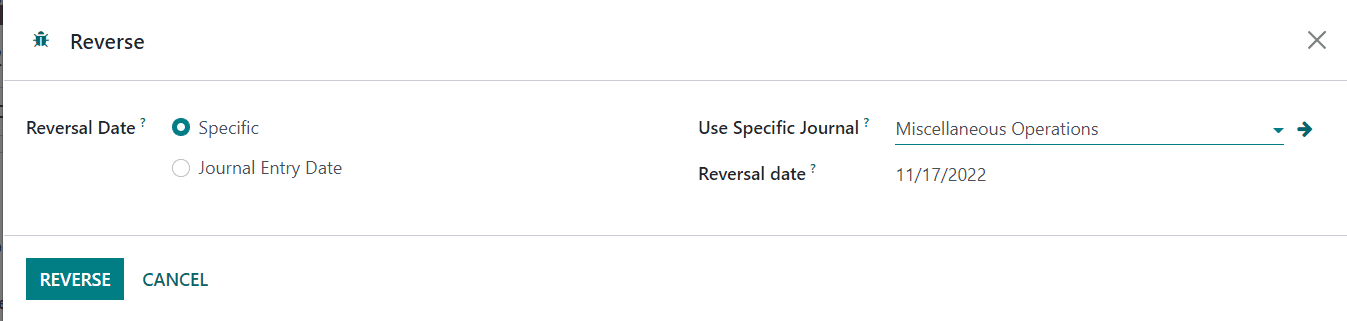
Using this button, you can easily reverse a posted journal entry. A pop-up will appear to specify the Reversal Date and Specific Journal.
The **Reversal Date** will automatically appear as soon as you select the Reversal Date as Specific. The Reversal Date can be set as the same as that of the Journal Entry Date by selecting the respective option. Click the **Reverse** button and the journal entry will be reversed.
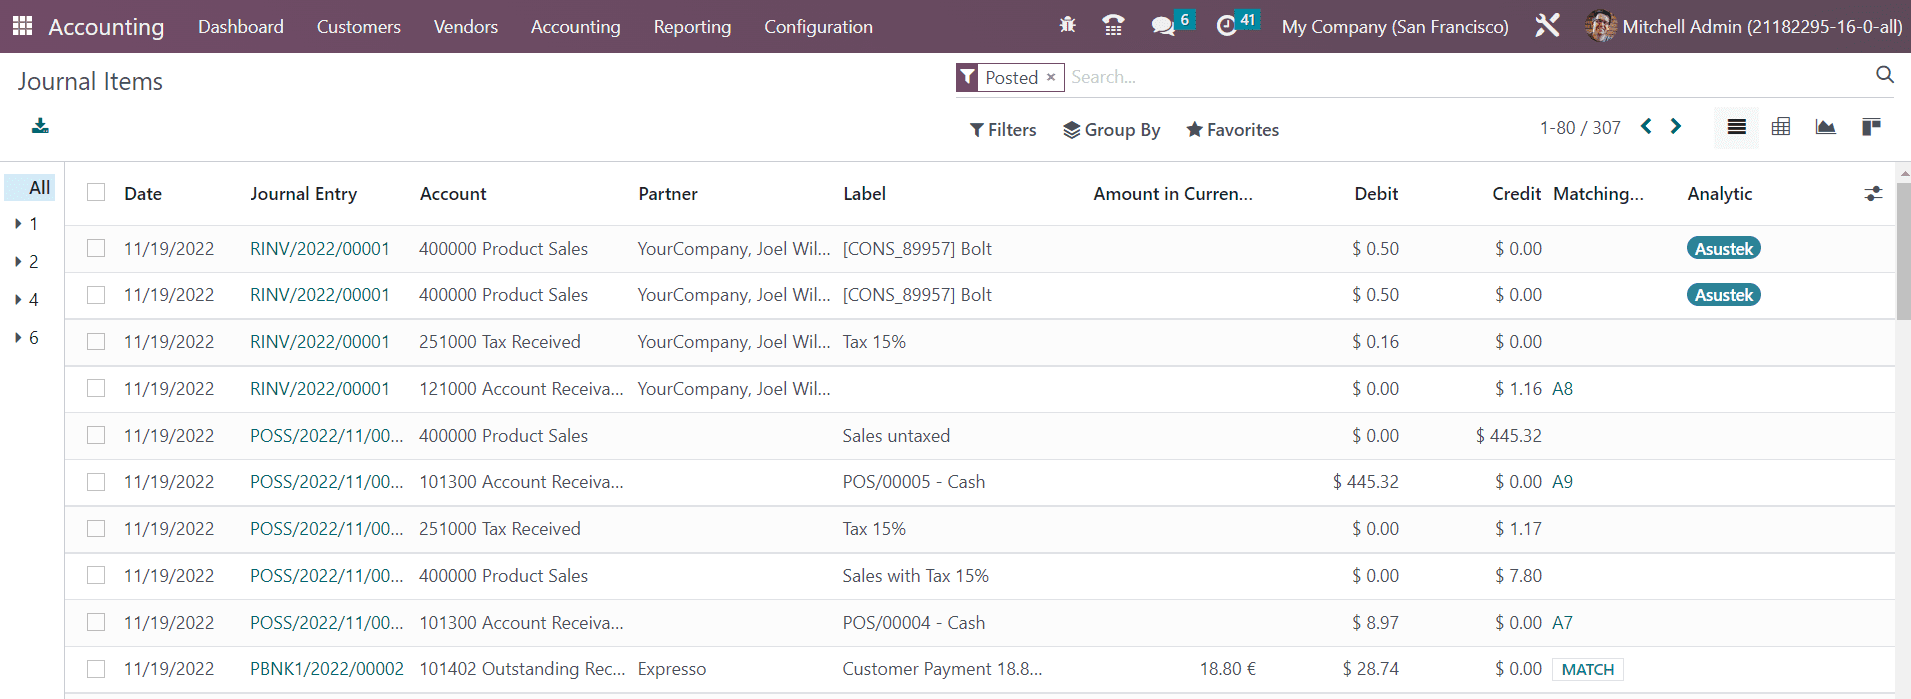
The journal items added to different journal entries can be observed in a separate platform in the Odoo Accounting module. Under the **Accounting** menu, you can find the **Journal Items** option which will record all journal items of your accounting entries.
The list view will show the details of the Date, Journal Entry, Account, Partner, Label, Amount in Currency, Debit, Credit, Matching Number, and Analytic. Using the **Match** button, you can match the journal item with the respective bank statement.
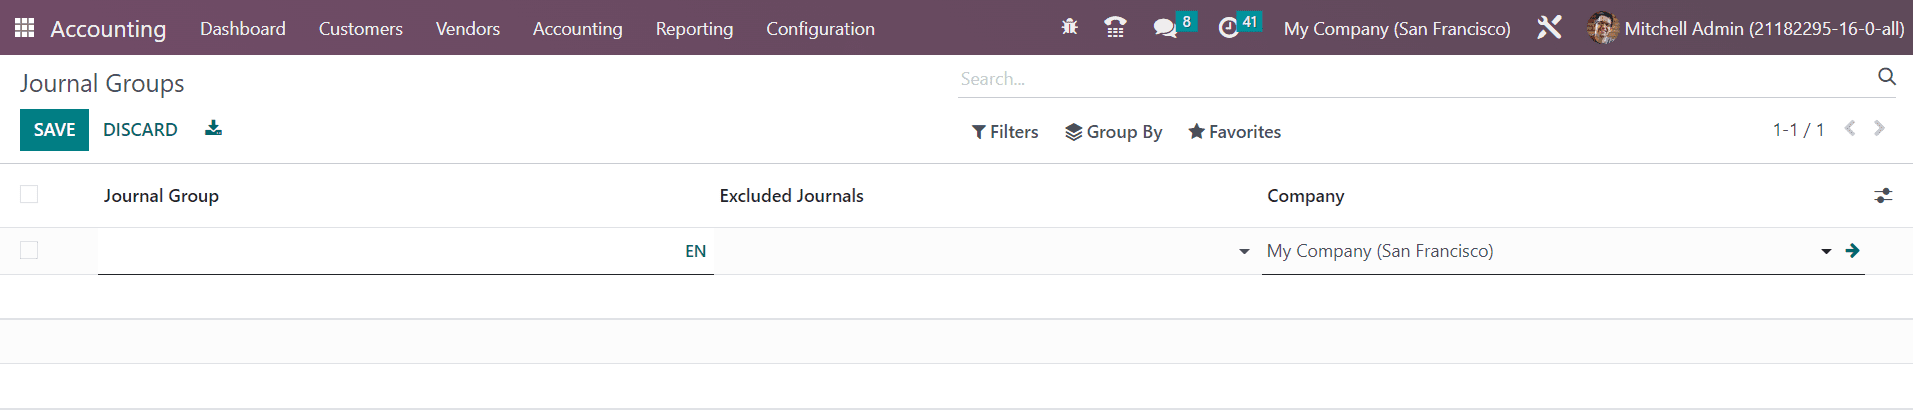
The **Journal Groups** option available in the **Configuration** menu can be used to create particular groups for the journals. Journal groups are used in reporting to display relevant data together.
Using the **Create** button, you can specify the name of the **Journal Group.** In the **Excluded Journals** field, you can add the journal ids which you want to exclude from this group. The name of the Company will be auto-populated in the respective field.
So far we are discussing the configuration of Journal Entries in the Odoo Accounting and now let’s move to the Automatic Transfers feature in the module