> For the complete documentation index, see [llms.txt](https://docs.wafra.sa/llms.txt). Markdown versions of documentation pages are available by appending `.md` to page URLs; this page is available as [Markdown](https://docs.wafra.sa/accounting/budgets.md).
# Budgets
### Budgets
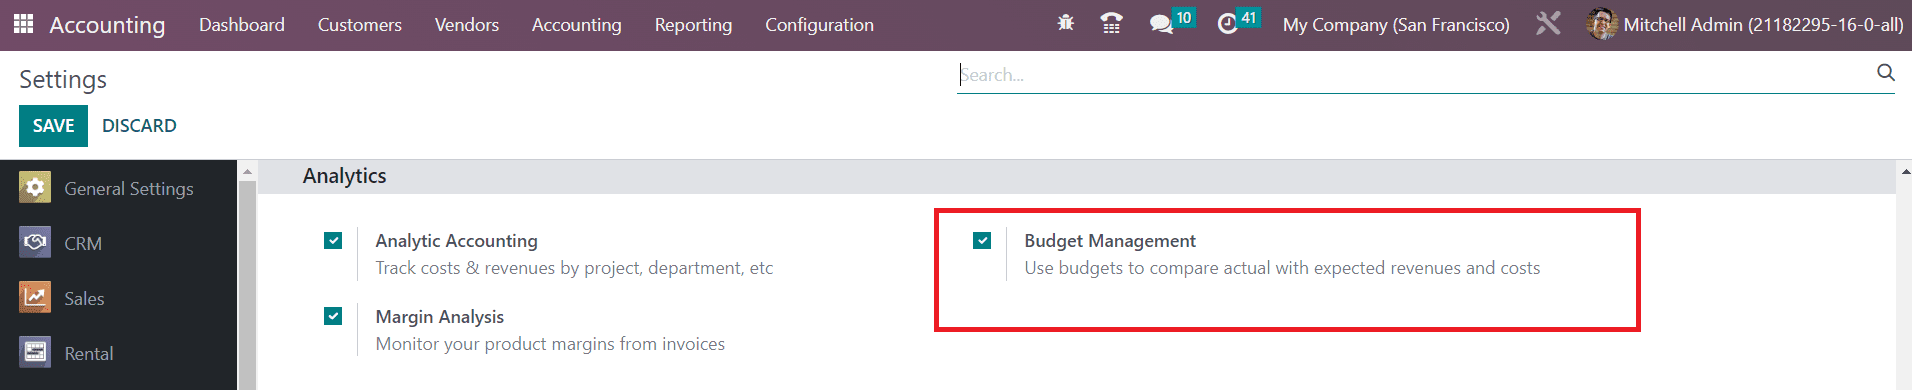
In managing expenses properly and prioritizing business operations according to the expense, budget plays an inevitable role in business management. It will help you to have a clear understanding of the plans and expenses required to perform various business activities over a particular period of time. For getting this feature in your Odoo Accounting module, go to the **Settings** menu and activate the **Budget Management** option as shown in the image below.
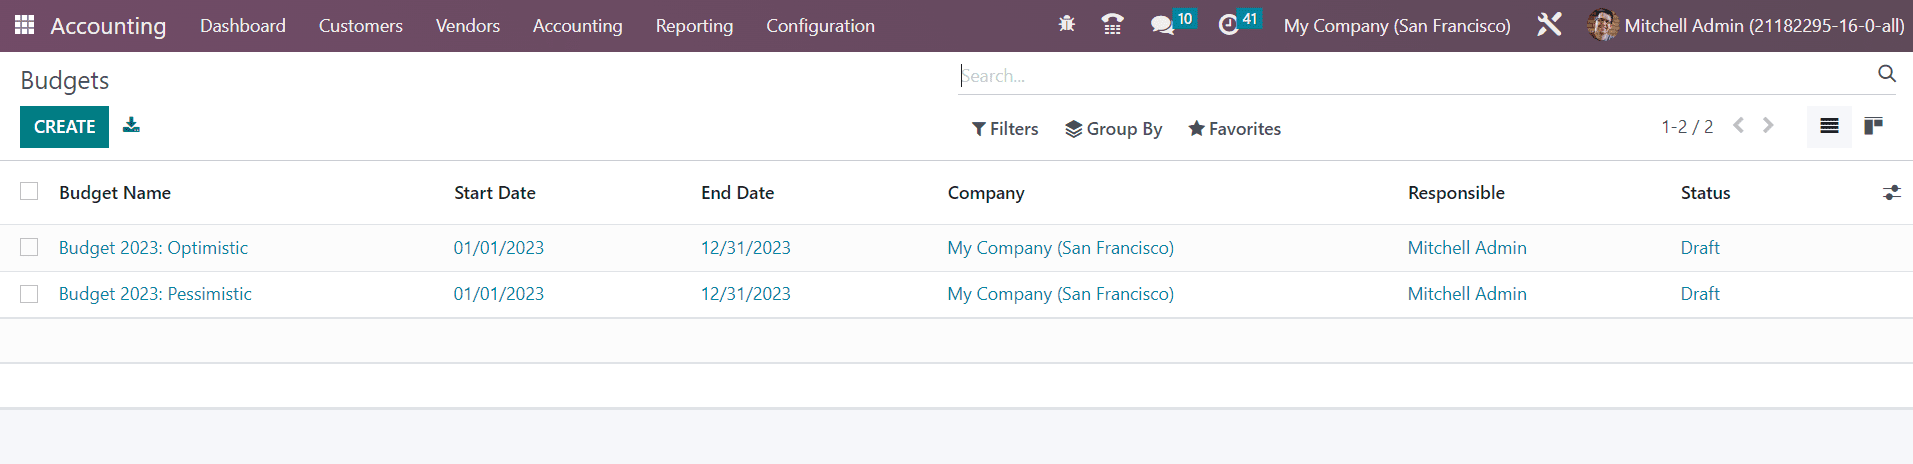
After activating this feature, you can go to the Accounting menu available in the main menu bar from where you will get access to the Budget platform as shown below.
The user gets the Budget Name, Start Date, End Date, Company, Responsible, and Status of already created budgets from this window. In order to create a new budget, you can use the **Create** button.
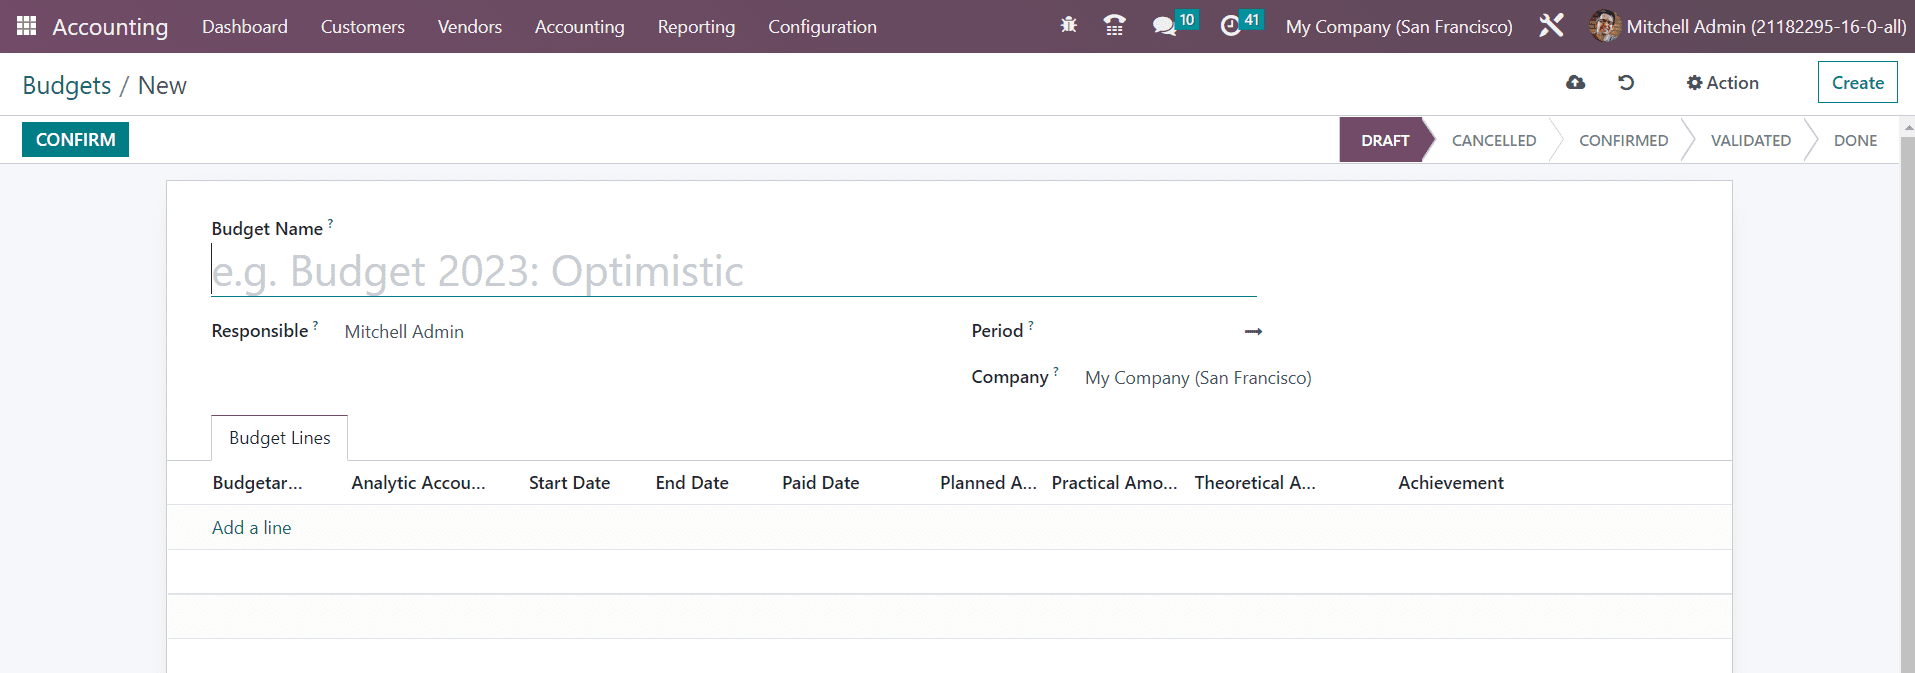
Specify a suitable name for your budget in the **Budget Name** field. Along with this, you can assign an employee for the managing and monitoring this budget in the **Responsible** field. The starting and ending period of this particular budget can be defined in the **Period** field. Since this database is working based on a US **Company,** the name of the Company can be seen in the Company field.
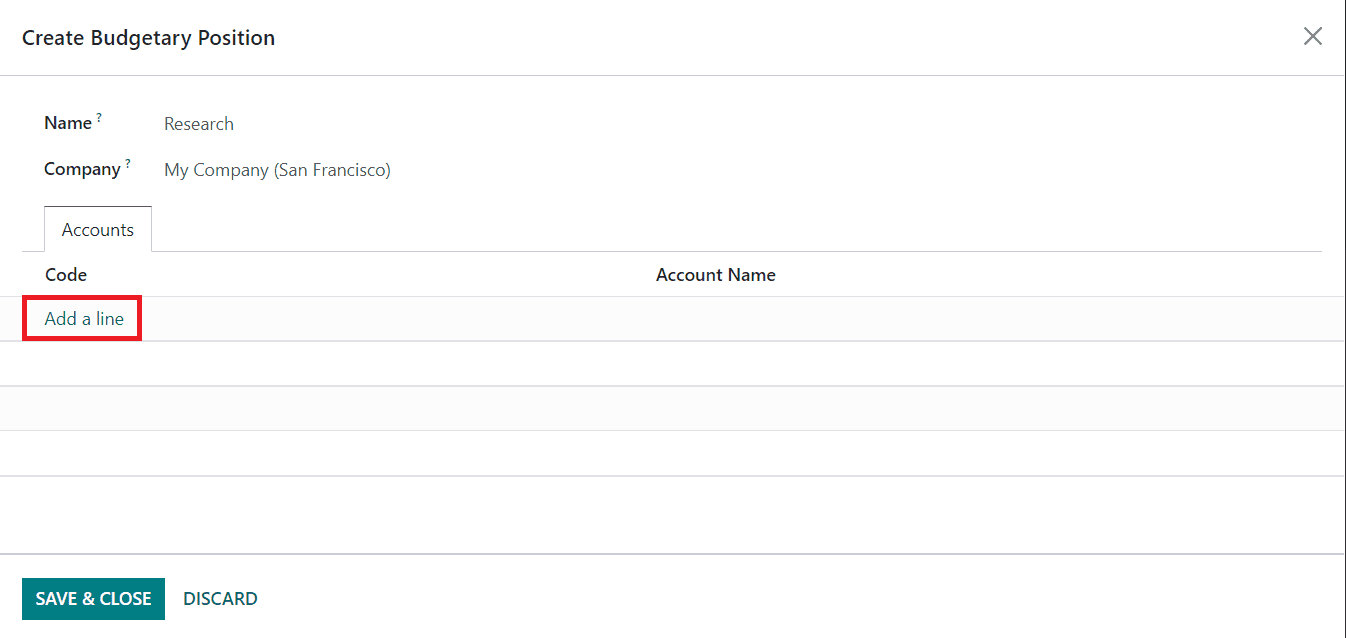
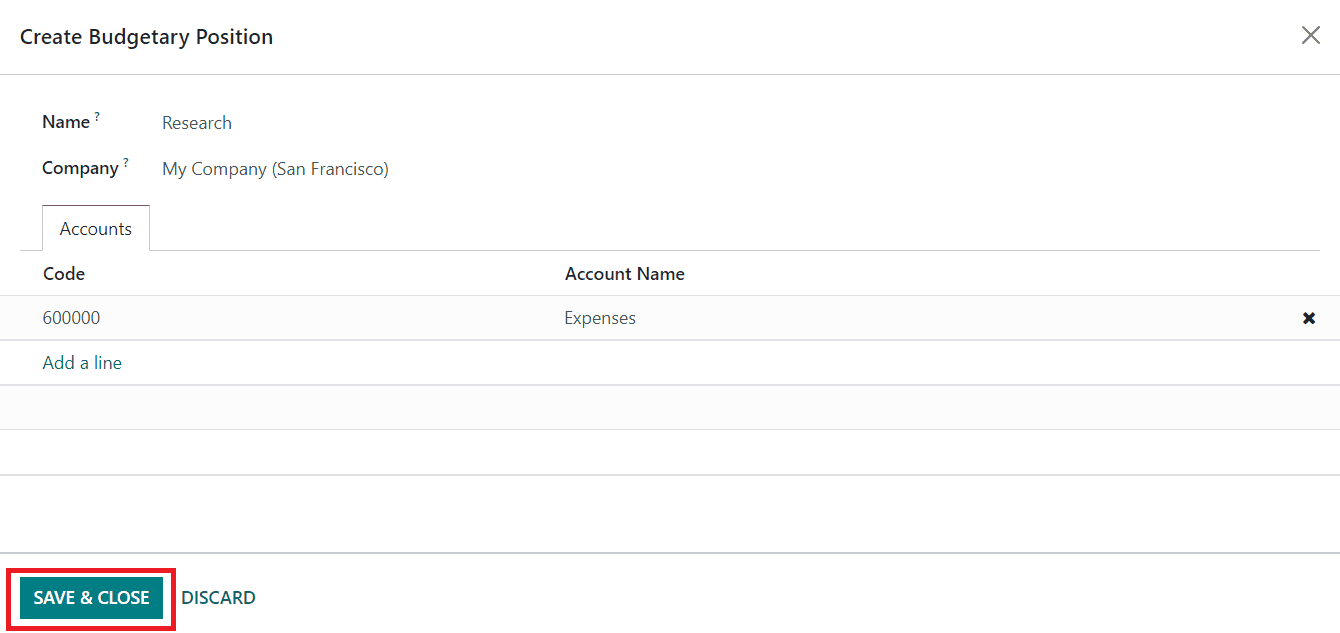
Now, you can add your budget lines under the **Budget Lines** tab using the **Add a Line** option. In the **Budgetary Position** field, you can specify the position of your budget. It is also possible to create a new budget position from this window itself. Once you mention the name of the budget position, a pop-up will appear as shown below.
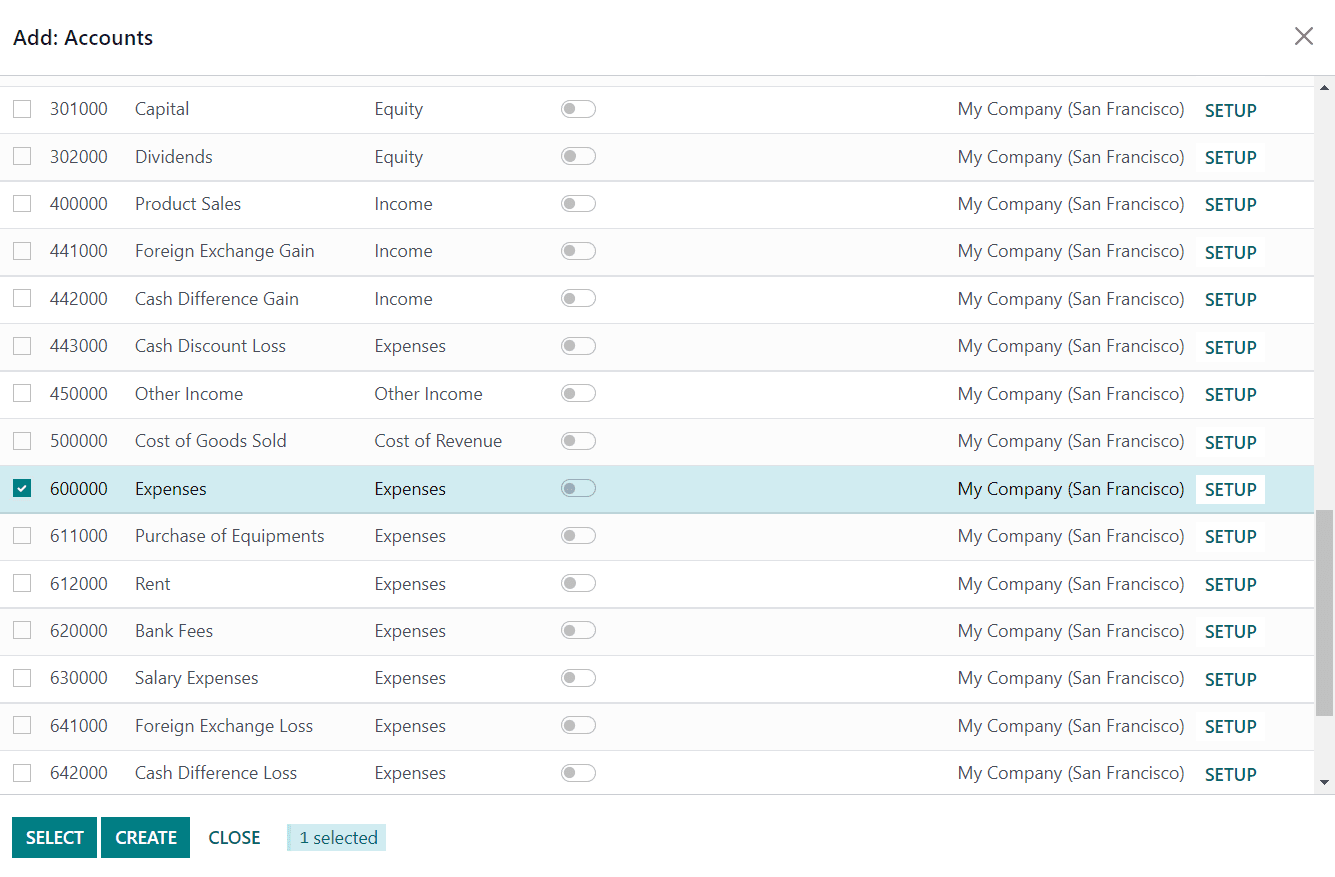
Here, you can see the **Name** and **Company** of the budgetary position. Under the **Accounts** tab, you can add suitable accounts for this particular budgetary position. By clicking on the **Add a Line** button, Odoo opens another pop-up to choose accounts.
After choosing the required accounts, you can click the **Select** button.
As you can see in the image above, the Code and Account Name will be displayed in the Budgetary Position window. Now, click the **Save & Close** button.
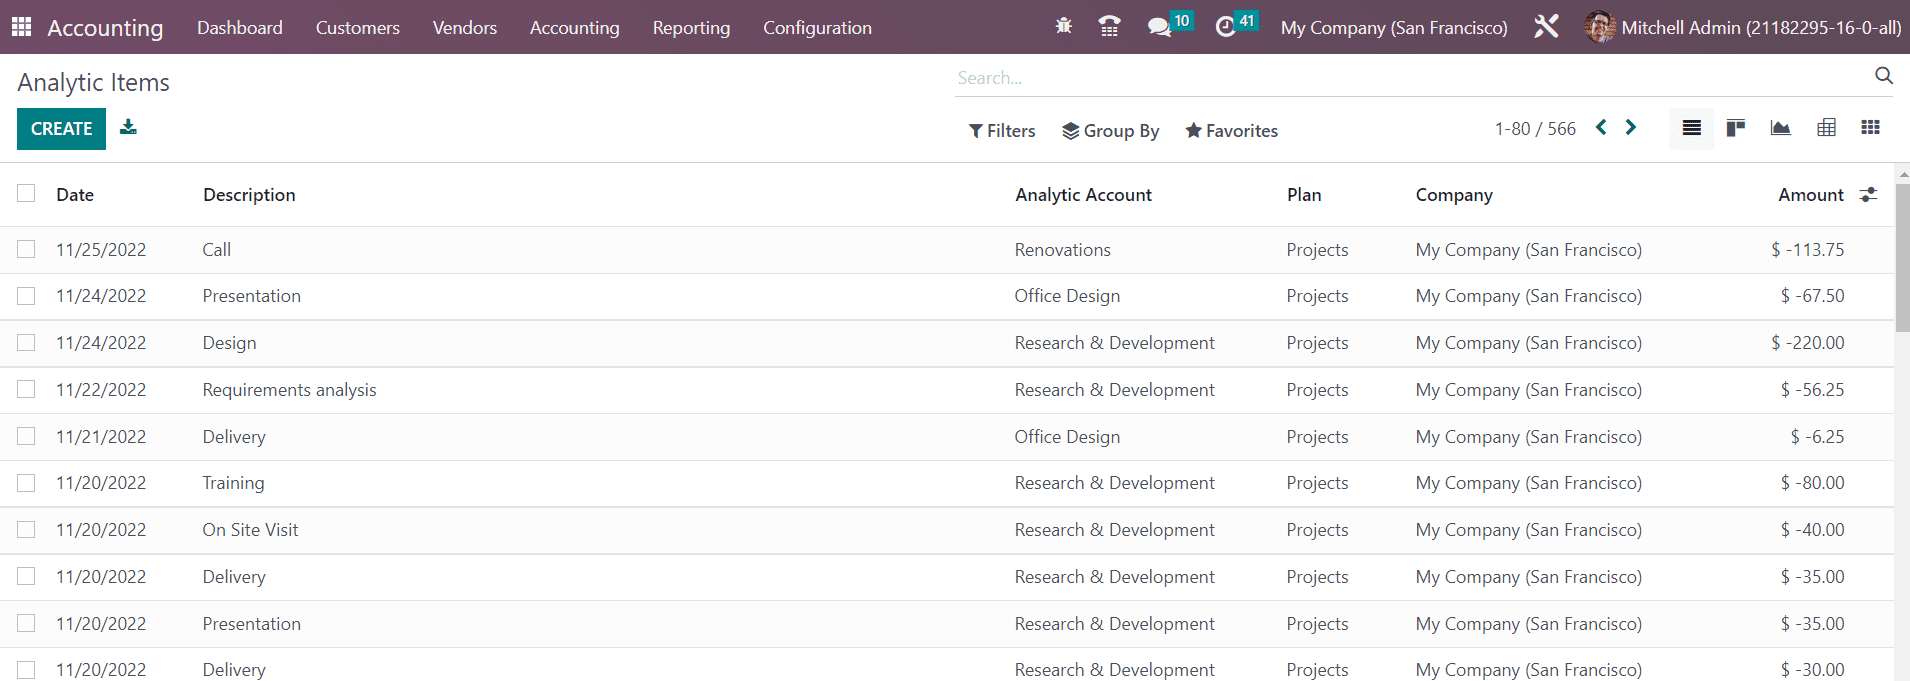
The accounting entries added to an analytic account will be counted as analytic items in Odoo Accounting. You can manage and create analytic items from the **Accounting** menu of the module. By clicking on the **Analytic Items** option, you will get the list of already defined analytic items for different analytic accounts in your system.
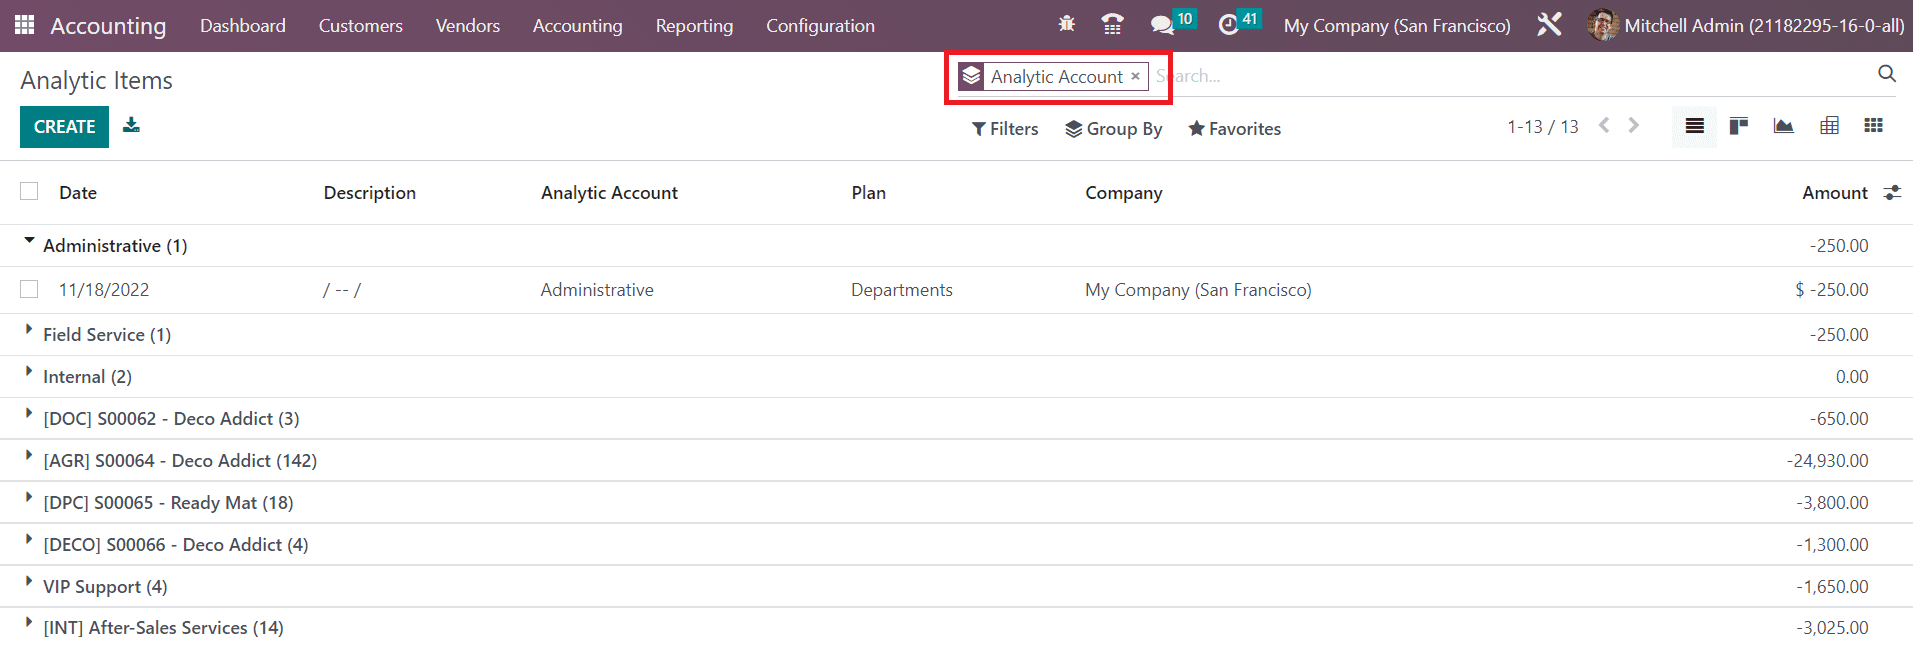
You can observe the Date, Description, Analytic Account, Plan, Company, and Amount of each analytic item here. To understand it easier, you can use the Group By option, **Analytic Account** which will provide a view with the details of analytic account with specific analytic items included in them.
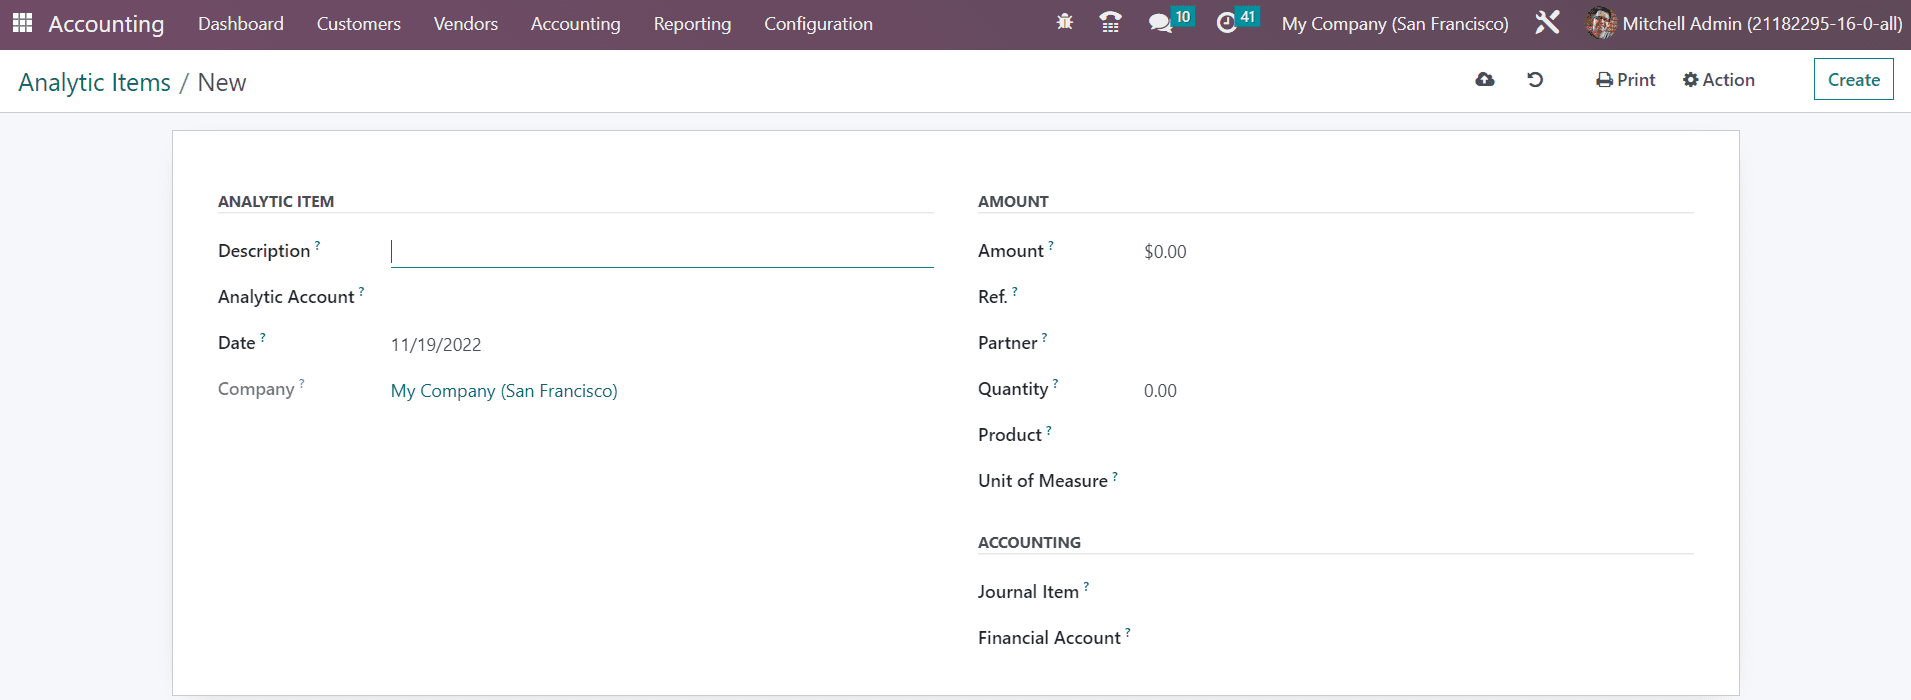
This will help you to understand the items defined in each analytic account. You can manually create a new analytic item for a specific account by clicking on the Create button.
In the **Description** field, you can mention a title for the new analytic item. In the corresponding fields, you can specify the **Analytic Account** to which you want to add this item, the **Date** of creation, and the **Company.** In the **Amount** section, specify the Amount, Reference, Partner, Quantity, Product, and Unit of Measure in the respective field. For Accounting details, you can add the **Journal** Item and **Financial Account** in the given spaces. Once you complete the configuration, the item will be added to the respective analytic account.