Fiscal Position
Fiscal Position
The currency rates and tax computation methods will be different for different countries. Using the fiscal positions, Odoo will help you to create appropriate rules to automatically adapt the taxes and accounts of a country used for business purposes. For configuring the Fiscal Position, you can go to the Configuration menu of the Accounting module and click on the Fiscal Position button. As shown in the image below, you will get the already configured fiscal positions here with the details of their name and companies.

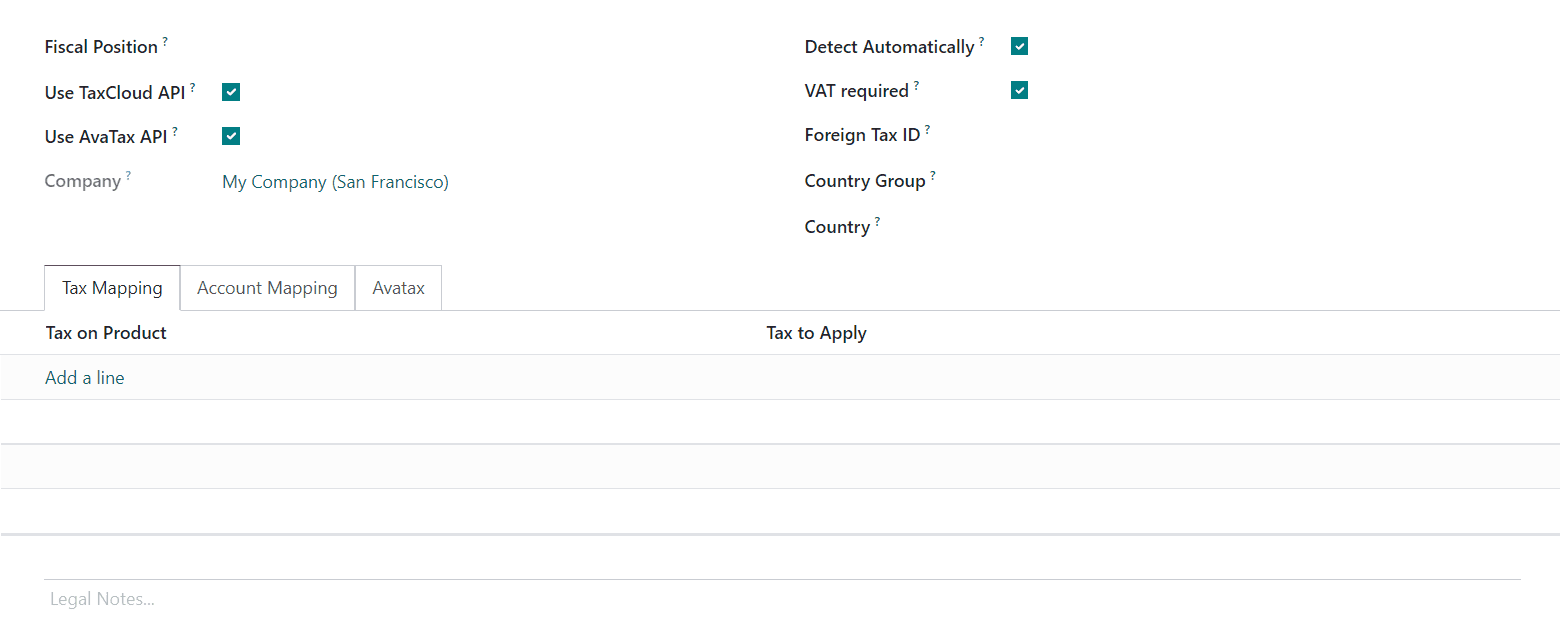
In order to create a new one click on the Create button. You can add a name for the Fiscal Position in the given field.

The Use TaxCloud API can be activated to automatically find the tax rate of the customer by location. In the Company field, you can observe the name of your company. By activating the Detect Automatically field, Odoo will automatically apply this fiscal position based on the location you select. Once you activate this option you will be able to get two additional options such as VAT Required and Country Group. By activating the VAT Required field, Odoo applies for this fiscal position only if the partner has a VAT number. The fiscal position will be applied only if the delivery country matches with the group or countries mentioned in the Country Group and Country fields. The tax ID of your company in the region mapped by this fiscal position can be mentioned in the Foreign Tax ID field.
The tax that will be mapped to this fiscal position can be added in the Tax Mapping tab. Using the Add a Line button, you can mention the tax that you want to replace in the Tax on Product field. The tax that you want to apply for this fiscal position can be mentioned in the Tax to Apply field.

Under the Account Mapping tab, you can mention the account you want to replace and the account you want to use for this fiscal position in the Account on Product and Account to Use Instead fields respectively.
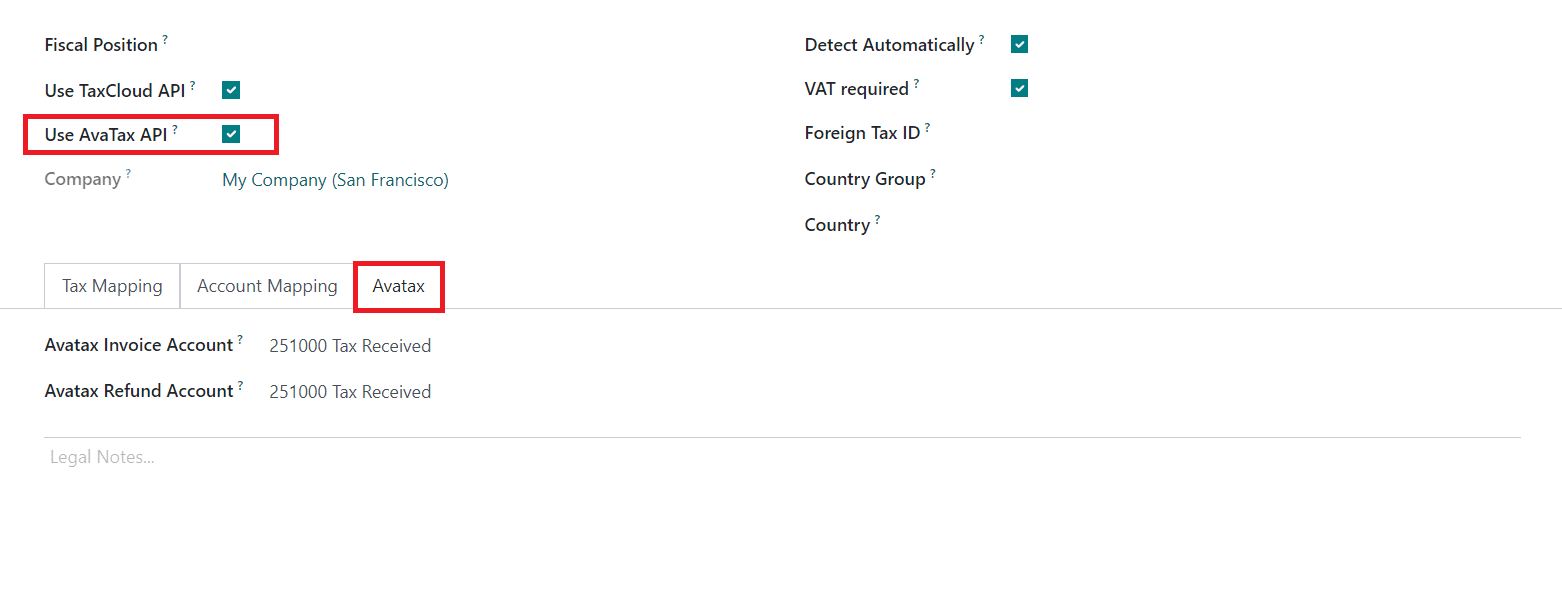
You can automatically compute the tax rates by activating the Use AvaTax AP option. By activating this option, you will get the AvaTax tab as shown in the screenshot below.

Here, you can specify the Avatax Invoice Account (the account that will be used by AvaTax taxes for invoices) and Avatax Refund Account (the account that will be used by AvaTax taxes for refunds). The legal mentions that have to be printed on the invoices can be specified in the Legal Notes space.
You can set your domestic country used for accounting operations in the Settings menu. As shown in the image below, you can set your Fiscal Country under the Taxes tab.

It is important to define the last day of your fiscal year so that Odoo can automatically open new entries. You can set the last day of your fiscal year in the Fiscal Period tab available in the Settings tab.

If the fiscal year of your company is more than or less than 12 months, you can activate the Fiscal Years option to configure the fiscal year of your company. You can configure new fiscal years using the external link available in this section. In the Invoicing Switch Threshold field, you can set a date and the invoices up to this date will not be taken into account as accounting entries.
Last updated