> For the complete documentation index, see [llms.txt](https://docs.wafra.sa/llms.txt). Markdown versions of documentation pages are available by appending `.md` to page URLs; this page is available as [Markdown](https://docs.wafra.sa/sales/discount-loyalty-and-gift-card.md).
# Discount, Loyalty, and Gift Card
### Discount, Loyalty, and Gift Card
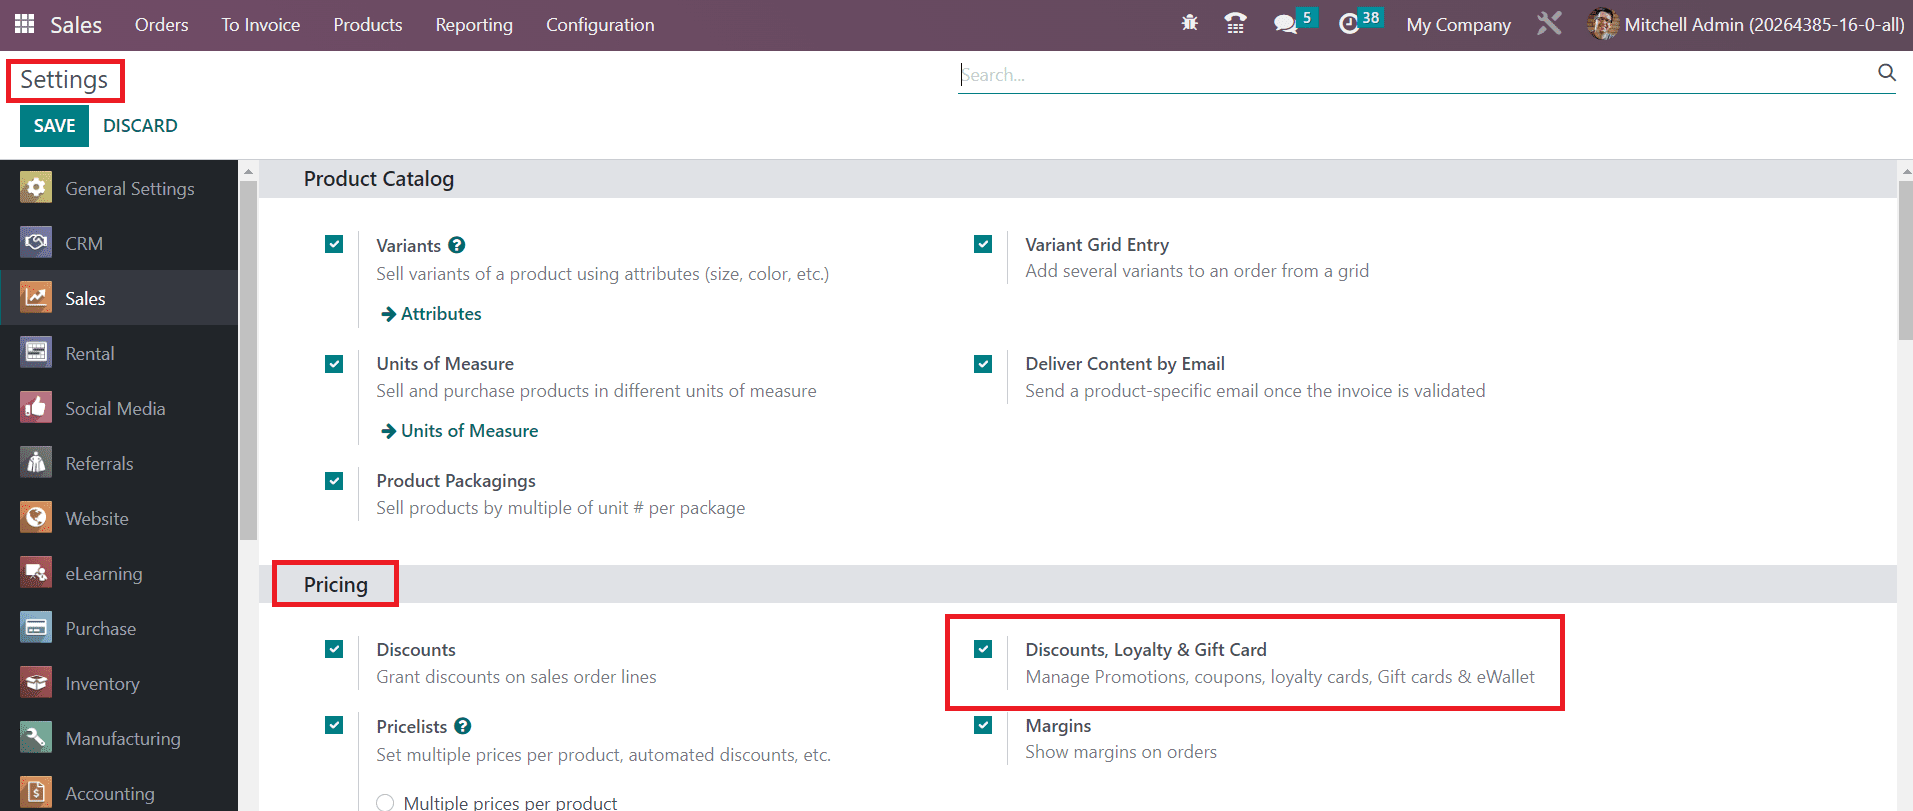
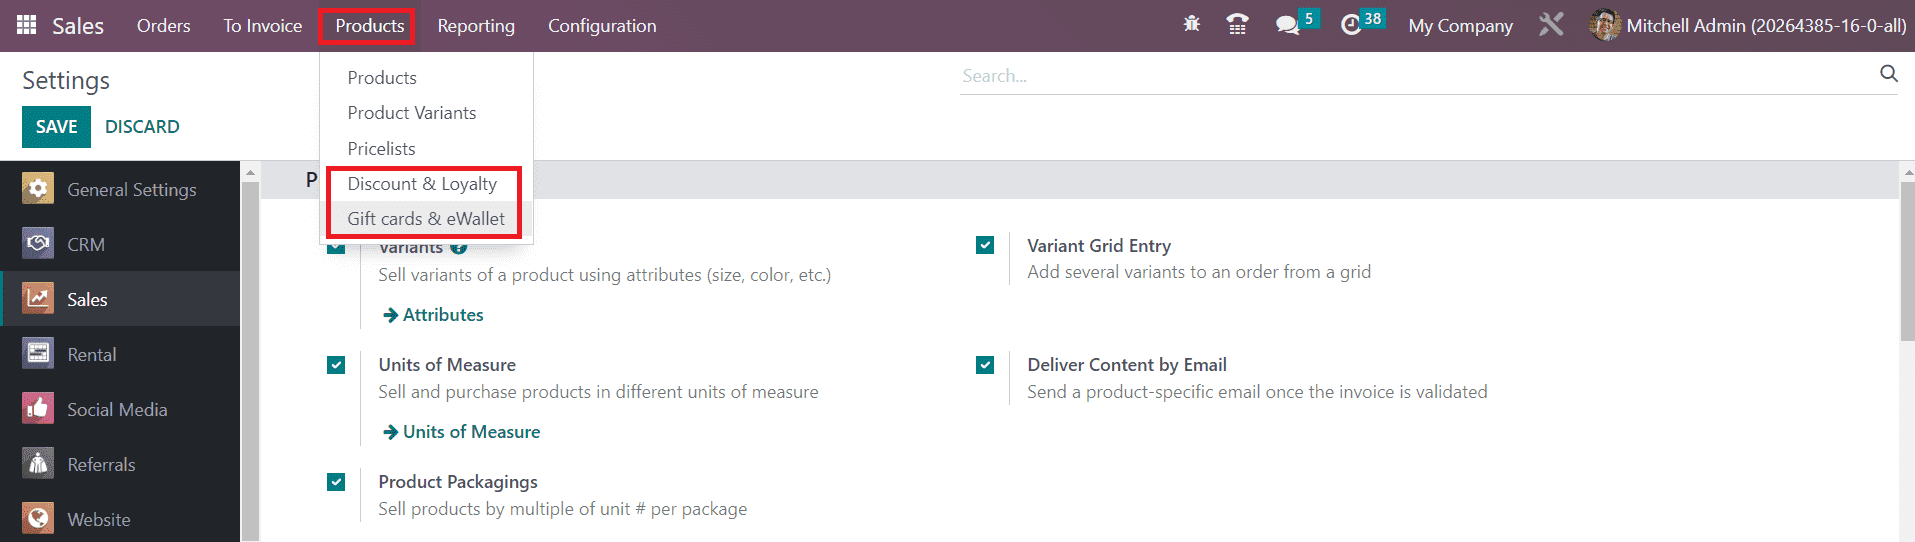
Instead of the Promotion and Coupon Programs in Odoo 15, you can find a single platform to configure discount, gift cards, eWallet and loyalty under the **Product** menu in Odoo 16. You can activate this feature from the **Settings** menu of the Sales module.
Under the **Pricing** tab, you will be able to get the **Discount, Loyalty, & Gift Card** feature to activate as highlighted in the screenshot above. These features are used to attract customers and thereby boost sales. You can go to the **Products** menu where you can find the separate options to manage Discount & Loyalty and Gift Cards & eWallet.
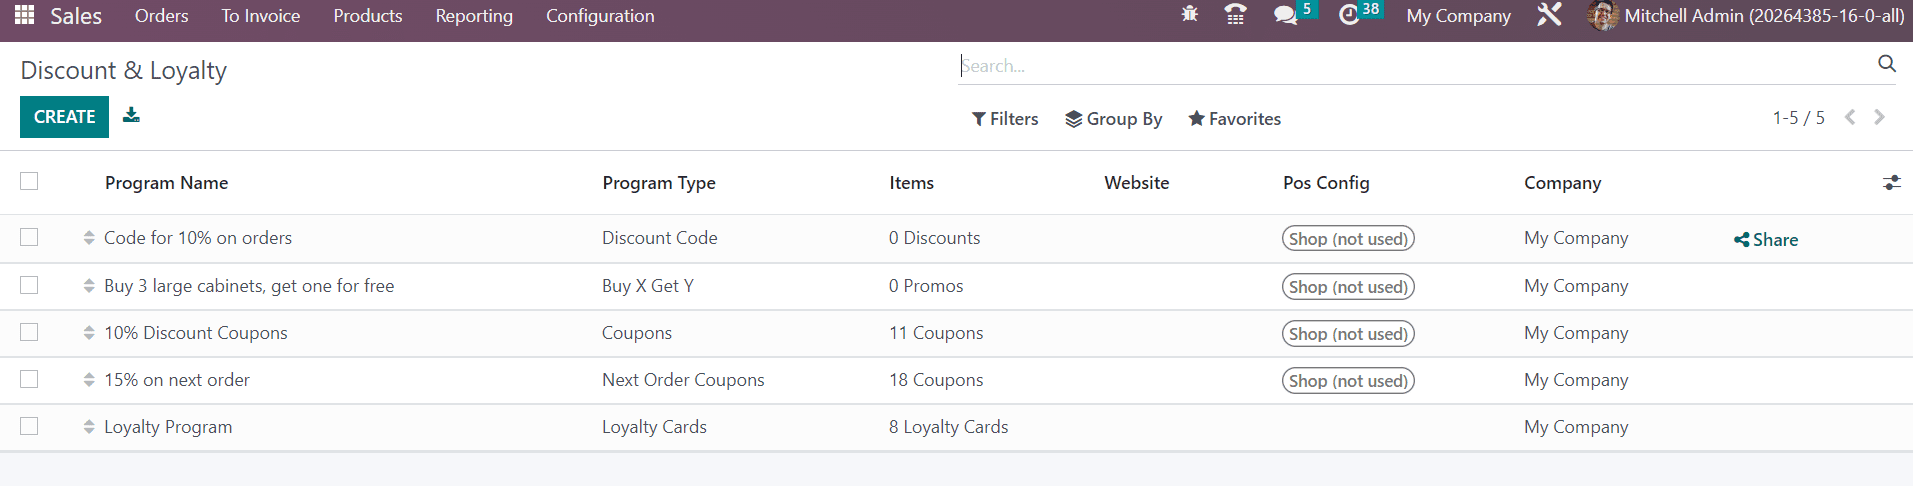
First, let’s take a look at the Discount & Loyalty option.
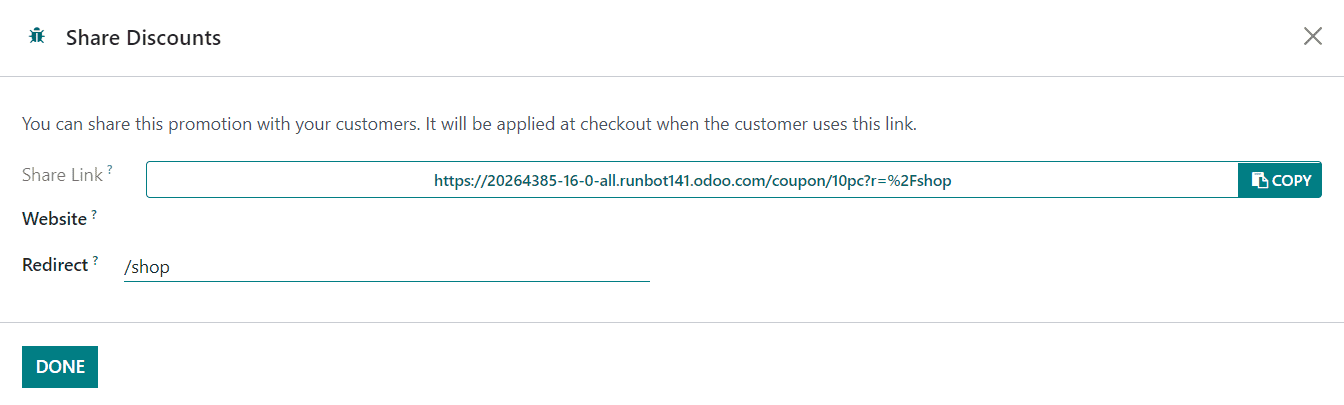
The preview of the list includes the Program Name,, Program Type, Items, Website, POS Configuration and Company details. Additionally, you will get a Share button that helps you to share the coupon on a particular website. A wizard will appear as soon as you click the Share button as depicted below.
You can mention the **Website** and **Redirect** in this pop-up window and click on the **Done** button.
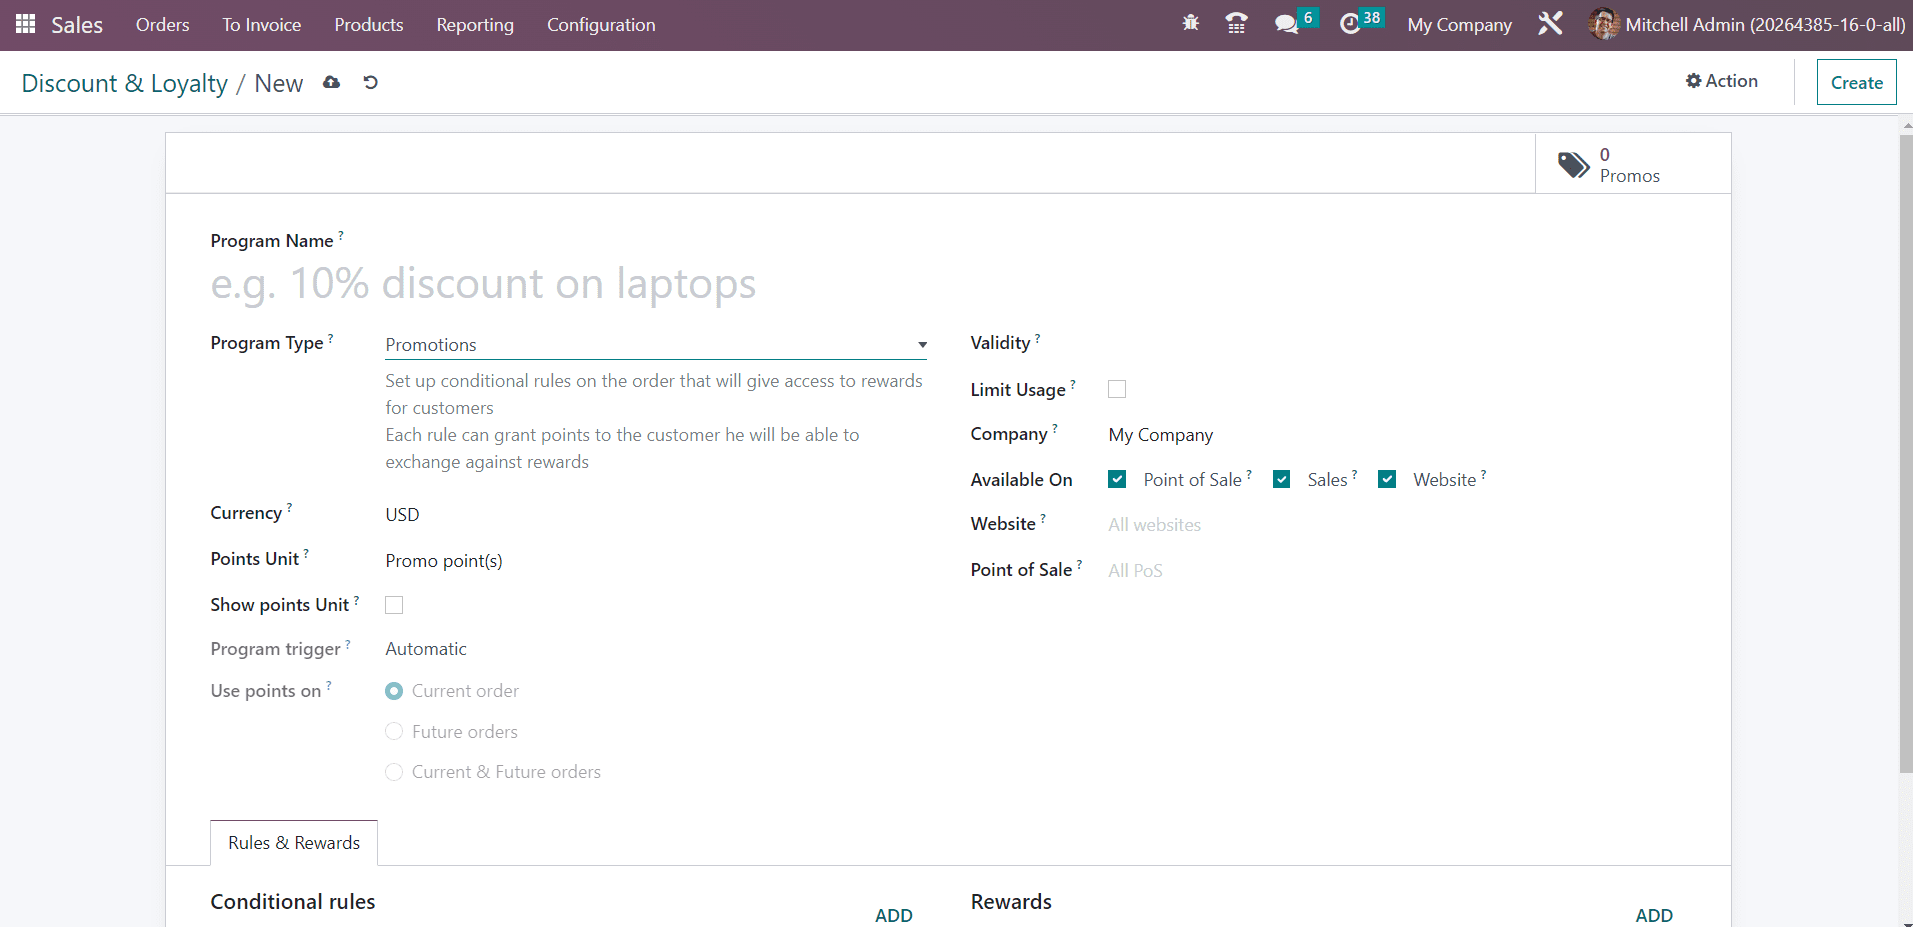
Now, let’s create a new program using the **Create** button. The Create button will lead you to a new window where you can create new offers for your customers to improve your sales. As you can see in the screenshot below, you will get a specific space to mention the name of the Program. You can provide a suitable title to the program in the **Program Name** field. Then you can select the **Program Type**.
In Odoo 16, you can create Coupons, Loyalty Cards, Promotions, Discount Code, Buy X Get Y, and Next Order Coupons from a single place. The method of creation of all these program types is almost similar. So, let's select a program type and detail its creation. Here, we selected Promotions as the Program Type. In the corresponding fields, you can specify the **Company, Points Unit, Currency,** and **Website.** In the **Validity** field, you can set an ending date for the promotion program.
If you want to limit the usage of the promotion program, you can activate the **Limit Usage** field and mention the number of usages allowed. Activating the **Show Points** field will display the number of points available and used by reward in the web portal, POS ticket, and eCommerce checkout. The promotion program will be available on Point of Sale, Sales, and Website by activating the respective fields in the **Available On** section. The customer will be eligible for a reward automatically in their cart by assigning the **Trigger** as **Automatic.** By assigning the **Trigger** as **Use a Code,** the customer will be eligible for the reward if they enter a specific code.
Under the **Rules & Rewards** tab, you can set rules and suitable rewards using the **Add** button.
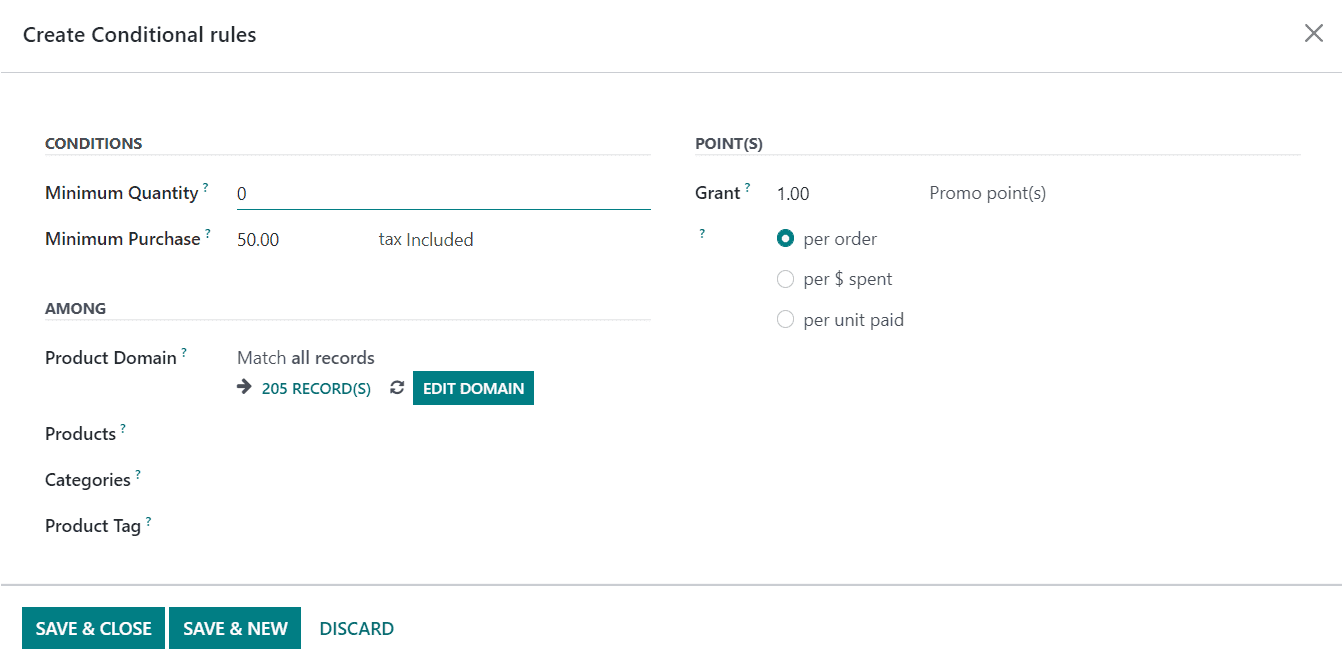
In order to add Conditional Rules, you can use the **Add** button given on the right corner of the Rules tab. A new pop-up will appear to create rules as shown below.
In the Conditions tab, you can mention the **Minimum Quantity** and **Minimum Purchase** amount to qualify for this promotion program. If you want to provide this promotion for particular Products, Categories, and Product Tag, you can specify them in the corresponding fields. Under the **Points** tab, you can mention the promo points in the **Grant** field. It can be granted based on the order, money spent, or unit paid. After configuring the new rule, you can use the **Save** button.
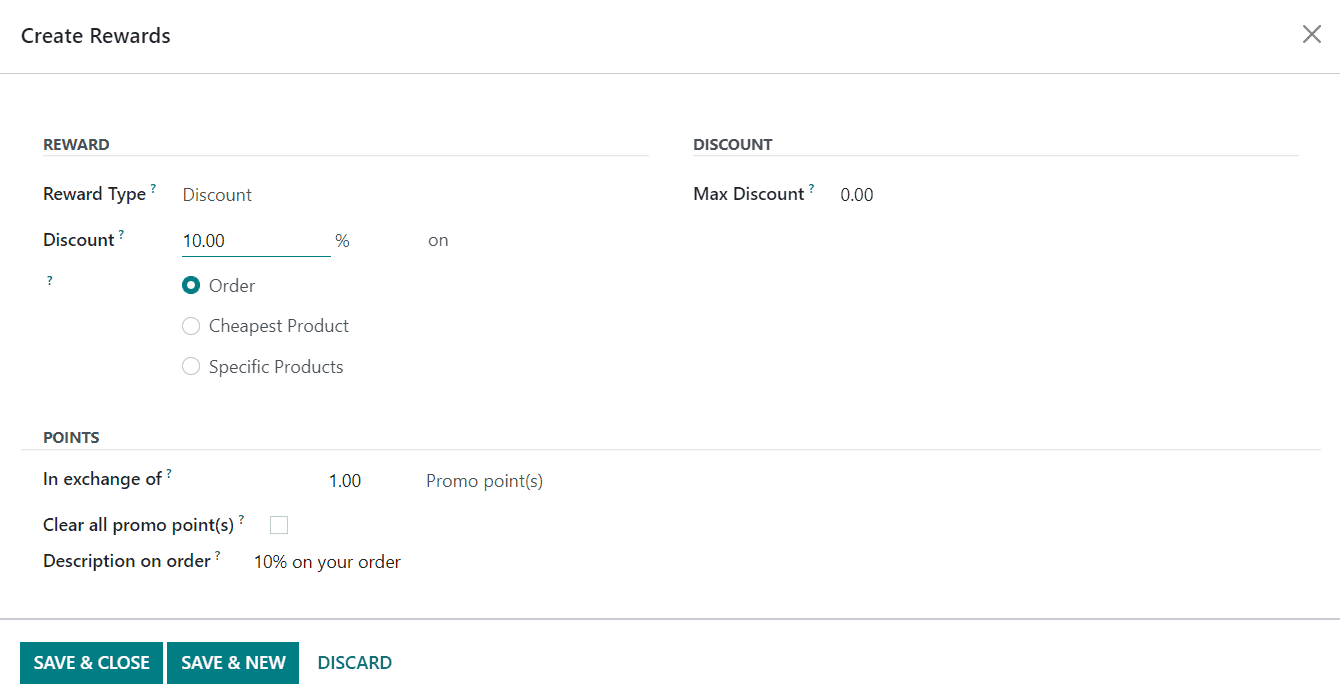
Using the Add button, you can add **Rewards** to the promotion program. A pop will appear on the screen as shown below.
Select the **Reward Type** here, it can be Discount, Free Product, or Free Shipping. If you want to provide a discount to your customer, you can select the Discount option. Then, you can specify the percentage of the **Discount** that you want to offer to your customer. You can provide a discount on Order, Cheapest Product, or Specific Product by selecting the corresponding option. Under the **Discount** tab, you can specify the **Maximum Discount** offered as reward.
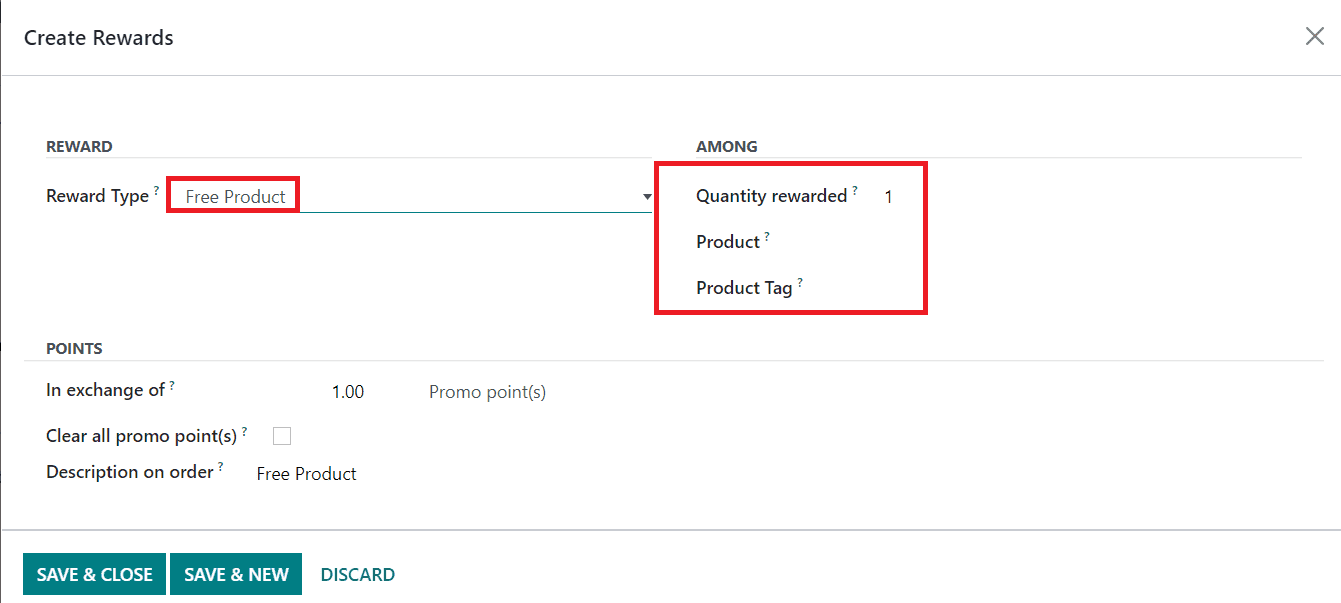
It is possible to give free products as a reward in Odoo. For this, you can select the **Reward Type** as **Free Product.** As soon as you select this option, you will get some additional fields to specify the details of the free product.
The quantity of the free product can be mentioned in the **Quantity Rewarded** field. In the **Product** field, you can mention the reward product and the corresponding tags can be added in the **Product Tag** field.
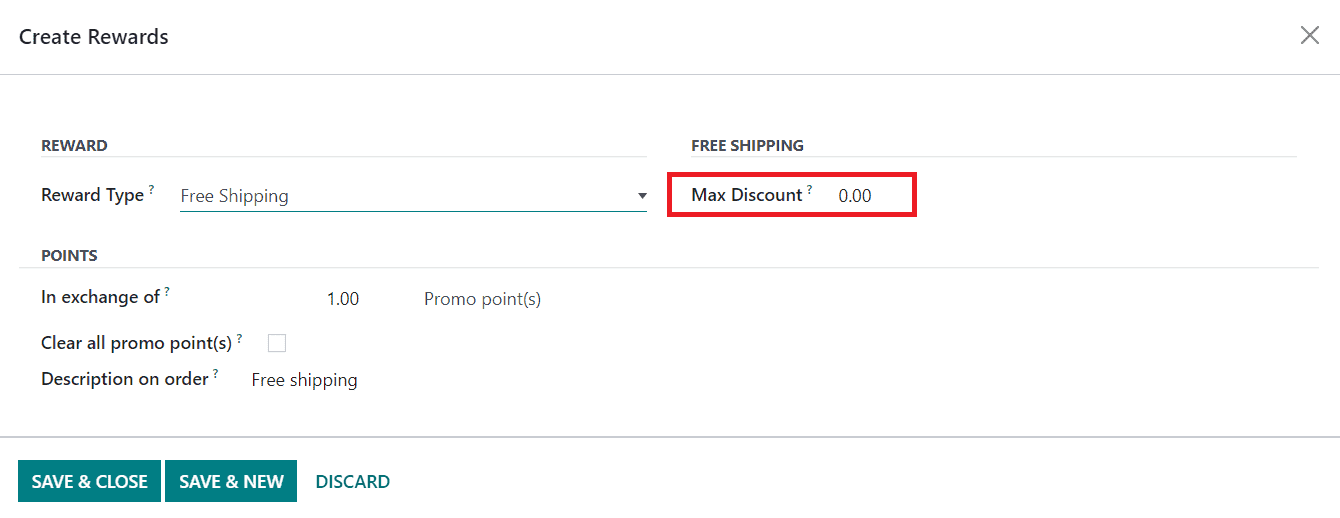
In the case of **Free Shipping** as reward, you can specify the Max Discount for free shipping.
Under the Points tab, mention the Promo Points and activate the Clear all promo points if necessary. The **Description on Order** will be also available in the Points tab. Click the **Save** button to save the new reward. This is how we create promotion programs in Odoo.
#### Gift Cards & eWallet
A separate menu for the management of Gift Cards and eWallets is a new feature in Odoo 16. In the new Odoo Sales module, you will get the features of the eWallet. As shown in the image below, the platform shows the list of Gift Cards and eWallets with the details of the Program Name, Program Type, Name, Website, PoS Configuration, and Company.
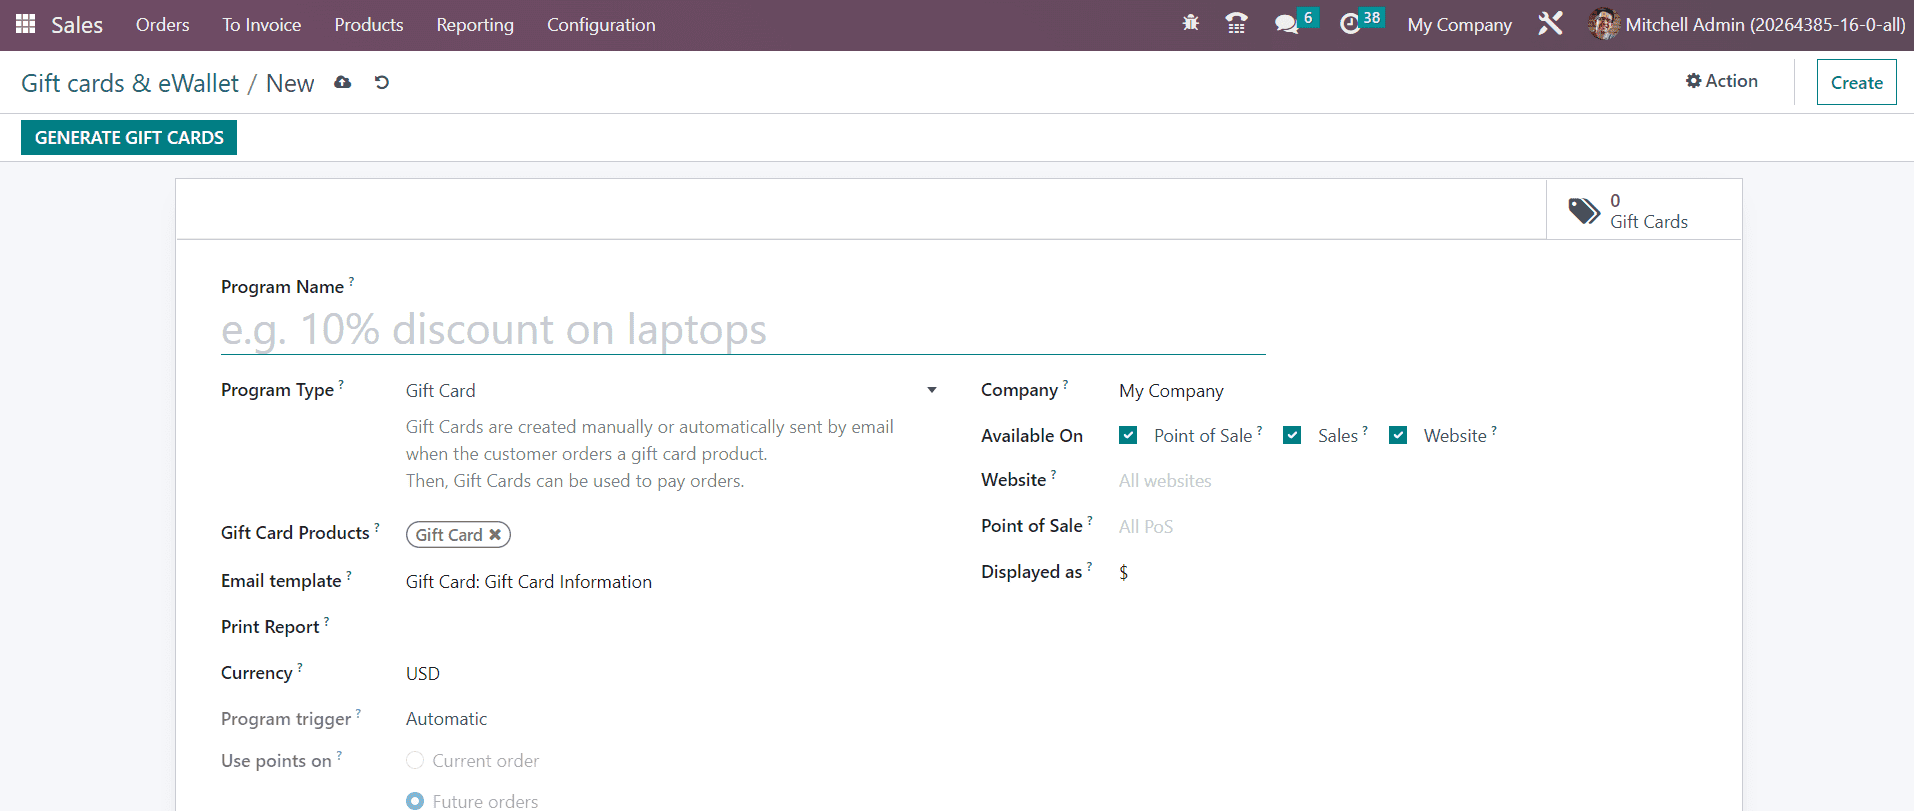
When you click on the **Create** button, Odoo will lead you to a new configuration window as shown below.
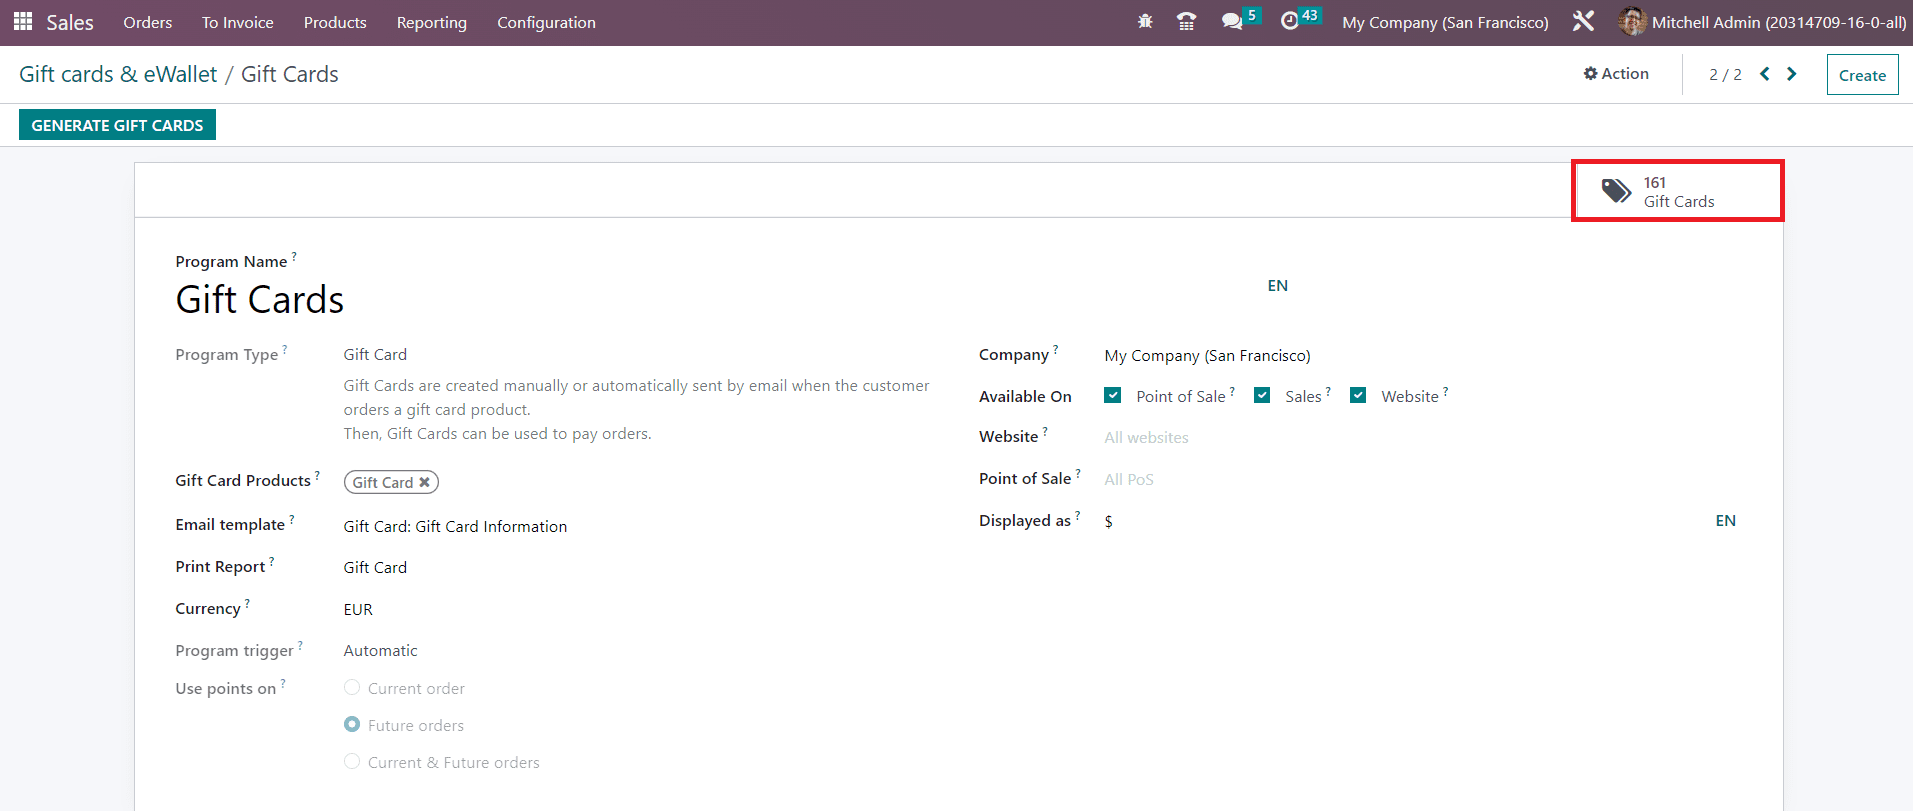
Here, you can specify the **Program Name** in the given field. In the **Program Type** field, you can define which type of program you want to create. It can be either a Gift Card or an eWallet. First, let’s take a look at the generation of gift cards. Gift Cards are created manually or automatically and sent by email when the customer orders a gift card product. The Gift Cards can be used to pay for orders. After selecting the **Program Type** as Gift Card, you can trigger product ids in the **Gift Card Products** field. In the **Email Template** field, you can add an email template for this gift card which will be used to send to the customer when they qualify for this reward. The option mentioned in the **Print Report** will be used to print the generated gift cards from PoS. The **Currency** used for the transactions of this gift card can be specified in the corresponding field. After mentioning the **Company,** you can make this gift card available on Point of Sale, Sales, and Website by activating the respective fields. You will get additional fields to mention the respective Point of Sale and Website on this platform. You can specify the point portal name in the **Displayed as** field.
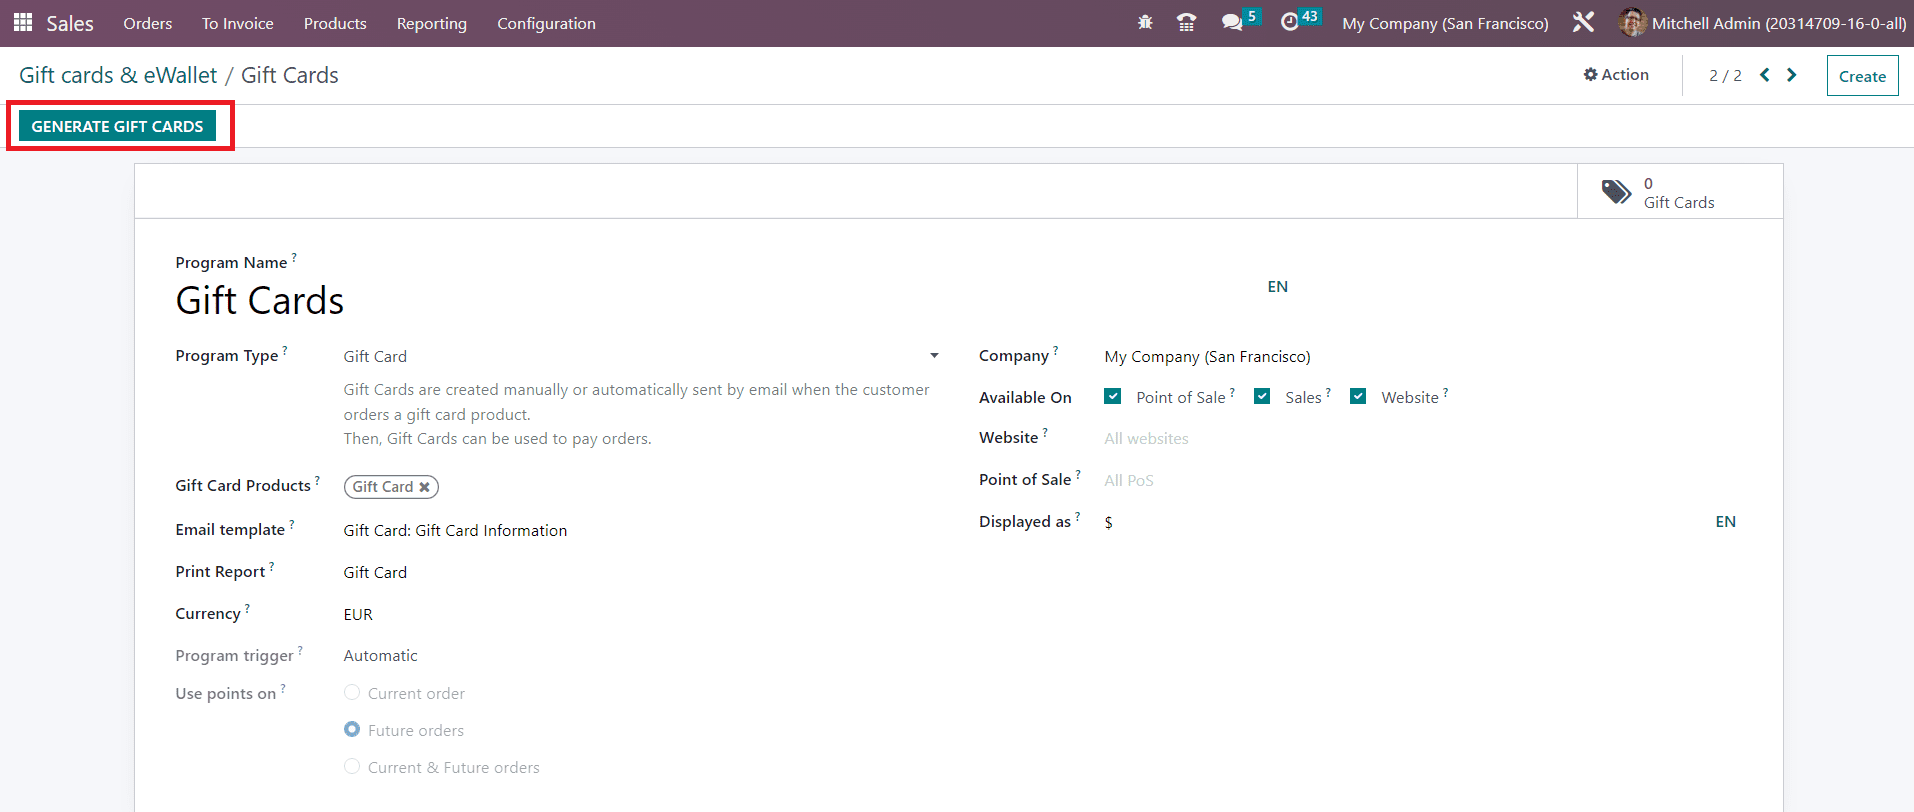
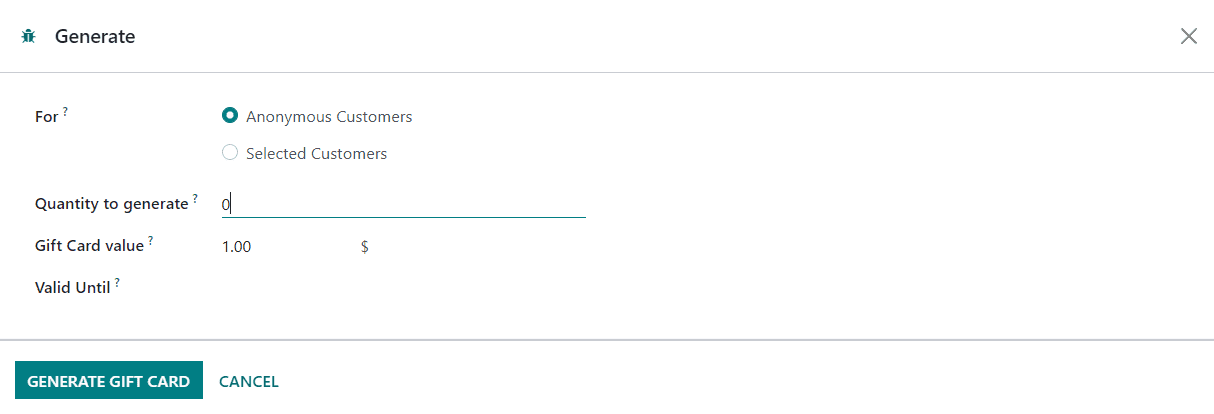
After creating the new gift cards, you can use the **Generate Gift Cards** button as highlighted in the screenshot above. A pop-up window will appear where you can give additional details required for the generation of the gift card.
It is possible to generate gift cards for Anonymous Customers as well as Selected Customers based on the option you select in the **For** field. In case you want to generate gift cards for Selected Customers, Odoo will provide additional fields to mention the Customers and Customer Tags. The total number of gift cards that you want to generate can be specified in the **Quantity to generate** field. Along with this, please mention the points granted to the customers in the **Gift Card Value** field. The **Valid Until** field will define the validity of these newly generated gift cards. Finally, clicking on the Generate Gift Card button will generate the required amount of gift cards. You can observe them using the smart button available on the screen as highlighted in the image below.
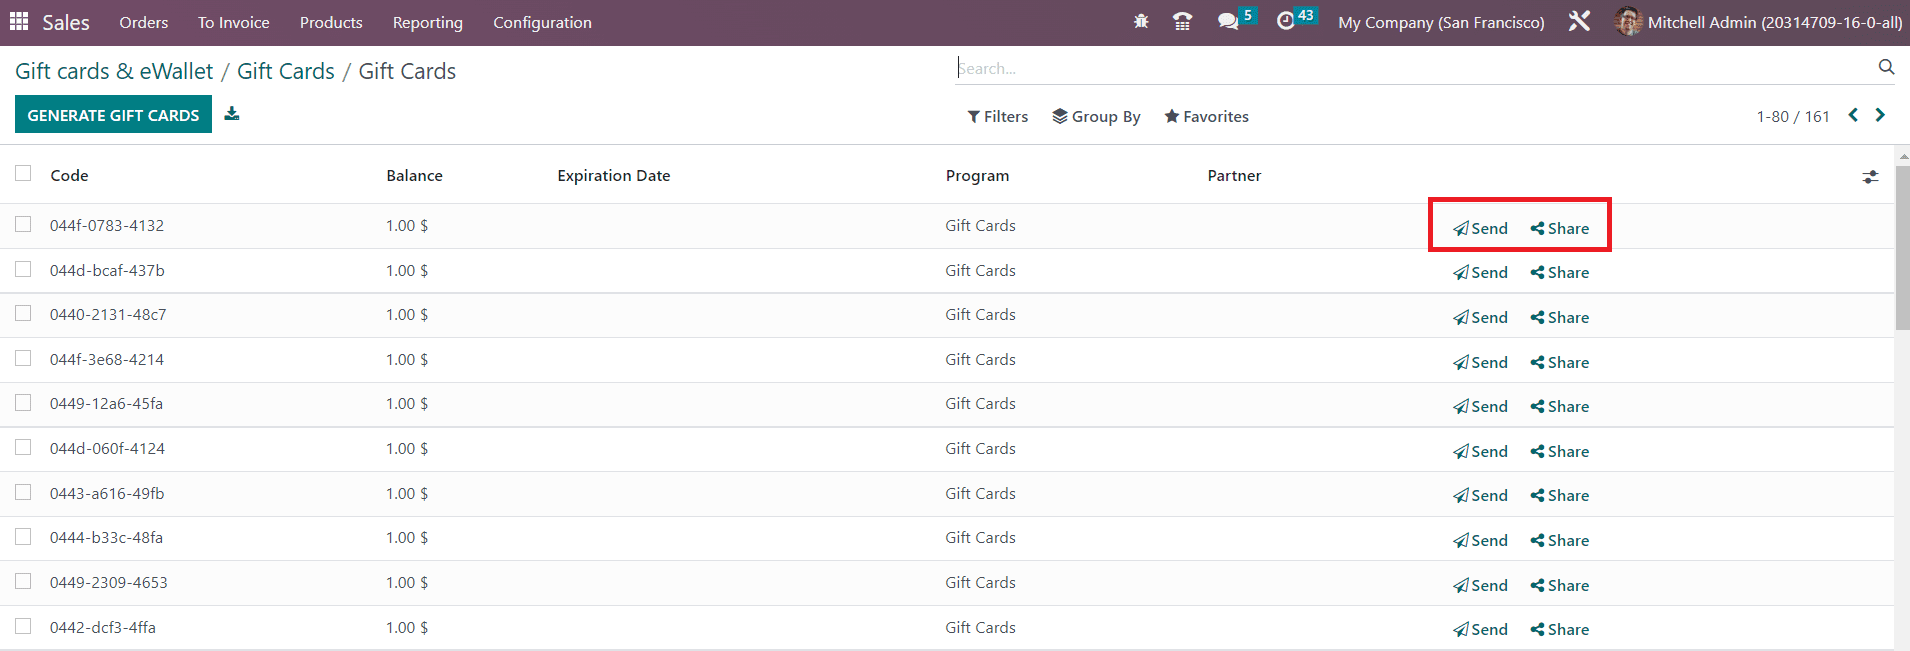
As soon as you click this button, the list of all generated gift cards will appear on the screen. It shows the details of the gift card Code, Balance, Expiration Date, Program, and Partner.
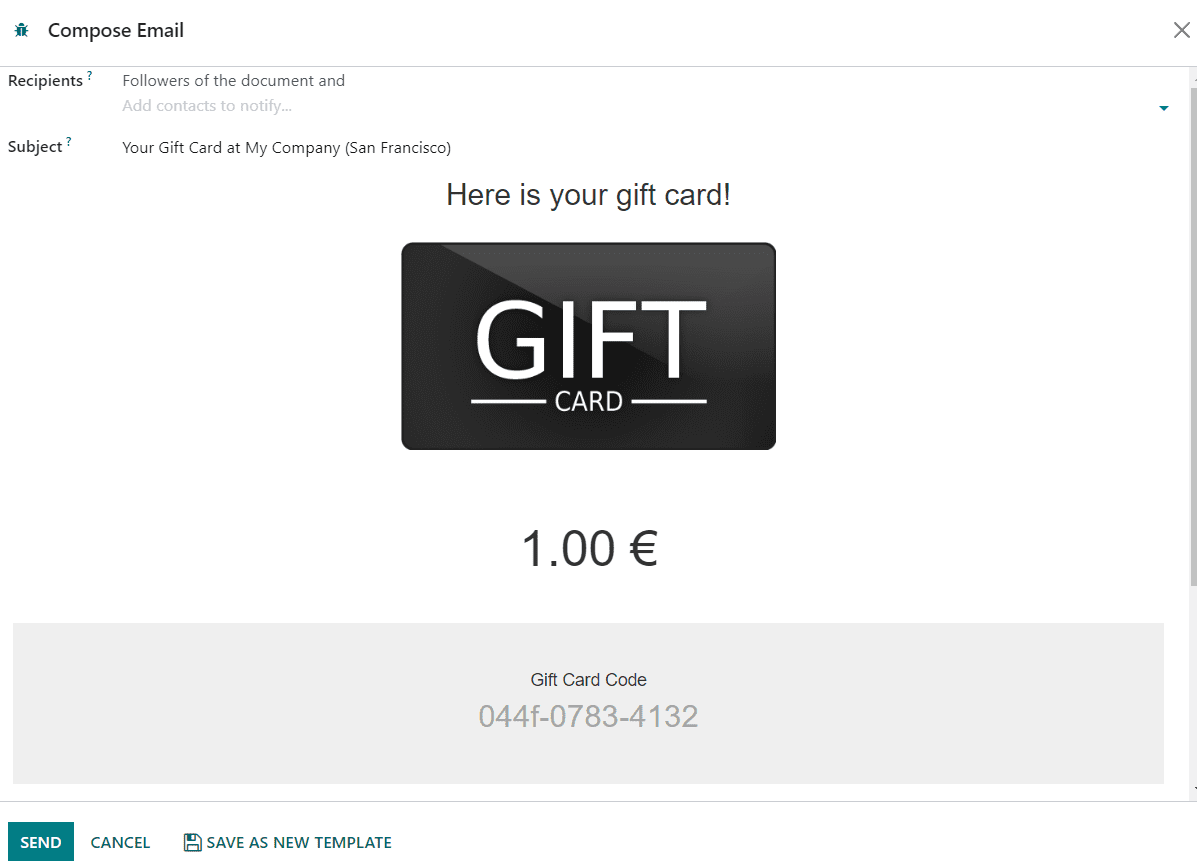
Clicking on the **Send** button will allow you to send the gift card to particular customers via mail.
Here, you can mention the name of the qualified customers in the Recipients field and use the Send button to send the gift card.
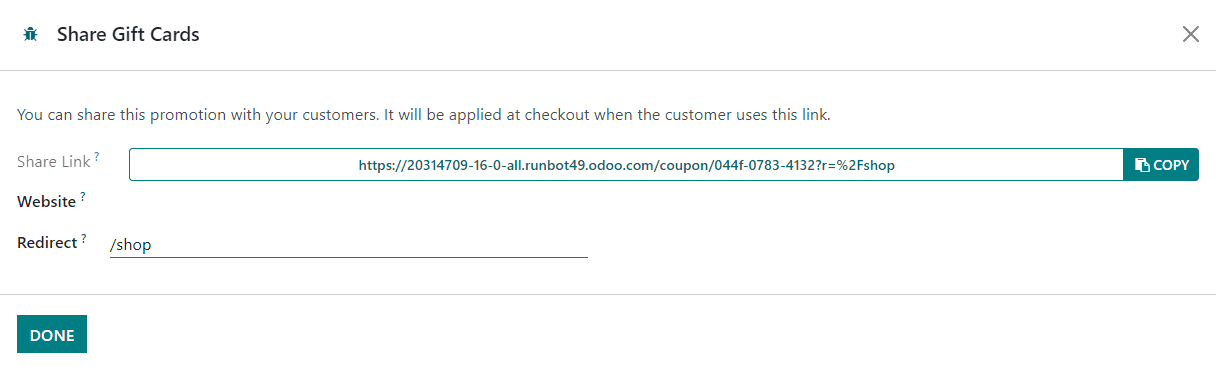
Clicking on the Share button will give a pop window from where you can copy the link of the gift card and share it on different channels.
The gift card can be also shared on the Website by mentioning the Website id in the given space.
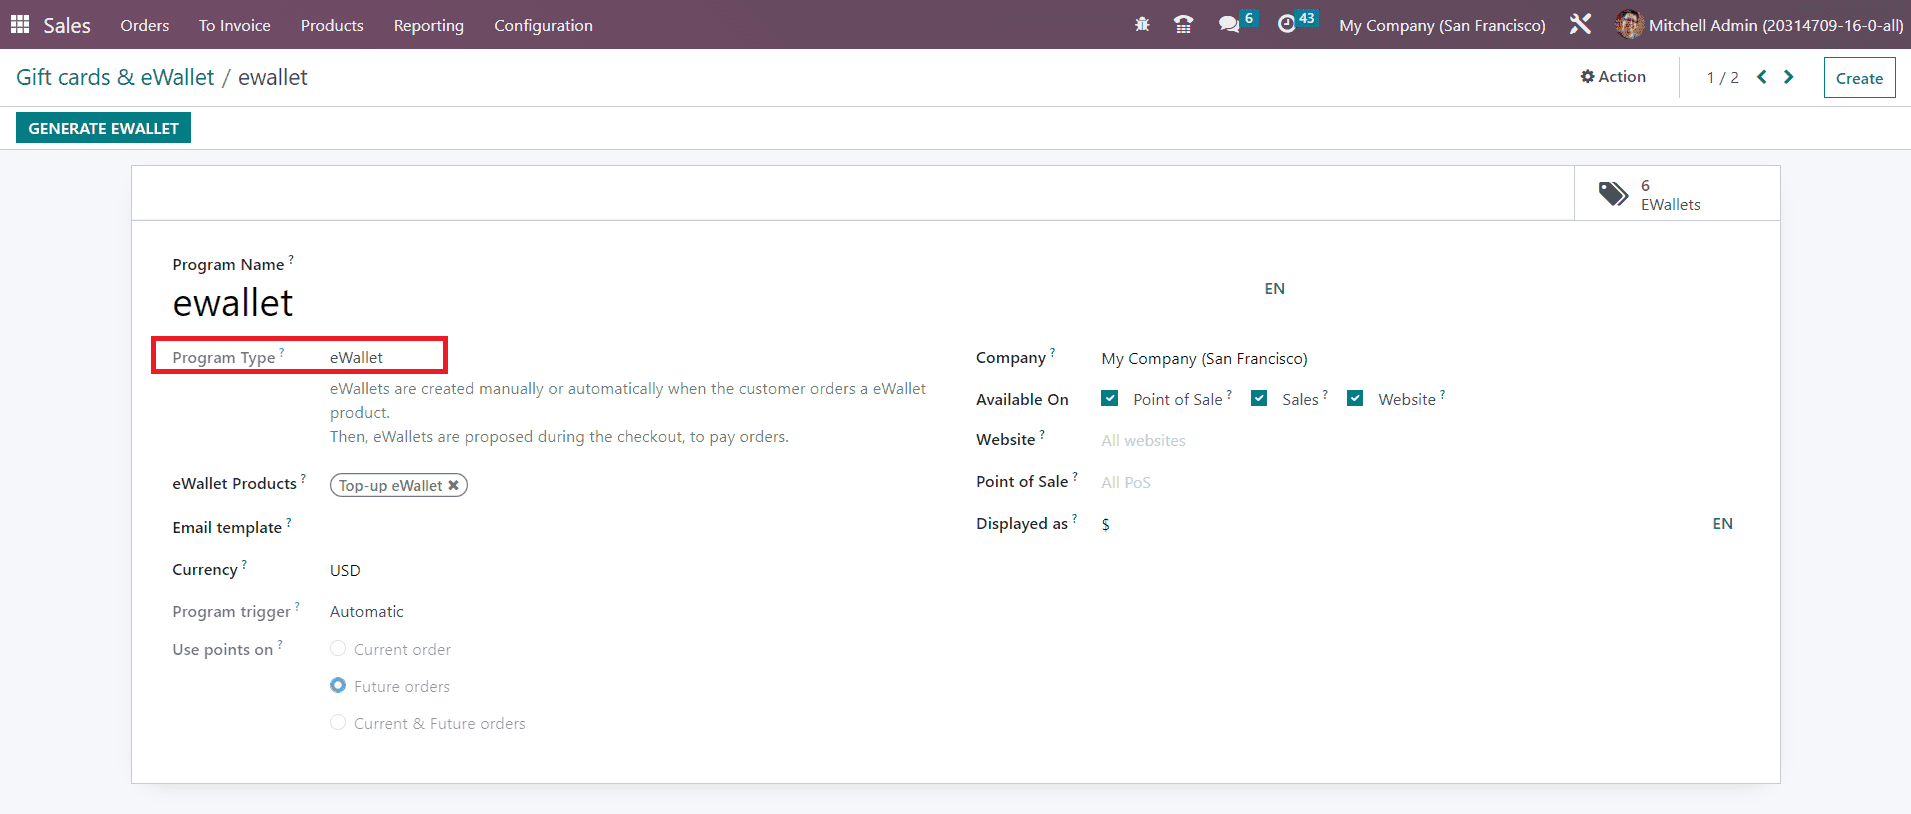
Generation of eWallets can be also easily done by following the similar method we used in the generation of gift cards. In the **Program Type** field, you can select the eWallet option. The eWallets are created manually or automatically when the customer orders an eWallet product. eWallets are proposed during the checkout, to pay orders.
In the **eWallet Products** field, you can trigger product ids. You can generate the required amount of eWallets by clicking on the **Generate eWallet** button.
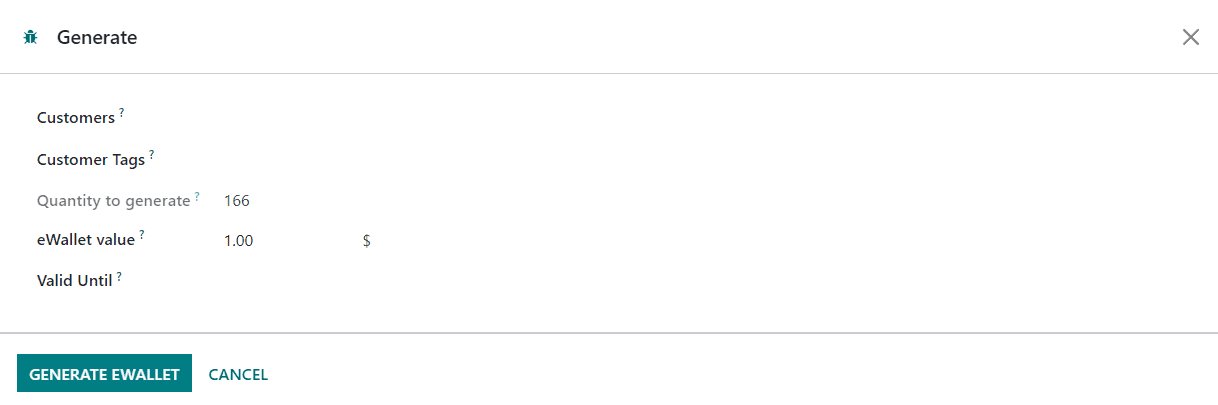
A new wizard will appear where you can mention the Customers, Customer Tags, Quantity to generate, eWallet Value, and Validity in the respective fields. Use the **Generate Ewallet** button to generate the required quantity of eWallets.
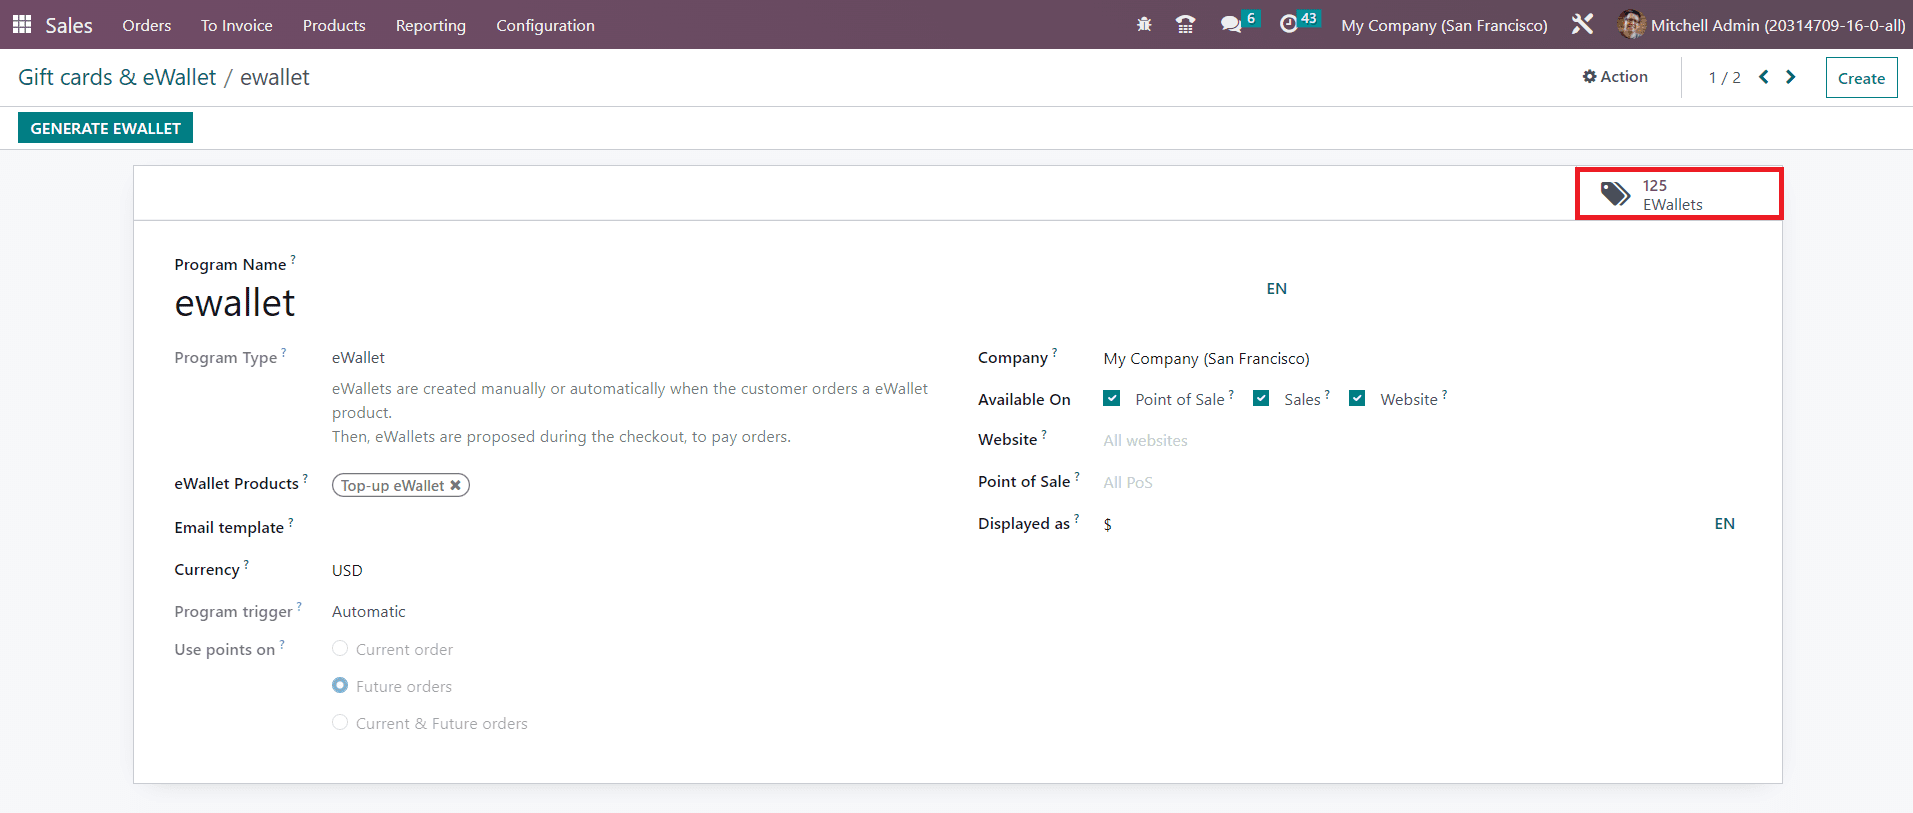
The smart button EWallets available on the screen will show the list of all newly generated Ewallets. You can send them to qualified customers and share them on different platforms using the share link according to your company policies.
Now we will discuss the configuration of new customers in the Odoo Sales module.