# Inventory Operations
### Inventory Operations
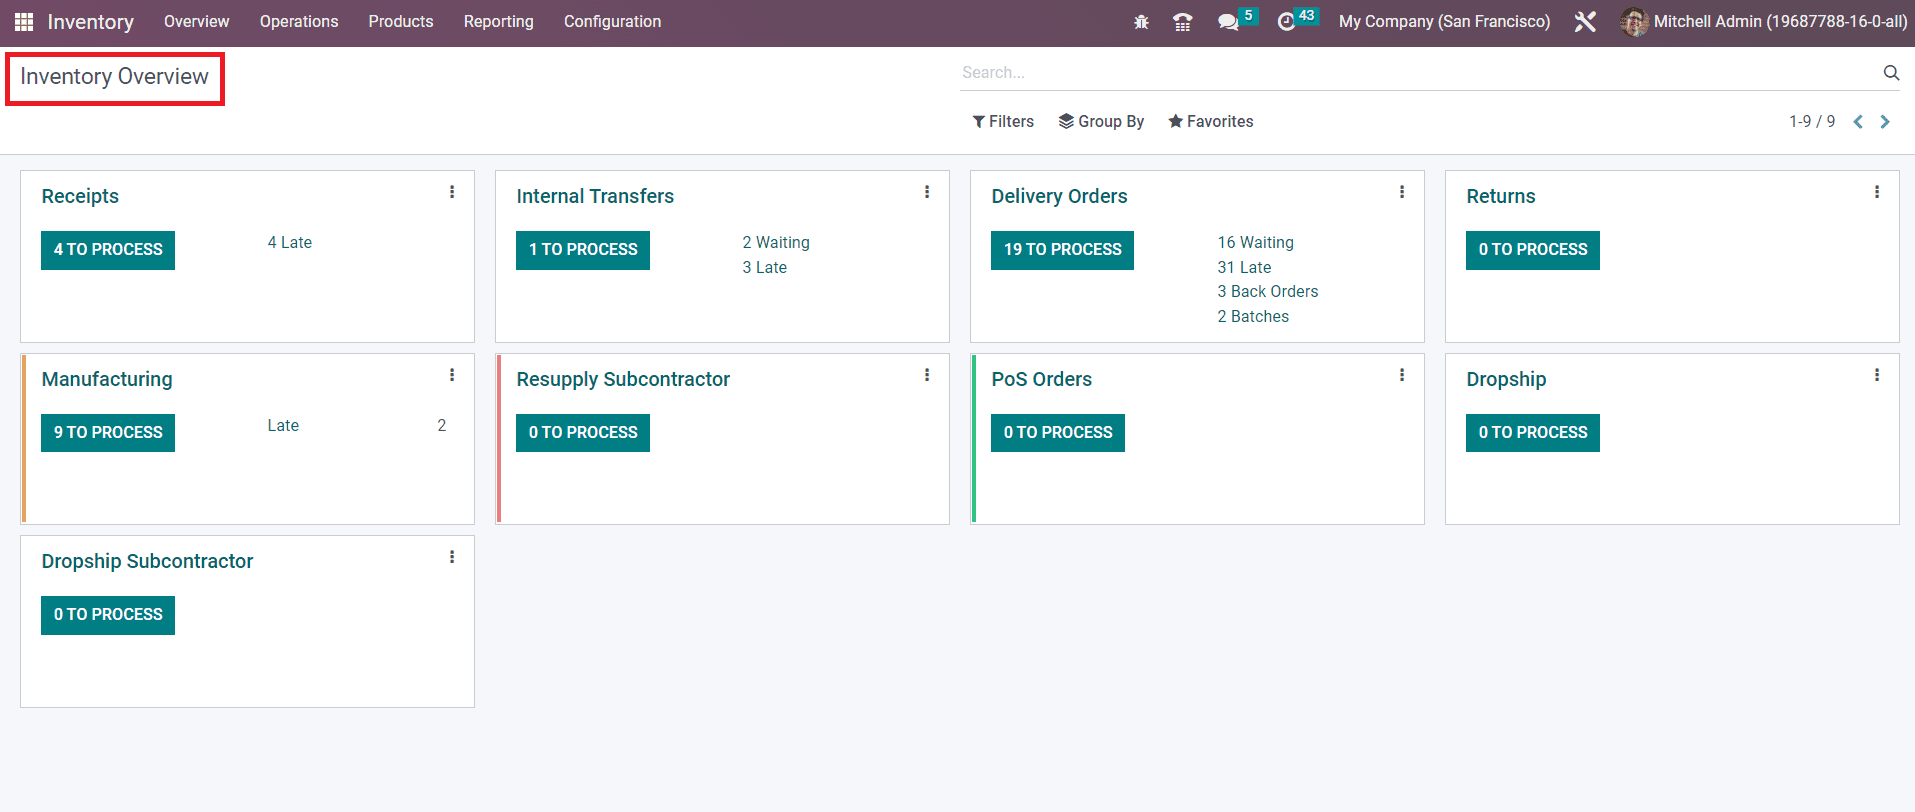
Odoo Inventory module is the best option for the effective management of all types of inventory operations. Providing proper support for inventory management in a company is essential to run the business flawlessly. When we talk about Odoo as the perfect solution for inventory management, you will be inquisitive about the features it offers. In this section, we will detail the inventory operations managed by Odoo with the dedicated Inventory module. The **Overview** window of the Inventory module itself will give a clear insight into all possible operations managed by the module.
From the Kanban view of the Inventory Overview window, you will be able to manage the Receipt, Internal Transfers, Delivery Orders, Returns, Manufacturing, Resupply Subcontractor, POS Orders, Dropship, Dropship Subcontractor, and many more based on the operations configured in the module. You will get exclusive options in the menu bar of the Inventory module to manage all these operations separately. But, this platform will help you to get an overview of all operations at a glance. The three vertical dots given on the top right corner of each operation tab will give you additional tools to manage each of these operations. If the database is working in a multi-company environment, then the overview will include the inventory operations of all companies configured in your system.
#### Creating new operation types
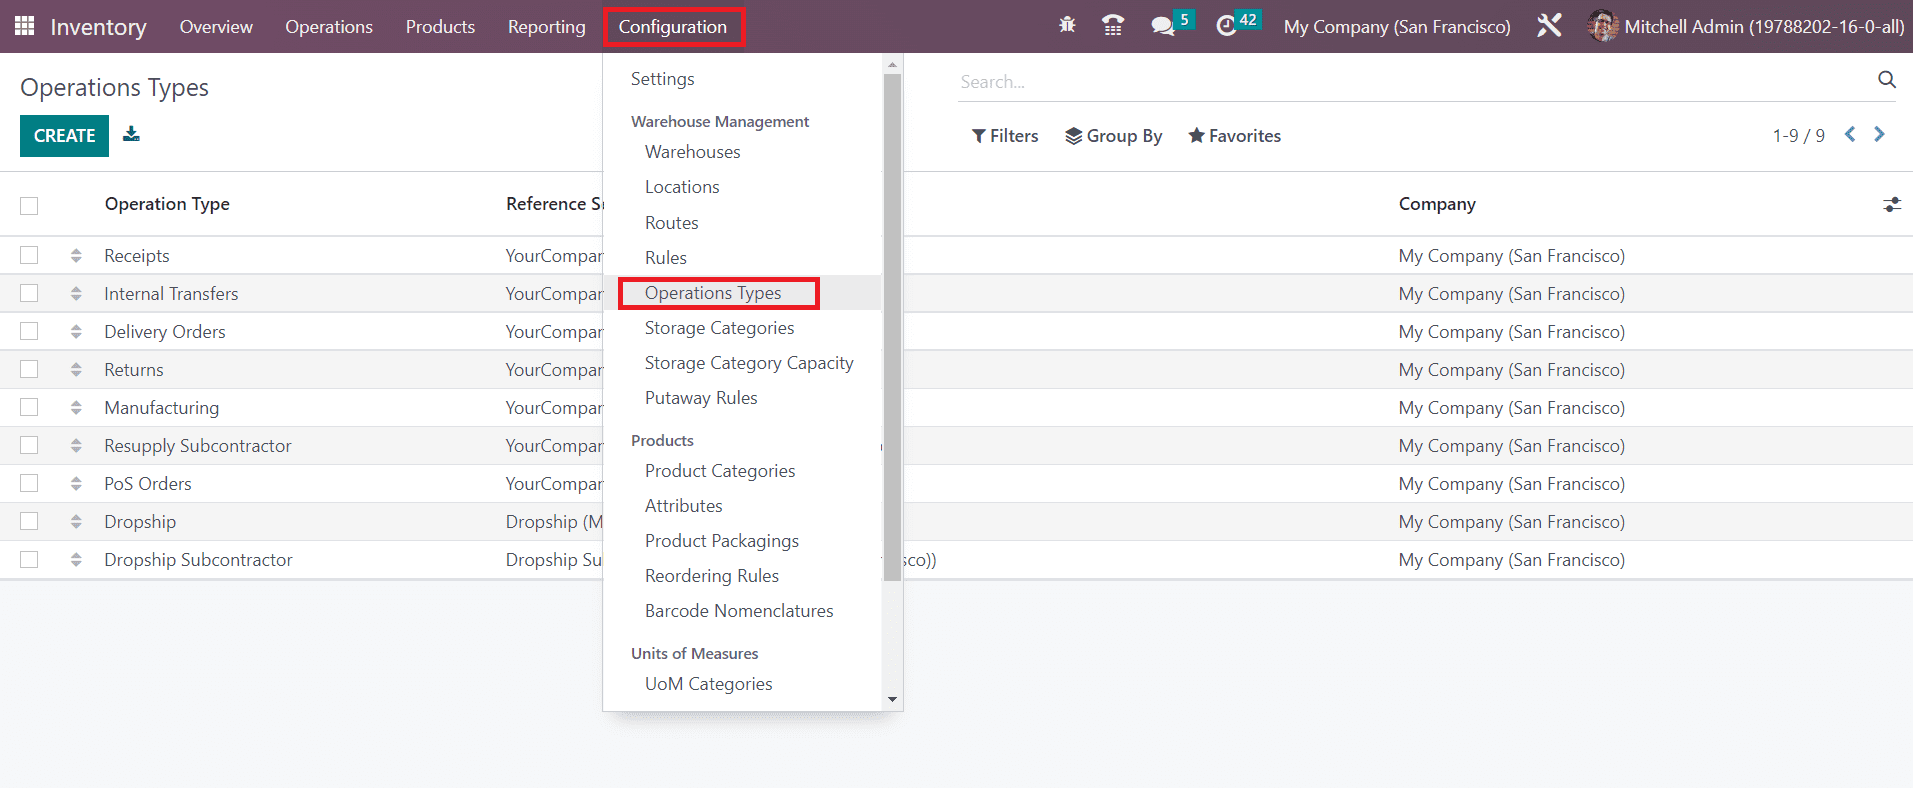
In the Odoo 16 Inventory module, you can effortlessly create new operation types with the help of the dedicated tools introduced in the module. The **Operation Types** menu can be accessed from the **Configuration** menu as shown below.
Clicking on this option opens a new window with the details of the already configured operation types. You can make changes to the available operation types by selecting them from the given list. Here, we are going to create a new Operation Type. So, click on the **Create** button.
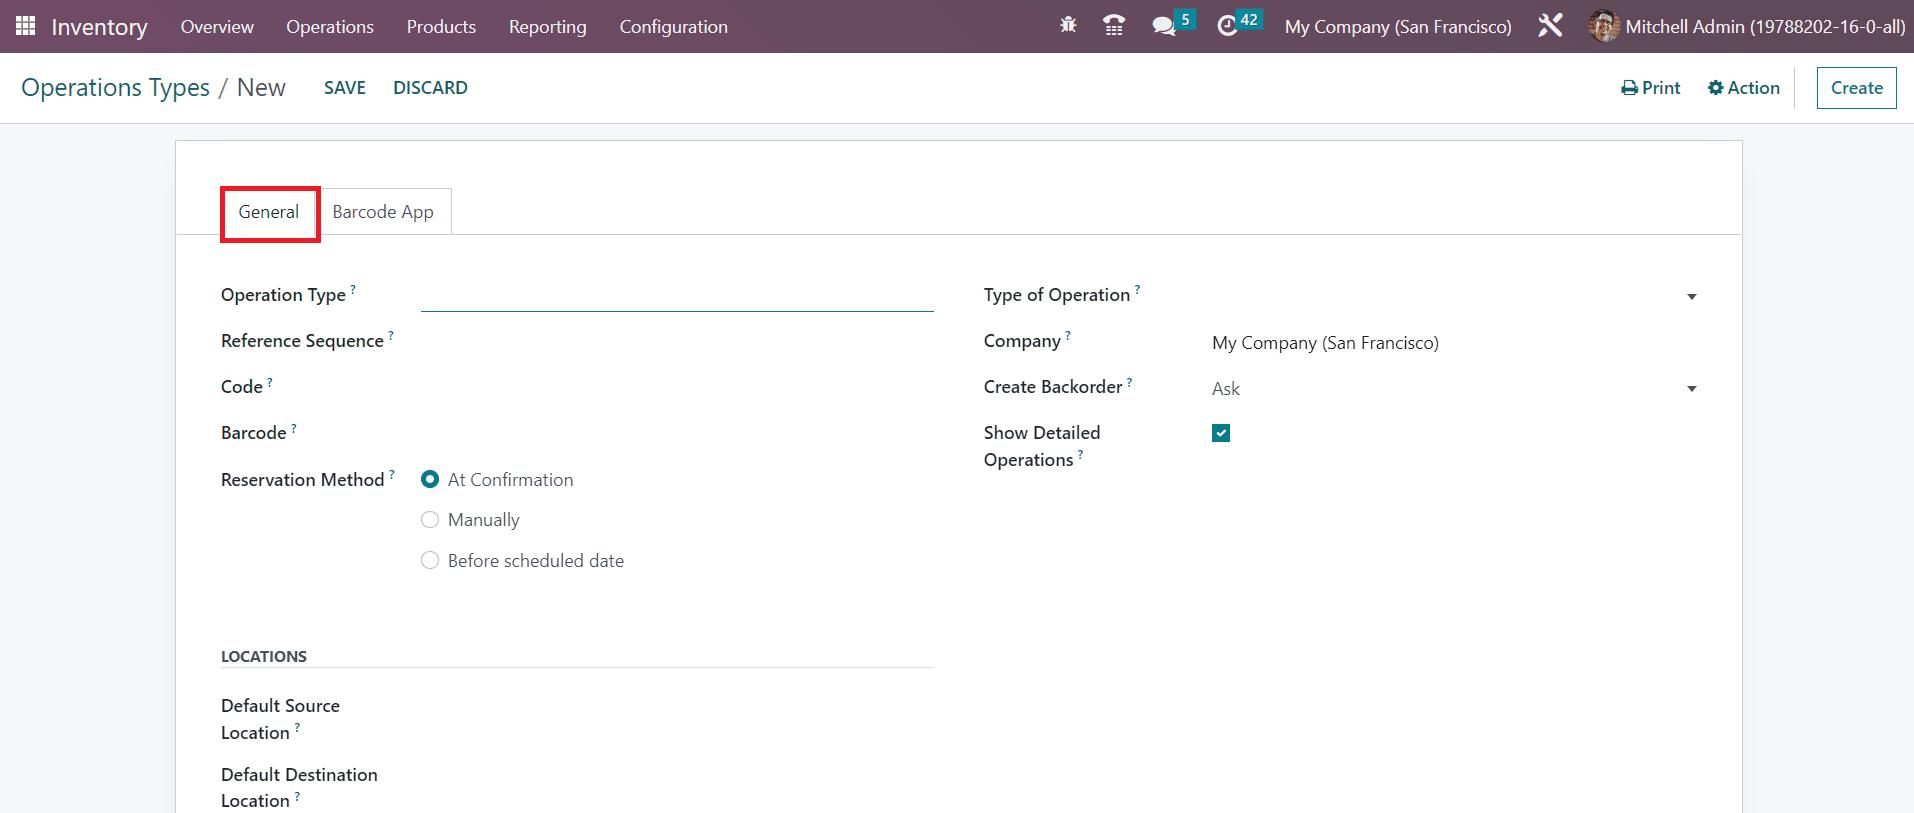
Here, you will get a new window to create a new operation type. You can mention the **Operation Type** in the corresponding field. Mention the Reference Sequence, Code, Barcode, Reservation Method, and Company in the respective fields. The Reservation Method will decide how the products in transfers of this operation type should be preserved. It can be either at confirmation, manually, or before the scheduled date. When validating a transfer, you can ask your users to choose if they want to create a backorder for the remaining products by selecting the option **Ask** in the **Create Backorder** field. By selecting the Always option, Odoo will automatically create a backorder for the remaining products. Selecting the **Never** option will cancel the remaining products. If you want to show a detailed stock operation in the picking lines then you can check the **Show Detailed Operation** box.
The **Default Source Location** and **Default Destination Location** of the transfers of this operation type can be specified in the corresponding fields under the **Locations** tab.
The **Type of Operation** can be Receipt, Delivery, Manufacturing, or Internal Transfer. Based on the Type of Operation you select, there will be small changes in the remaining fields. Each Type of Operation has different configuration options. For example, if you select Receipt as the Type of Operation the additional fields that appear on the screen are highlighted below.
[ ](https://www.images.cybrosys.com/images/odoo-book-16/odoo-book-16-inventory-67.png)[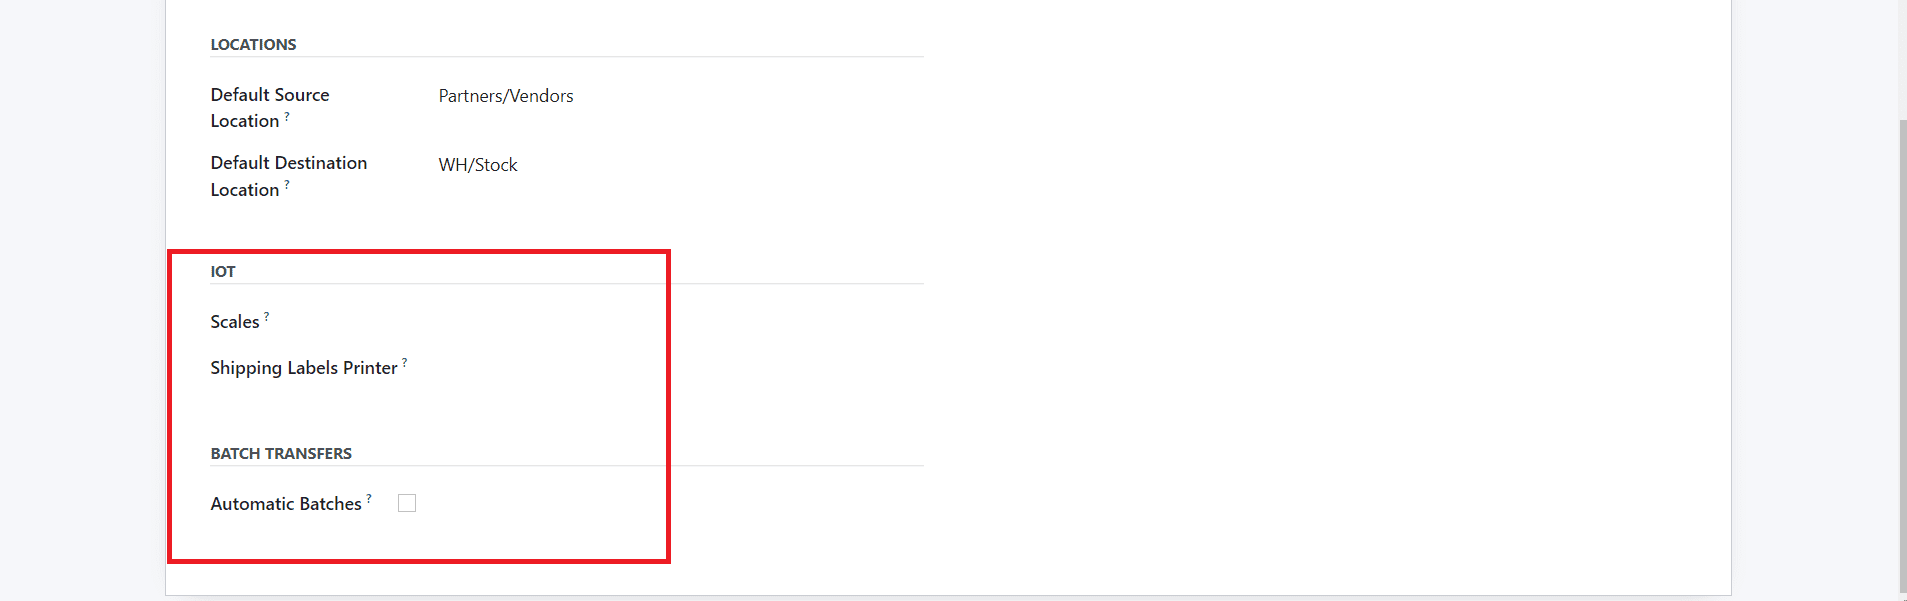](https://www.images.cybrosys.com/images/odoo-book-16/odoo-book-16-inventory-68.png)
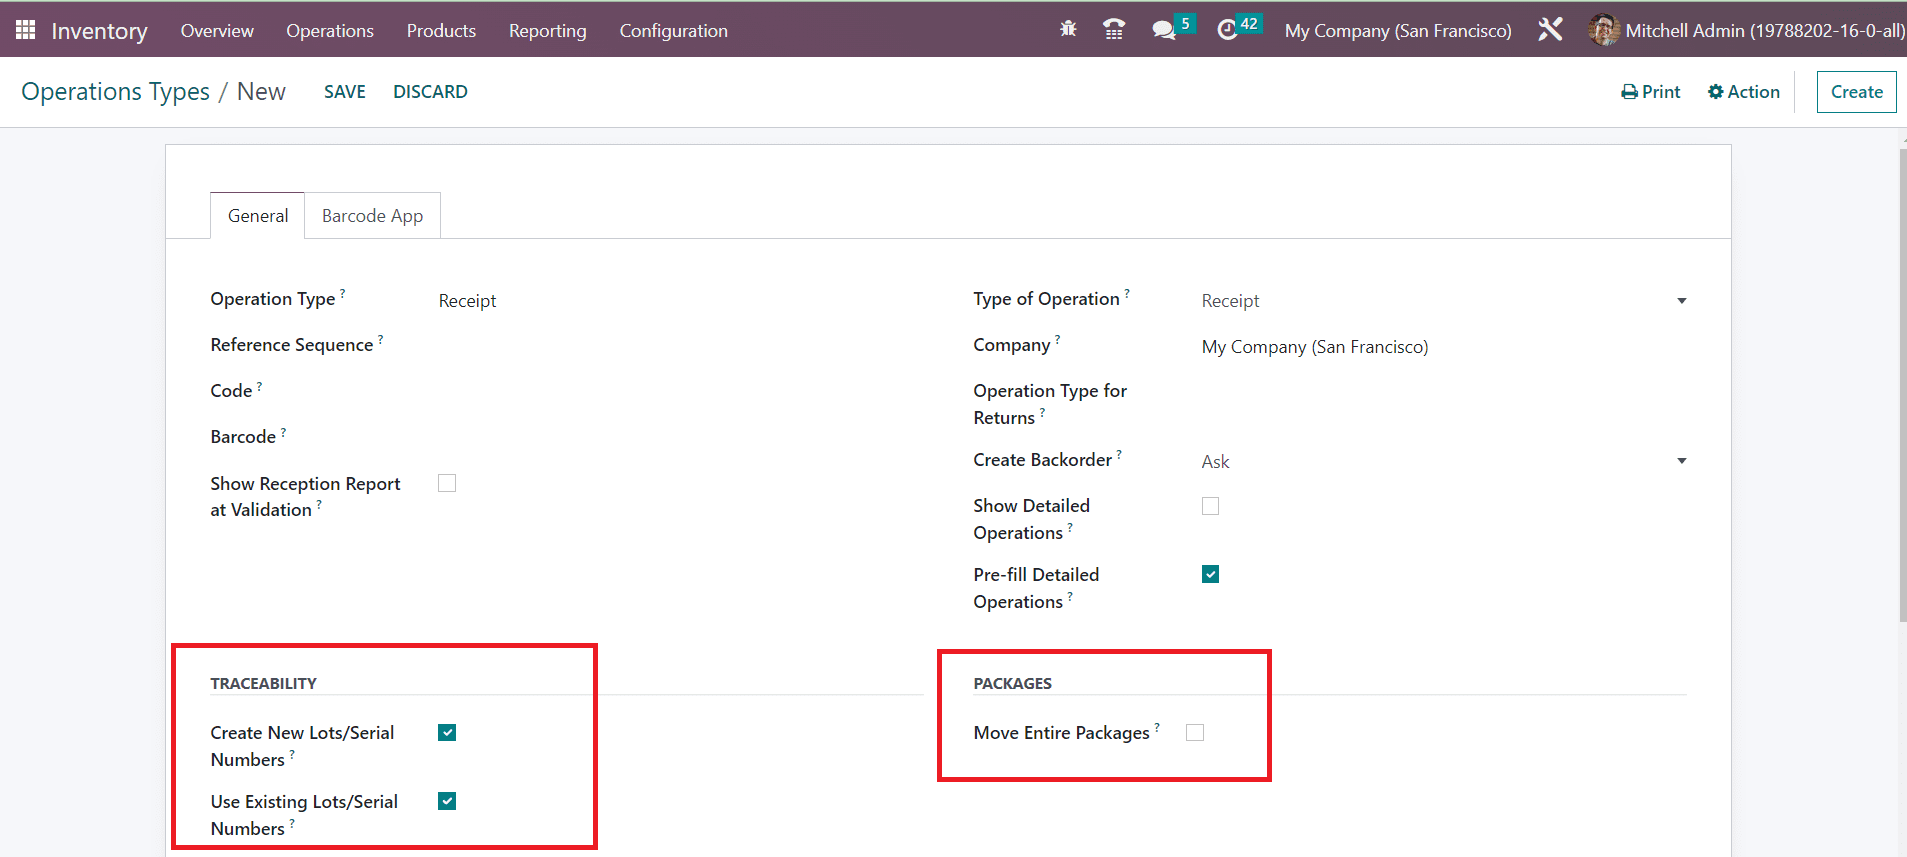
Here, in the case of Receipt, you can activate the **Show Reception Report at Validation** feature if you want to get an automated reception report at the time of validation. In the **Operation Type for Returns** field, you can specify the operation type suitable for the return operations of the products. Odoo will automatically pre-fill the detailed operations with the corresponding products, location, and lot/serial numbers.
By activating the Create New Lots/Serial Numbers option from the Traceability tab, Odoo will allow you to create new lots/serial numbers for the products in the transfers of this operation type. You can also use the existing lots/serial numbers for product transfers by activating the Use Existing Lots/Serial Numbers option. By checking the Move Entire Packages box from the Packages tab, you will be able to select entire packages to move.
The Product traceability feature offered by Odoo will assist in tracing and tracking each and every component of a product. Tracking a product at each stage of stock movement is necessary to bring all operations under control. In order to ensure effective monitoring of the stock movement, lots and serial numbers play an important role. From manufacturing processes to delivery operations, product traceability will keep a proper track that improves the efficiency of stock management. Proper monitoring is required to reduce the risk factors during the stock movements of any company. The Odoo ERP system will record exact details of the stock movement of each component of a product in inventory in the form of a traceability report. The user can observe the whole production to distribution procedures in the inventory using the lots and serial numbers.
Lots and serial numbers are not exactly the same. Commonly we use a lot as a unique identification number to identify a group of products of the same type. If the products are small or can not count as individual products, you can put them together in a single pack and allot a lot number. They are picked as batches in the inventory. For individual products, you can assign serial numbers. The serial number is considered to identify individual products in the inventory.
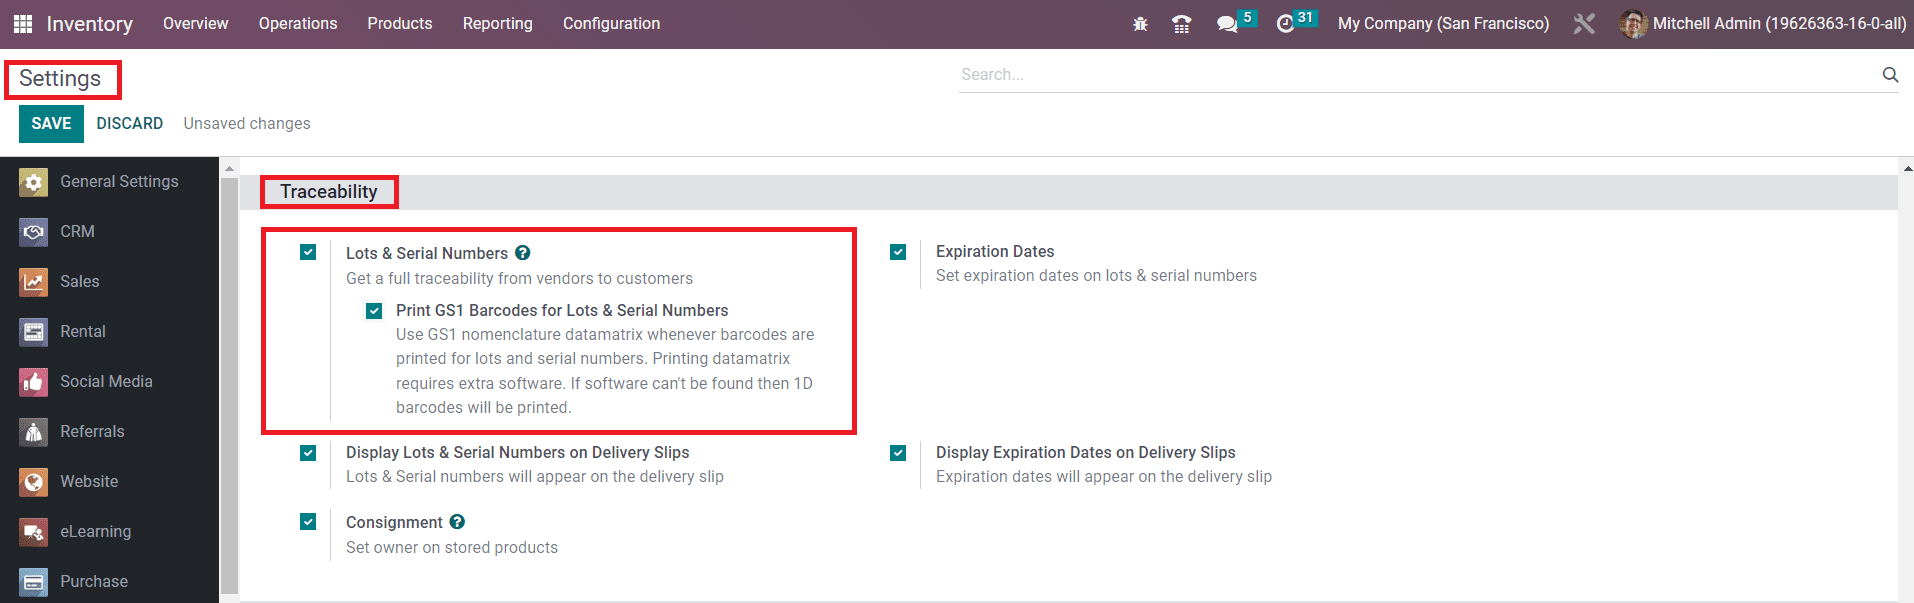
We allocate lots and serial numbers for products at the time of their inventory management. You can assign lots and serial numbers to the products while configuring them in the Inventory module so that you can easily keep the traceability report of the respective products thereafter. The inventory management tools offered by Odoo 16 support this traceability feature to ensure effective tracking operations. In order to get the complete features of the traceability in the Inventory module, you are requested to activate the **Lots & Serial Numbers** option from the **Settings** menu.
As shown in the image above, this feature will be available under the **Traceability** tab. After activating this feature, you will get the **Lots/Serial Numbers** option under the **Products** menu.
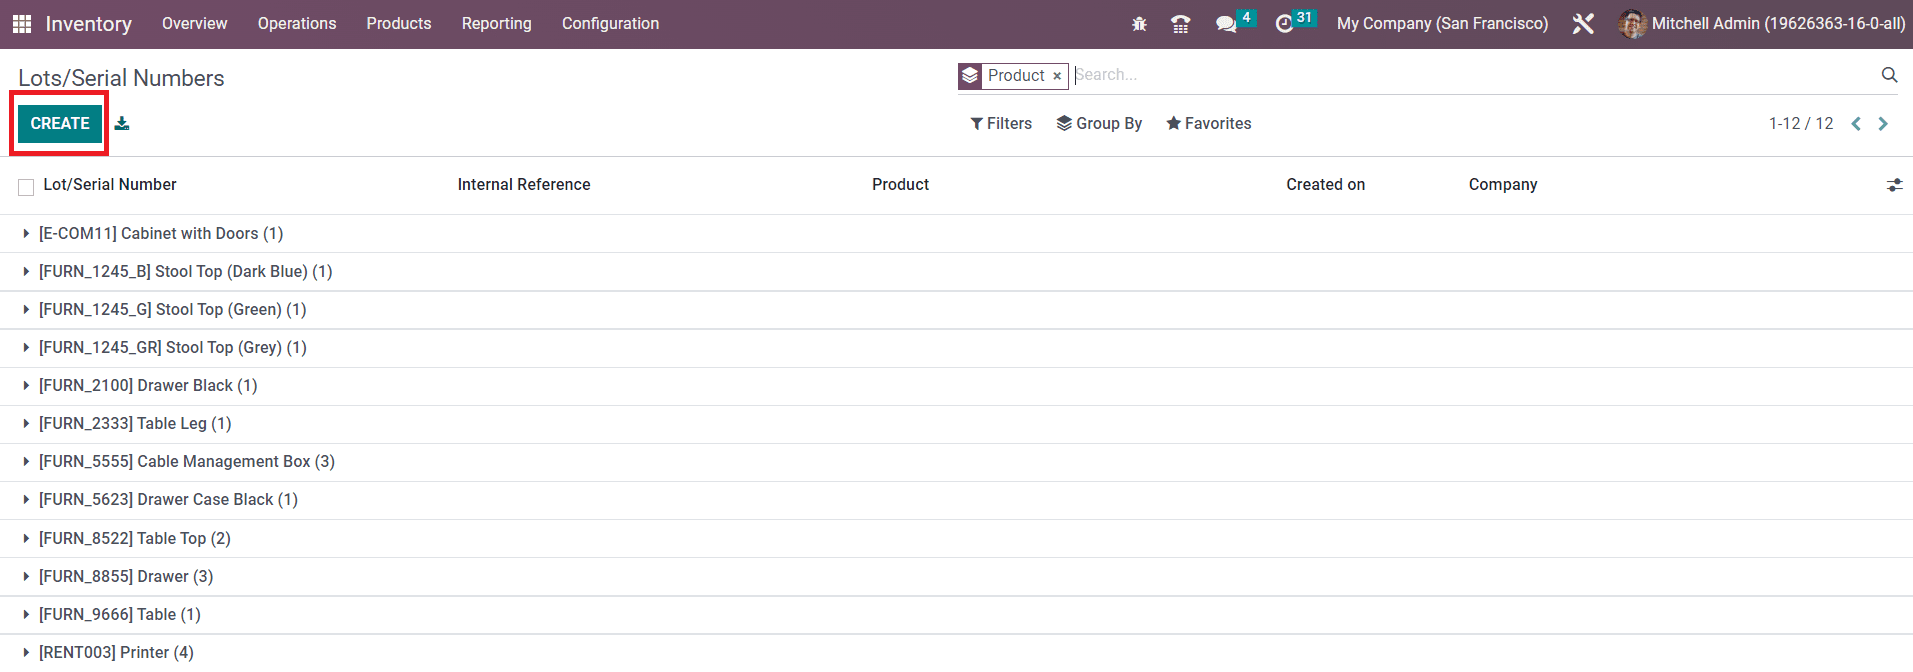
Here, already configured lots and serial numbers can be observed. It includes the Lot/Serial number, Internal Reference number in case it differs from the manufacturer’s lots/serial numbers, Product, Creation date, and Company. Assigning a new lost/serial number for a product can be easily done using the **Create** button.
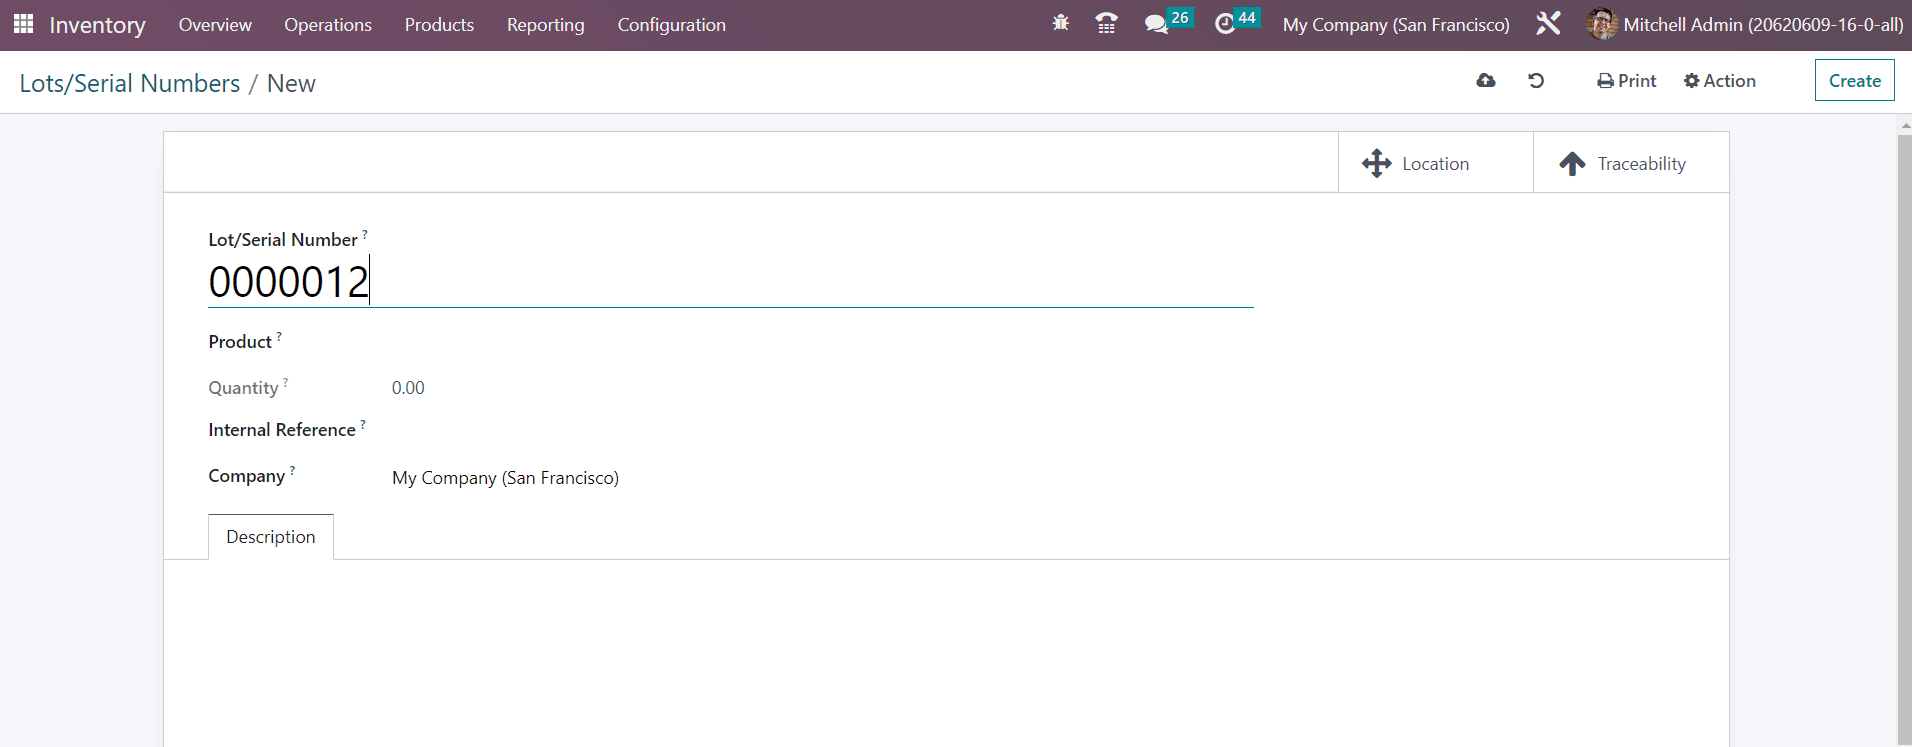
First, you can mention a unique lot/serial number in the given space. In the respective fields, you can specify the Product, Quantity, Internal Reference, and Company. You can not change the serial number anymore if the product has already been moved. Additional notes related to this lot/serial number can be specified in the **Description** tab.
The user will get some additional smart buttons on the window based on the operations done using this lot/serial number. As soon as you configure a new lot/serial number, you will get two smart buttons called Location and Traceability on the window as shown below.
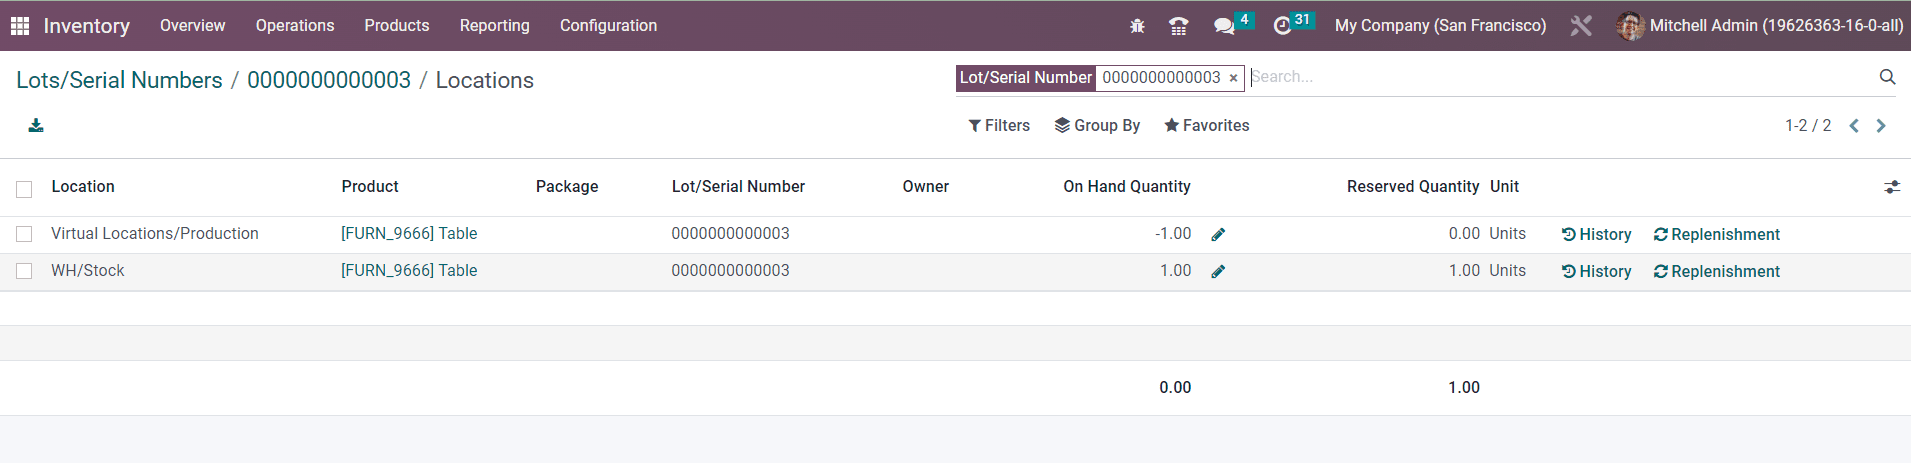
By clicking on the **Location** button, you will get the exact location details of the product.
In the location history, you can find the Location, Product, Package, Lot/Serial Number, Owner, On Hand Quantity, Reserved Quantity, and Unit details. The **History** button available here will help you to get the movement history of the product. The product can be replenished from this window itself using the **Replenishment** button.
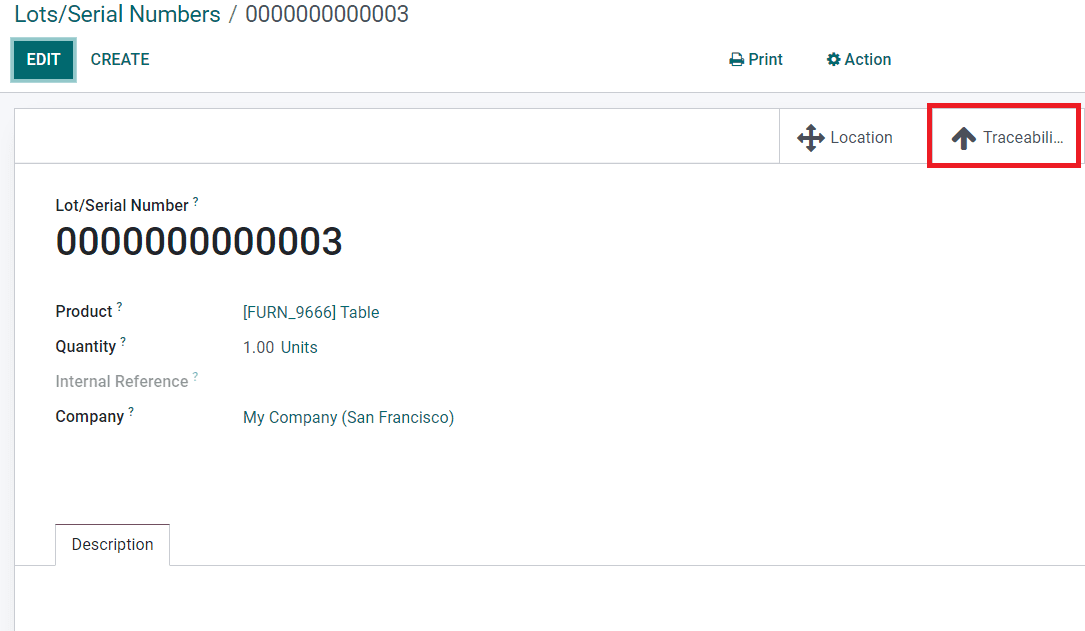
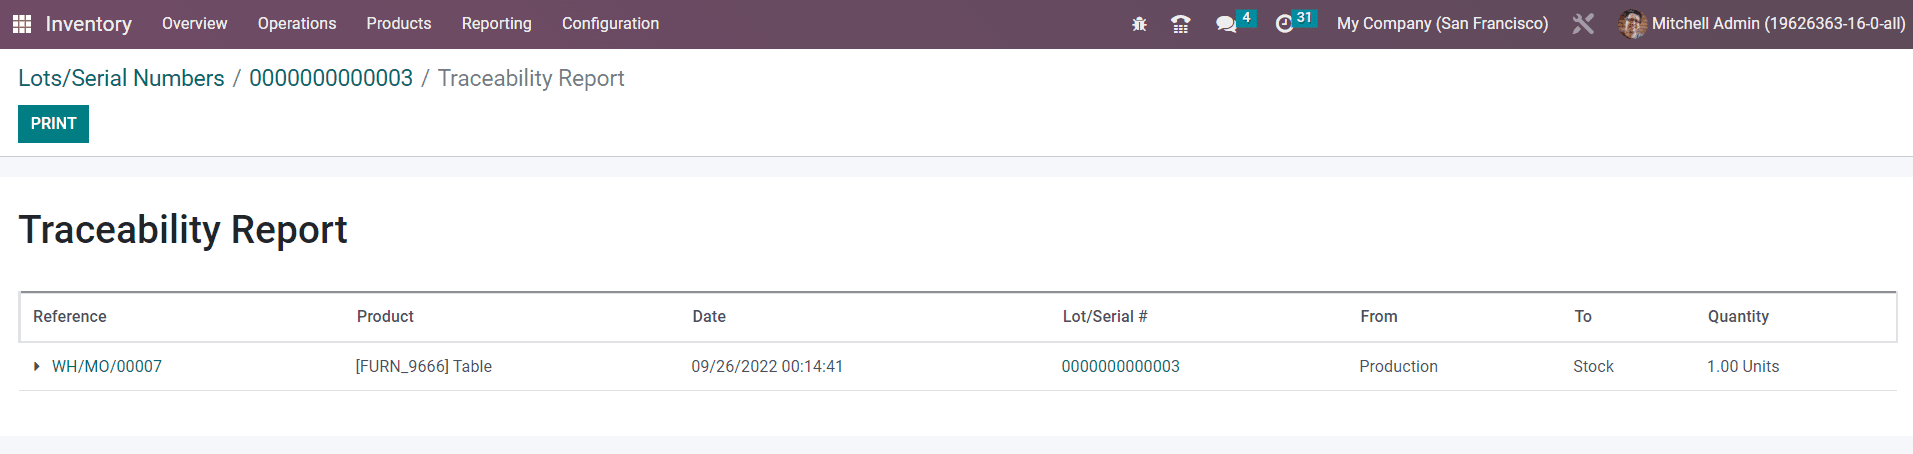
The Traceability smart button will give you the tracking information of the product.
Here, you will get the Reference, Product, Date, Lot/Serial, From, To, and Quantity details of each product movement.
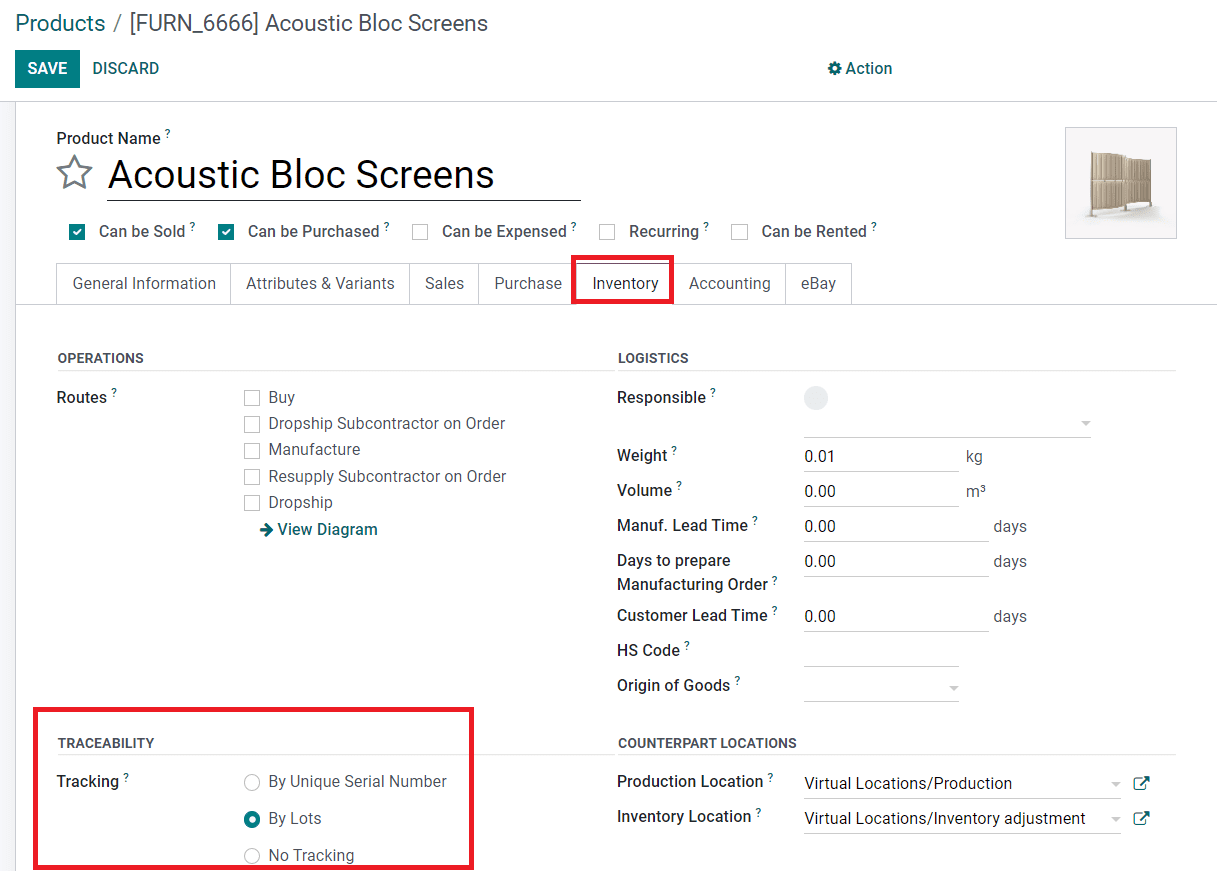
While configuring a new product in the Odoo Inventory module, you can define the traceability of the product. As shown in the image below, you will get the option to define the **Traceability** of the product under the **Inventory** tab.
You can set the tracking of the product by using **Unique Serial Number** or **Lots** from this window. If you don’t want to track the product, you can select the **No Tracking** option.
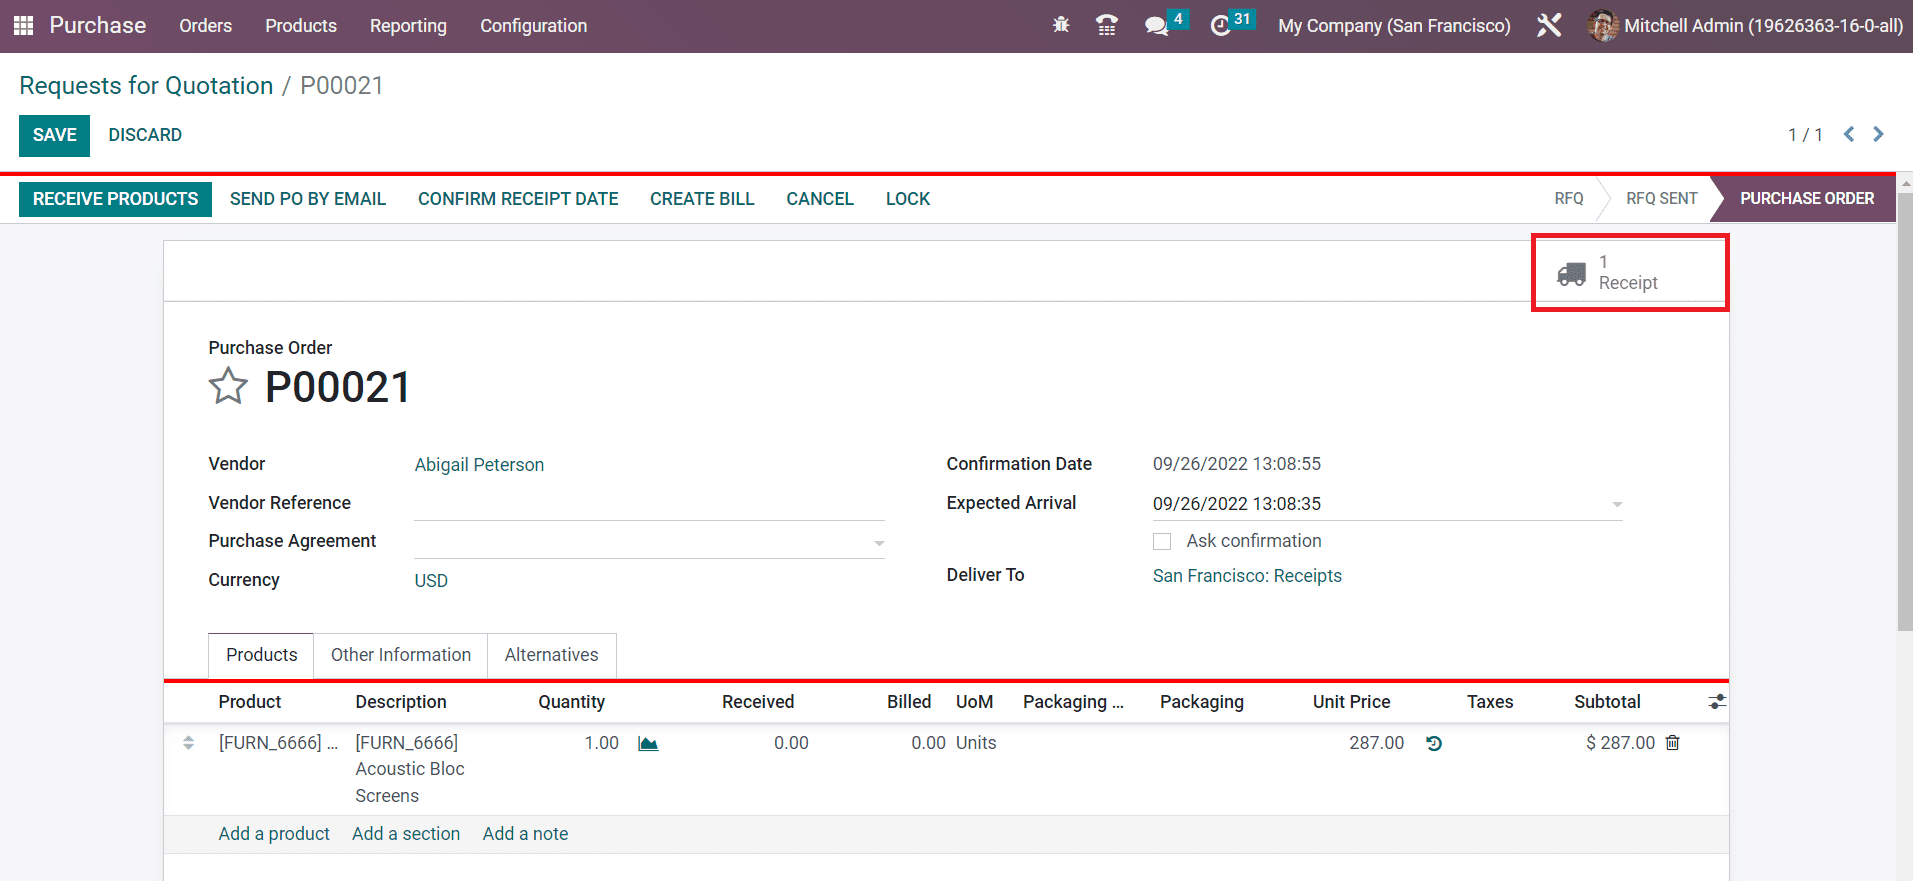
You can assign lots/serial numbers to products while receiving them in the inventory. After confirming a purchase order, you will be able to manage lots and serial numbers for the products before receiving them. In order to understand this precisely, let’s create a new purchase order and confirm it.
The above-shown screenshot is a confirmed purchase order. Here, you will get a smart button to manage the **Receipt** of the purchase. Click this button.
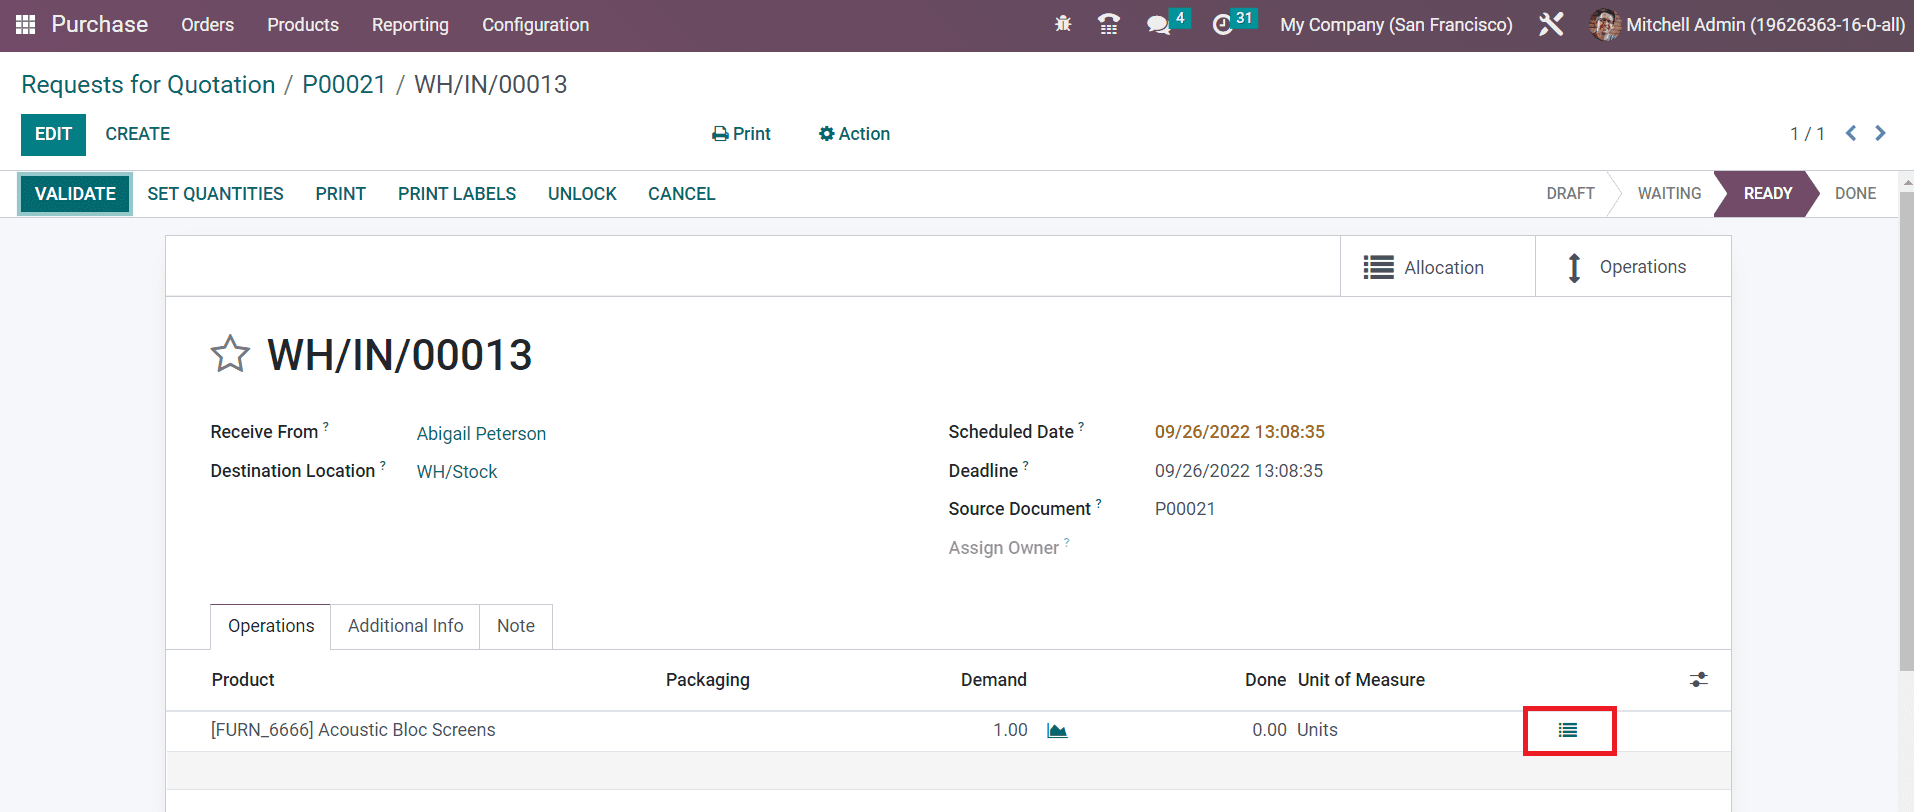
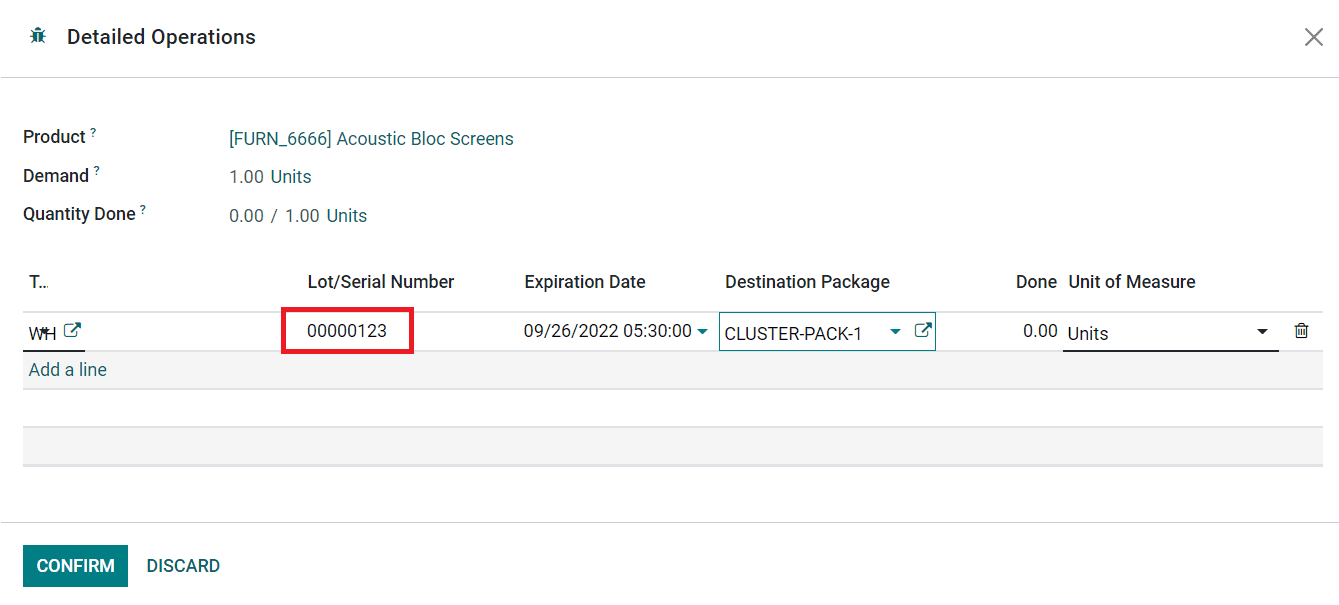
Now, you can use the option highlighted in the image above from the Receipt window. As soon as you click on this button, a new wizard will appear to define the lots/serial number of the selected product.
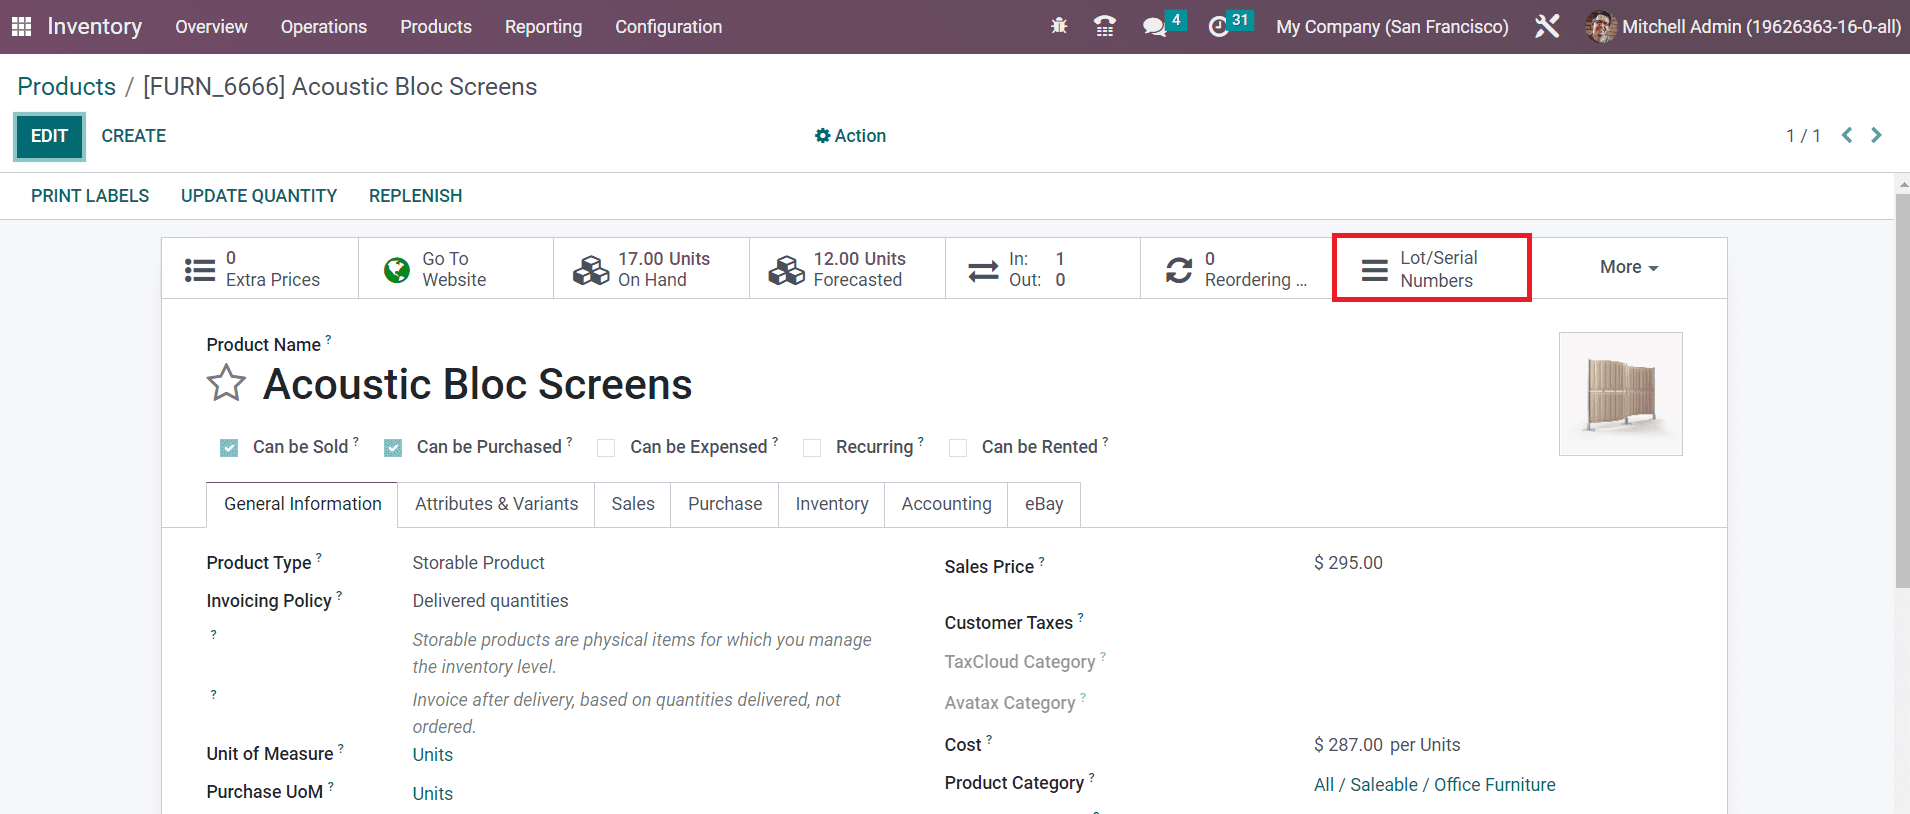
Here, you can specify the Lot/Serial number and Destination Package in the corresponding fields using the **Add a Line** button. Click the **Confirm** button. Now, you can validate the receipt and receive the product in your inventory. This lot/serial number will be added to the product details window of this newly purchased product. You can check this using the smart button available on the product details window as highlighted in the image below.
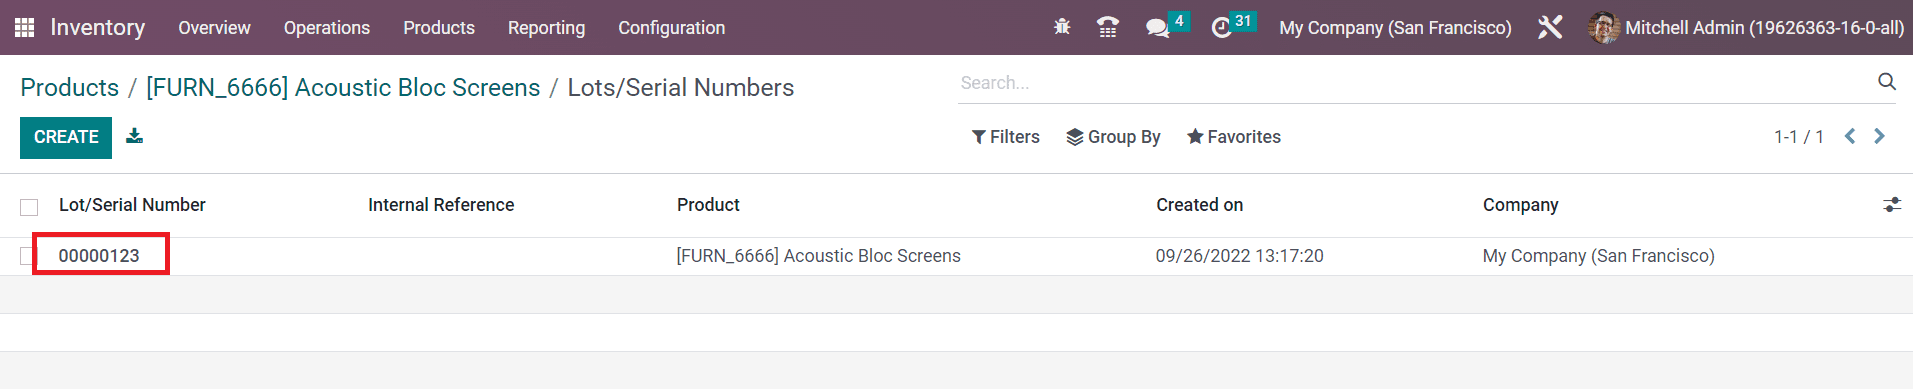
You can observe the newly assigned lot/serial number here.
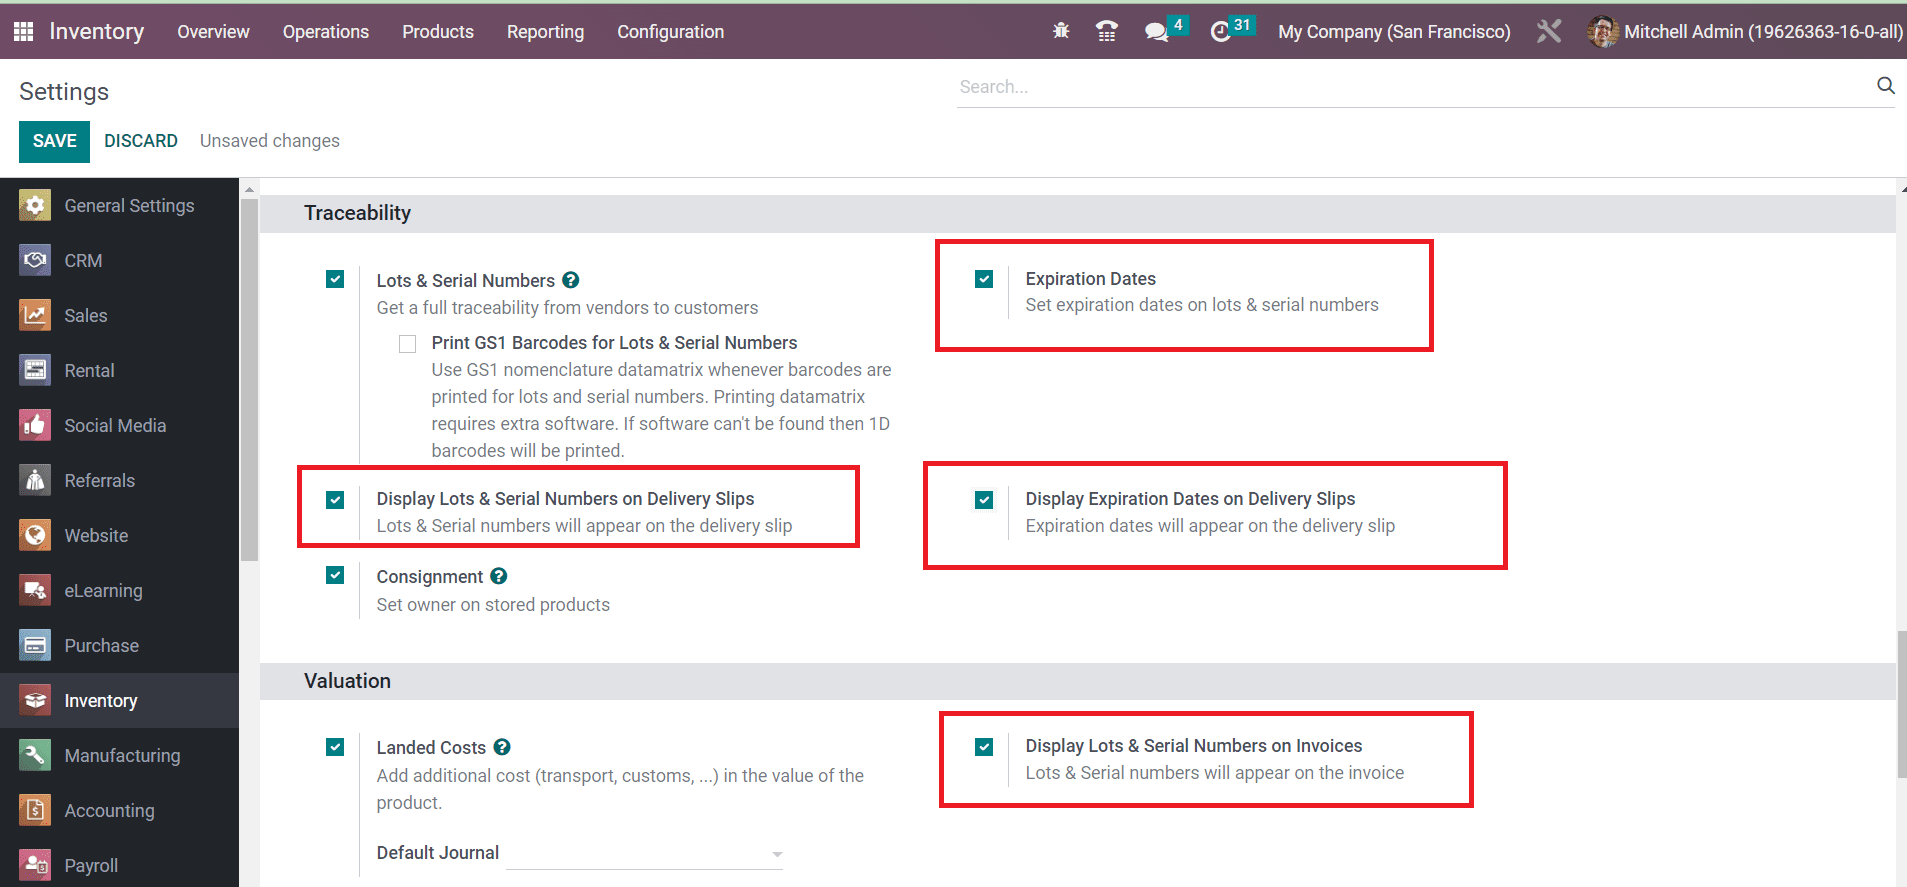
You can display lots and serial numbers on the delivery slips by activating the **Display Lots & Serial Numbers** on Delivery Slips option from the **Traceability** tab of the **Settings** menu. Similarly, activating the **Display Lots & Serial Numbers on Invoices** button will show lots and serial numbers on invoices.
Now, let’s check how to set expiration dates on lots and serial numbers.
#### Expiration Date
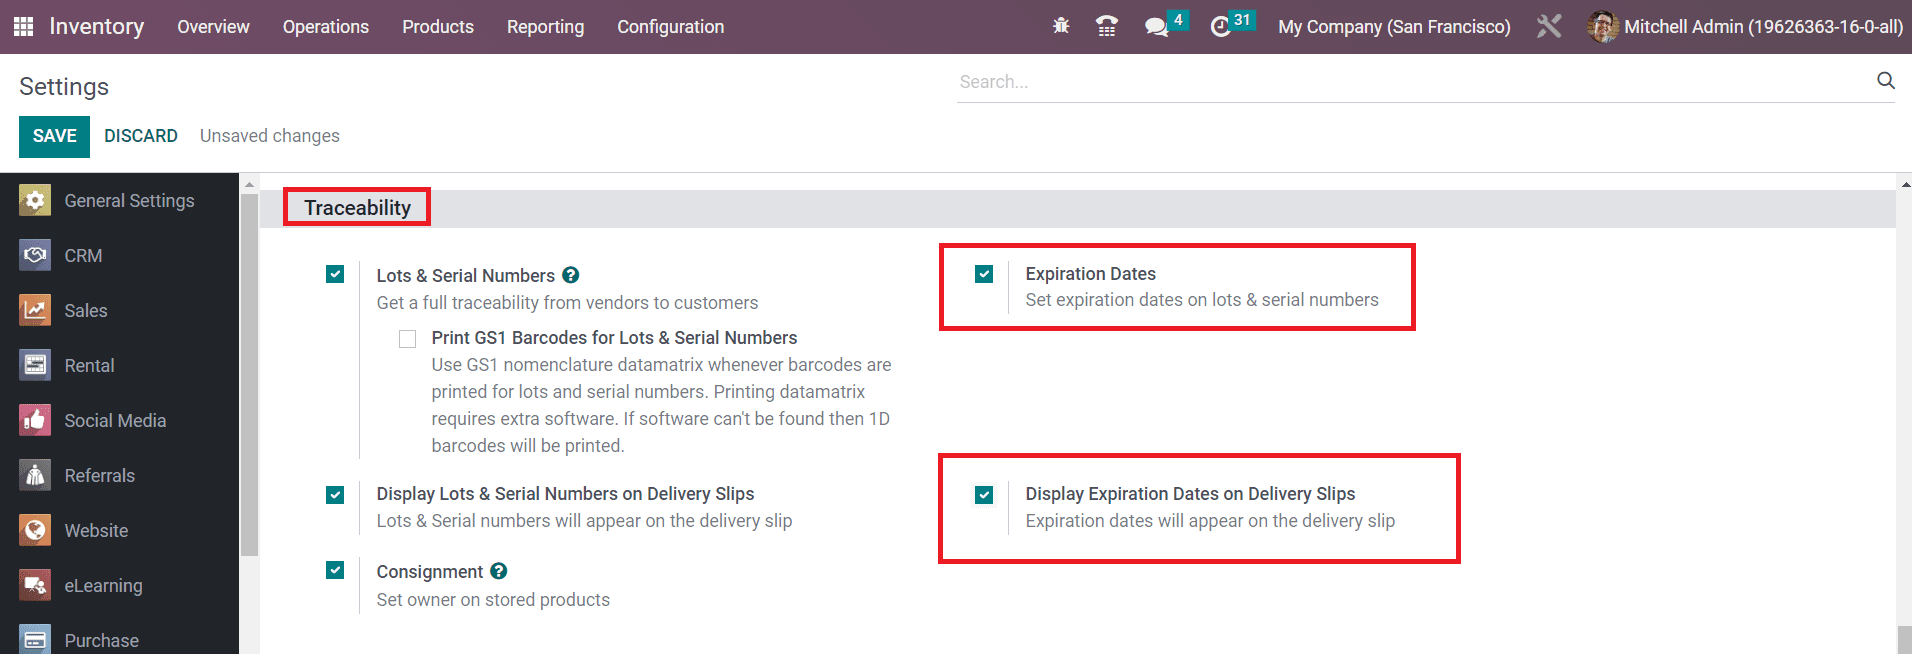
Defining expiration dates for the storable or consumable products in your inventory is a crucial task. You should definitely mention the expiration date on each product so that the customer will get knowledge about the safety period to consume the product. Odoo manages the expiration dates of the products using the lots and serial numbers aspects. You can activate this feature from the **Settings** menu of the Inventory module.
Under the **Traceability** tab, you can find the **Expiration Dates** option to activate. Along with this, you can activate the **Display Expiration Dates on Delivery Slips** option to display the expiration dates on the delivery slips.
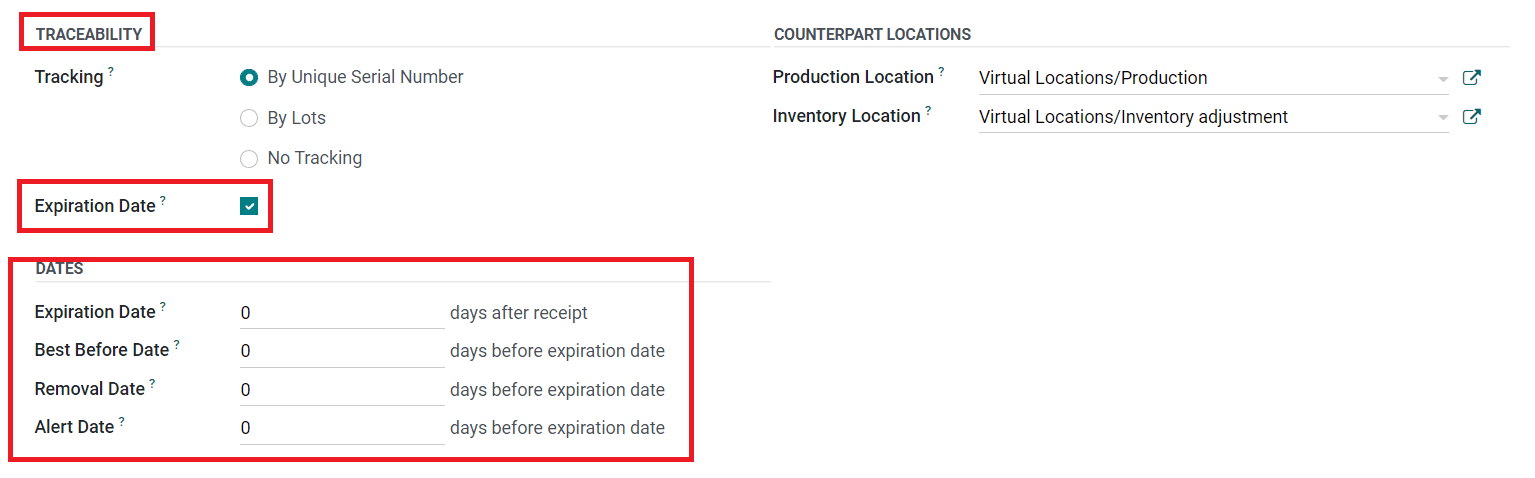
After activating the expiration date feature, you can set expiration dates on lots or serial numbers of a product. For this, you can go to the product configuration window. Select the **Inventory** tab as shown below.
Here, you can define the tracking method from the **Traceability** field. After selecting the tracking method, you can activate the **Expiration Date** option.
When this option is activated, you will be able to specify the dates to manage product expiration on the product and on the corresponding lots/serial numbers. As soon as you activate this option, you will get some additional fields to define some important dates which are detailed below.
**Expiration Date:** The number of days after the receipt of the product after which the goods may become dangerous and must not be consumed. It will be computed on the lot/serial number.
**Best Before Date:** The number of days before the expiration date after which the goods start to deteriorate, without being dangerous yet.
**Removal Date:** The number of days before the expiration date after which the goods should be removed from the stock.
**Alert Date:** The number of days before the expiration date after which an alert should be raised on the lot/serial number.
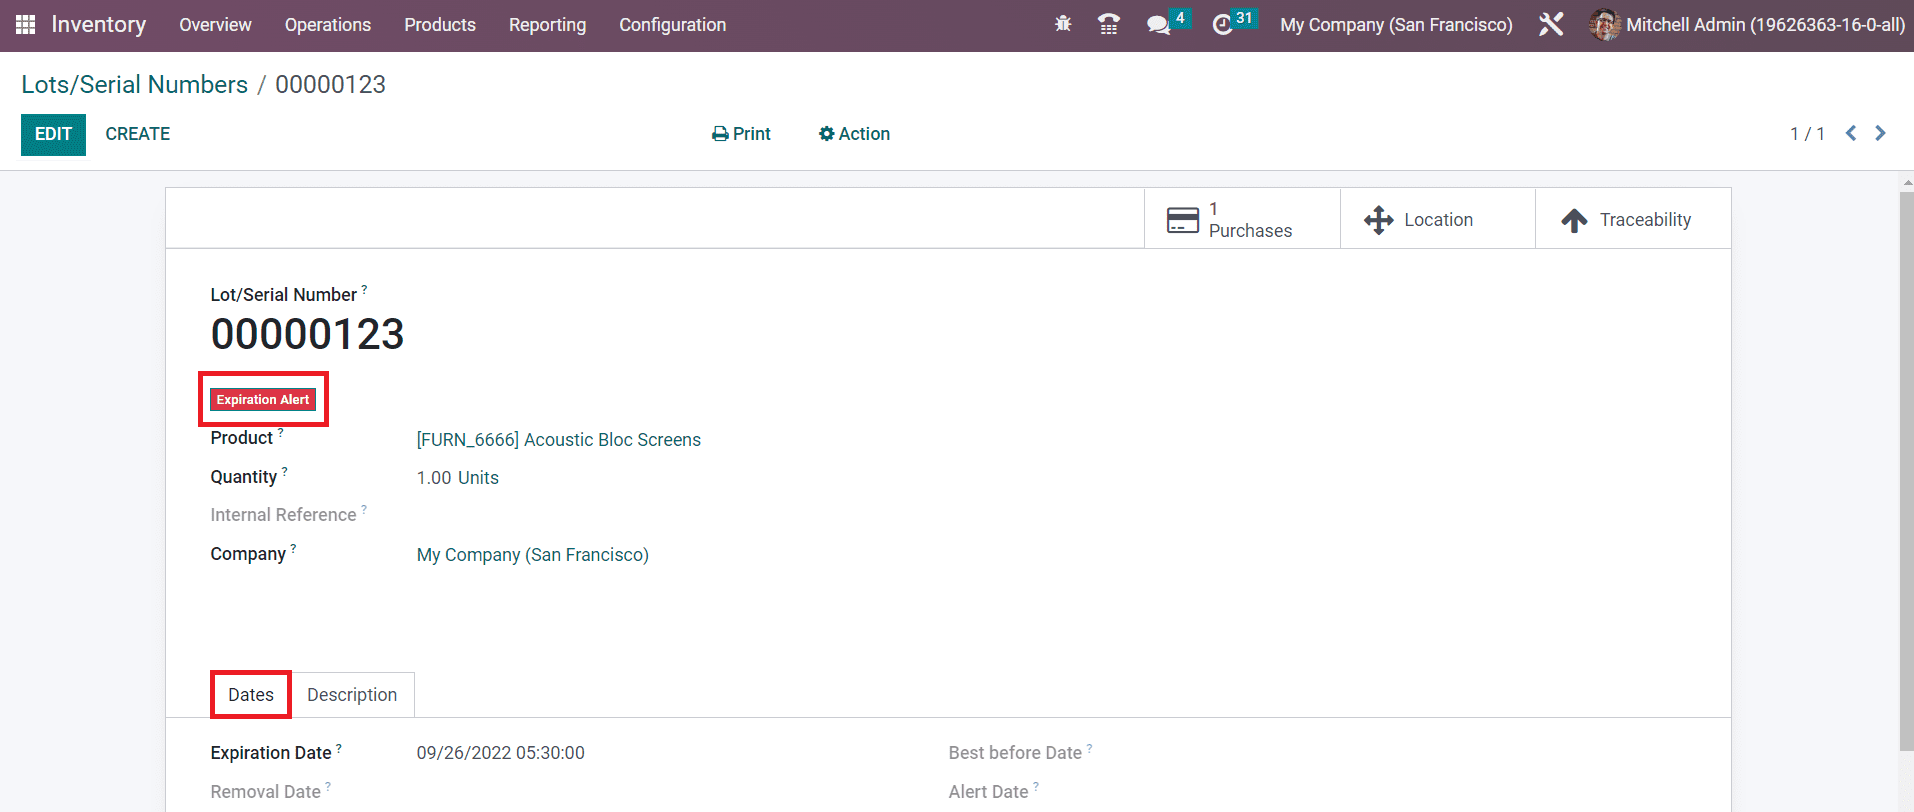
After specifying the expiration date for a product, you can check the lot and serial number window of the respective product where you will get the expiration details automatically.
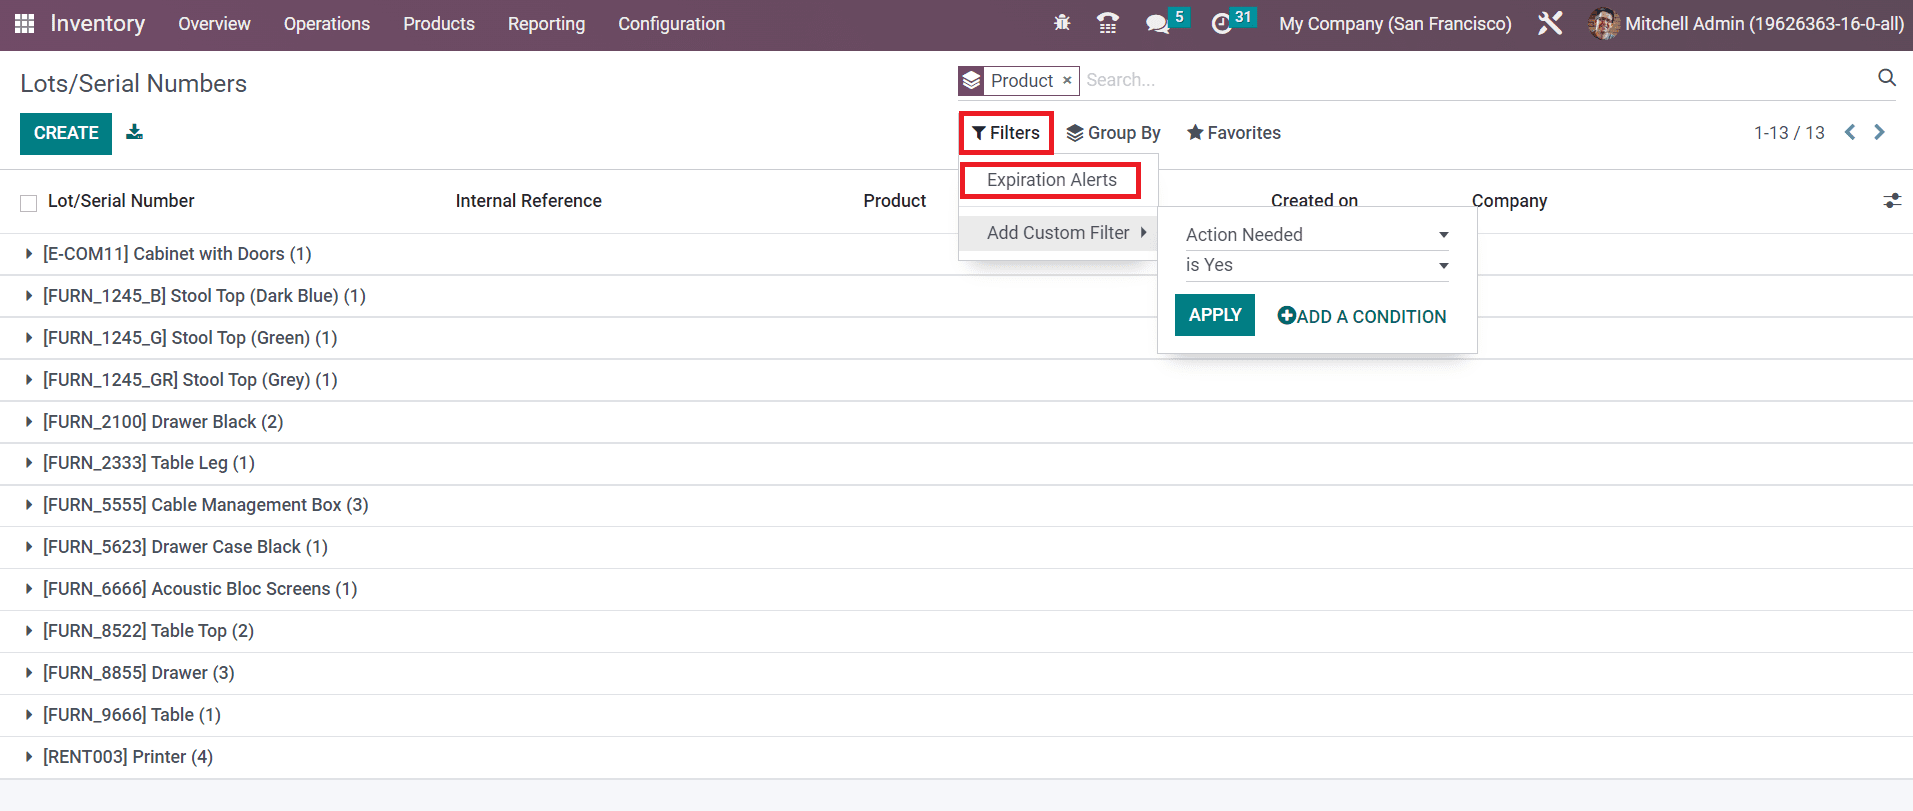
The Dates tab will show the expiry details of the lot/serial number. You can observe an expiration alert on the serial number if it is expired or near to expiration date. The filter Expiration Alert will assist you to get the exact list of the expired lots and serial numbers.
We detailed the feature of the product traceability in this section, now let’s discuss the inventory operations offered by Odoo 16.
---
# Agent Instructions: Querying This Documentation
If you need additional information that is not directly available in this page, you can query the documentation dynamically by asking a question.
Perform an HTTP GET request on the current page URL with the `ask` query parameter:
```
GET https://docs.wafra.sa/inventory/inventory-operations.md?ask=
```
The question should be specific, self-contained, and written in natural language.
The response will contain a direct answer to the question and relevant excerpts and sources from the documentation.
Use this mechanism when the answer is not explicitly present in the current page, you need clarification or additional context, or you want to retrieve related documentation sections.