
Vendor Bills
Vendor Bills
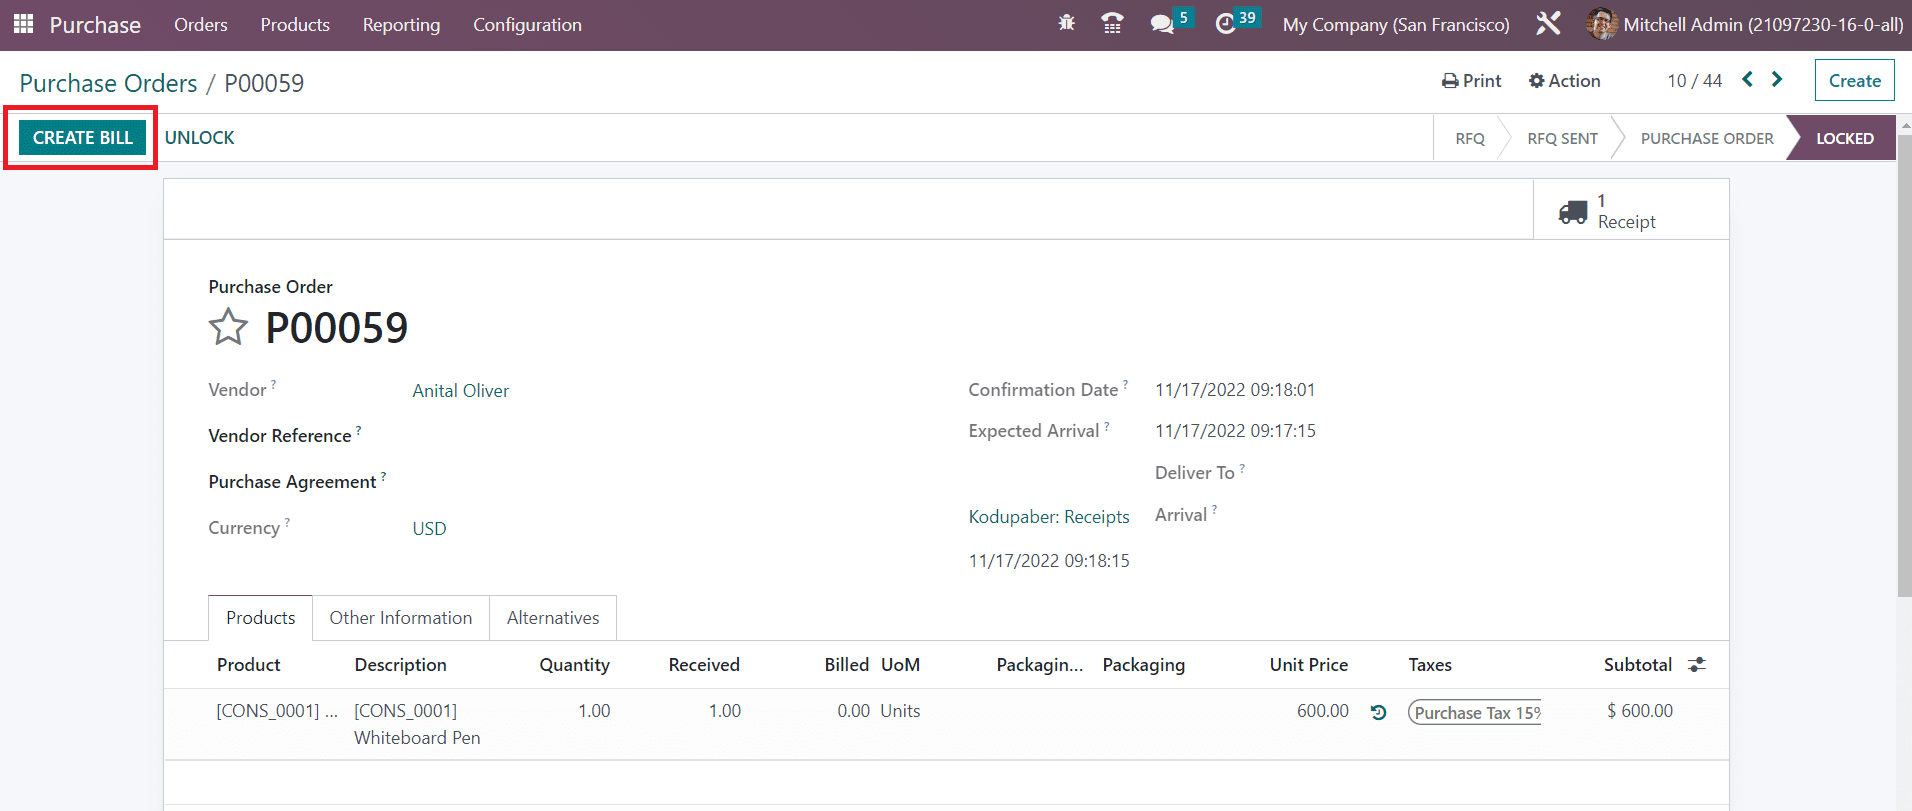
While doing purchases from a vendor, you can generate vendor bills in the Odoo Accounting module which shows the payment that you need to make to the respective vendor. A vendor bill will document all payment details of the purchases done by your company from a vendor. Once you confirm a purchase order, you will get the option Create Bill as shown in the image below in order to automatically generate the corresponding vendor bill.
We already discussed the management vendor bills in the Purchase module. Such generated vendor bills will be recorded in the Accounting module also. You can find the Bills option under the Vendor menu in the Accounting module. As shown in the image below, already generated bills can be observed here.

The user can select either Kanban or List view on this platform. The preview of the list view includes Number, Vendor, Bill Date, Due Date, Reference, Activities, Tax Included, Total, Total in Currency, Payment Status, and Status of each vendor bill.
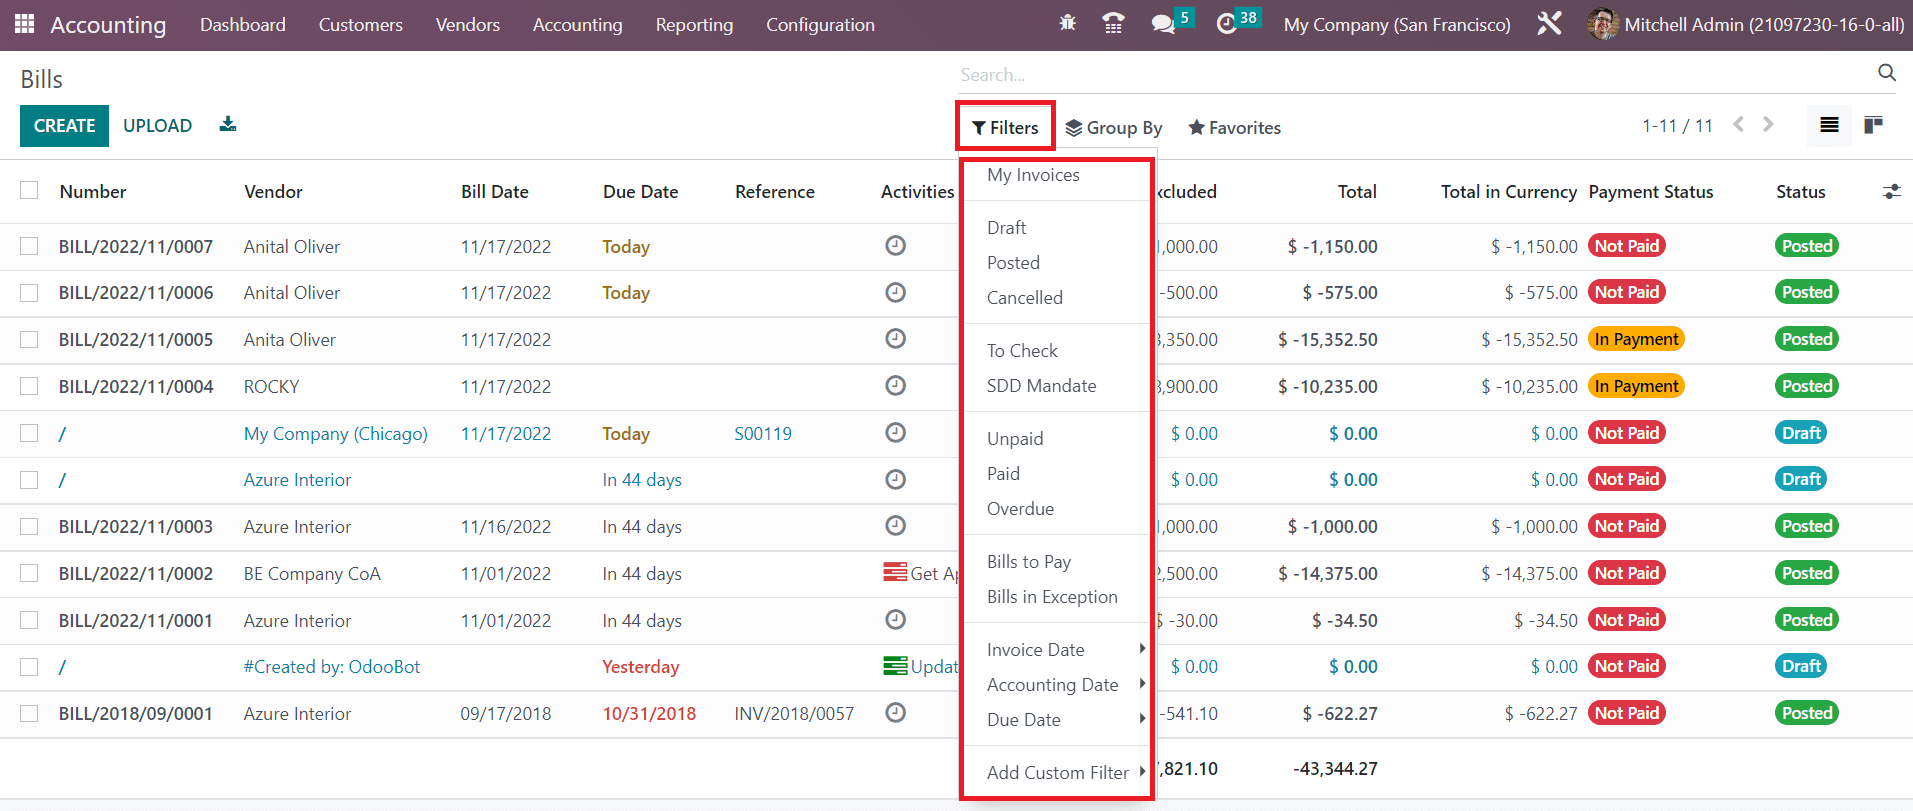
You can use My Invoices, Draft, Posted, Canceled, To Check, SDD Mandates, Unpaid, Paid, Overdue, Bills to Pay, Bills in Exception, Invoice Date, Accounting Date, and Due Date as filters for the available vendor bills. Additional filters can be added using the Add Custom Filter option.
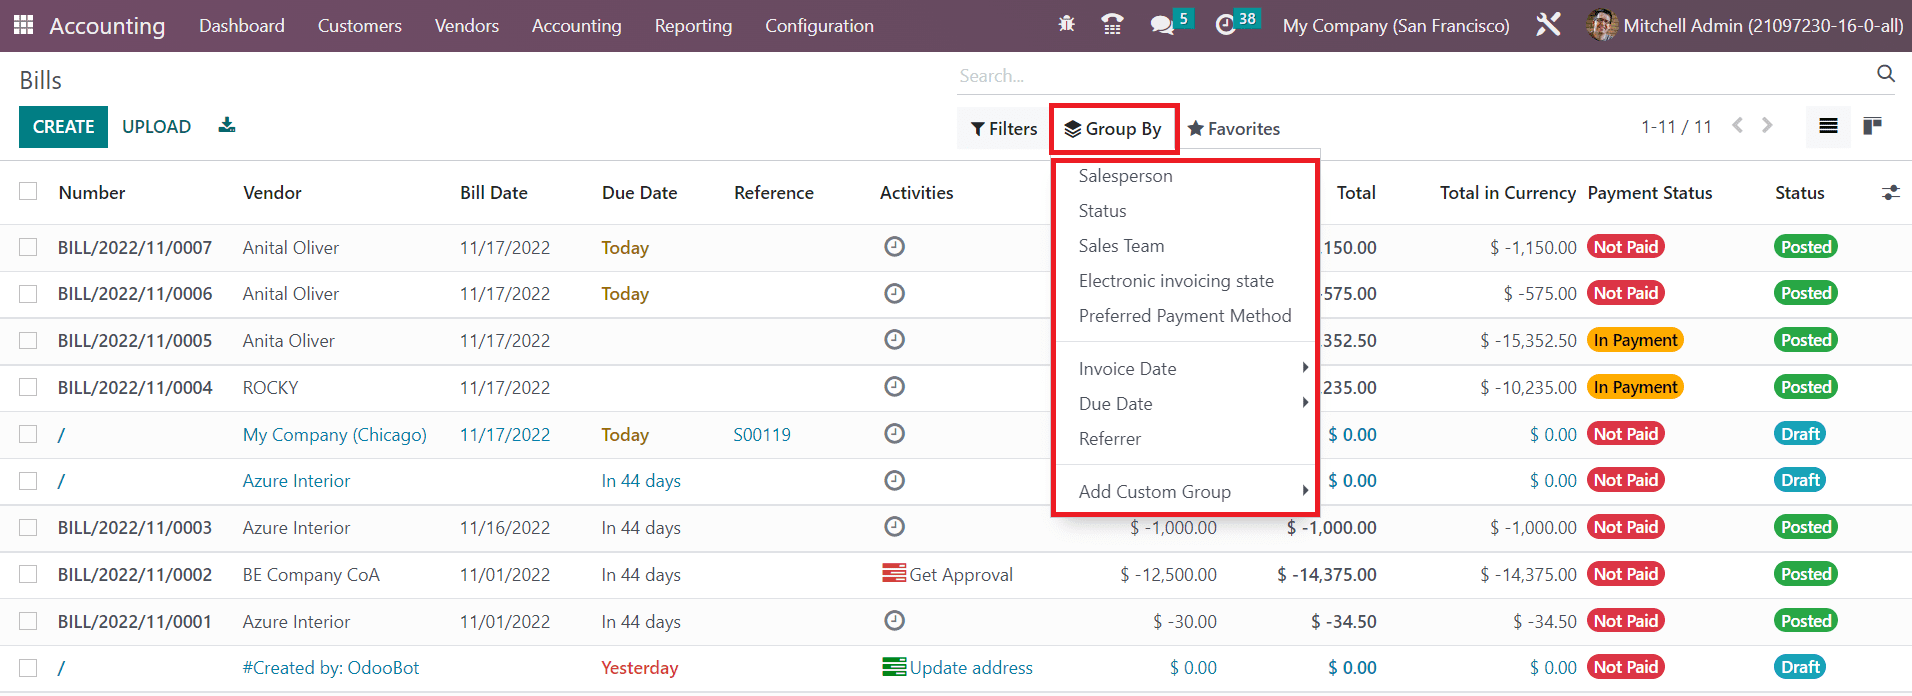
The available default Group By options are Salesperson, Status, Sales Team, Electronic Invoicing State, Preferred Payment Method, Invoice Date, Due Date, and Referrer. Use the Add Custom Group button to create a new custom group by options.
You can upload a reference of the vendor bill using the Upload button. Manual creation of vendor bills can be performed using the Create button. A new window appears on the screen to mention the necessary details regarding the bill.
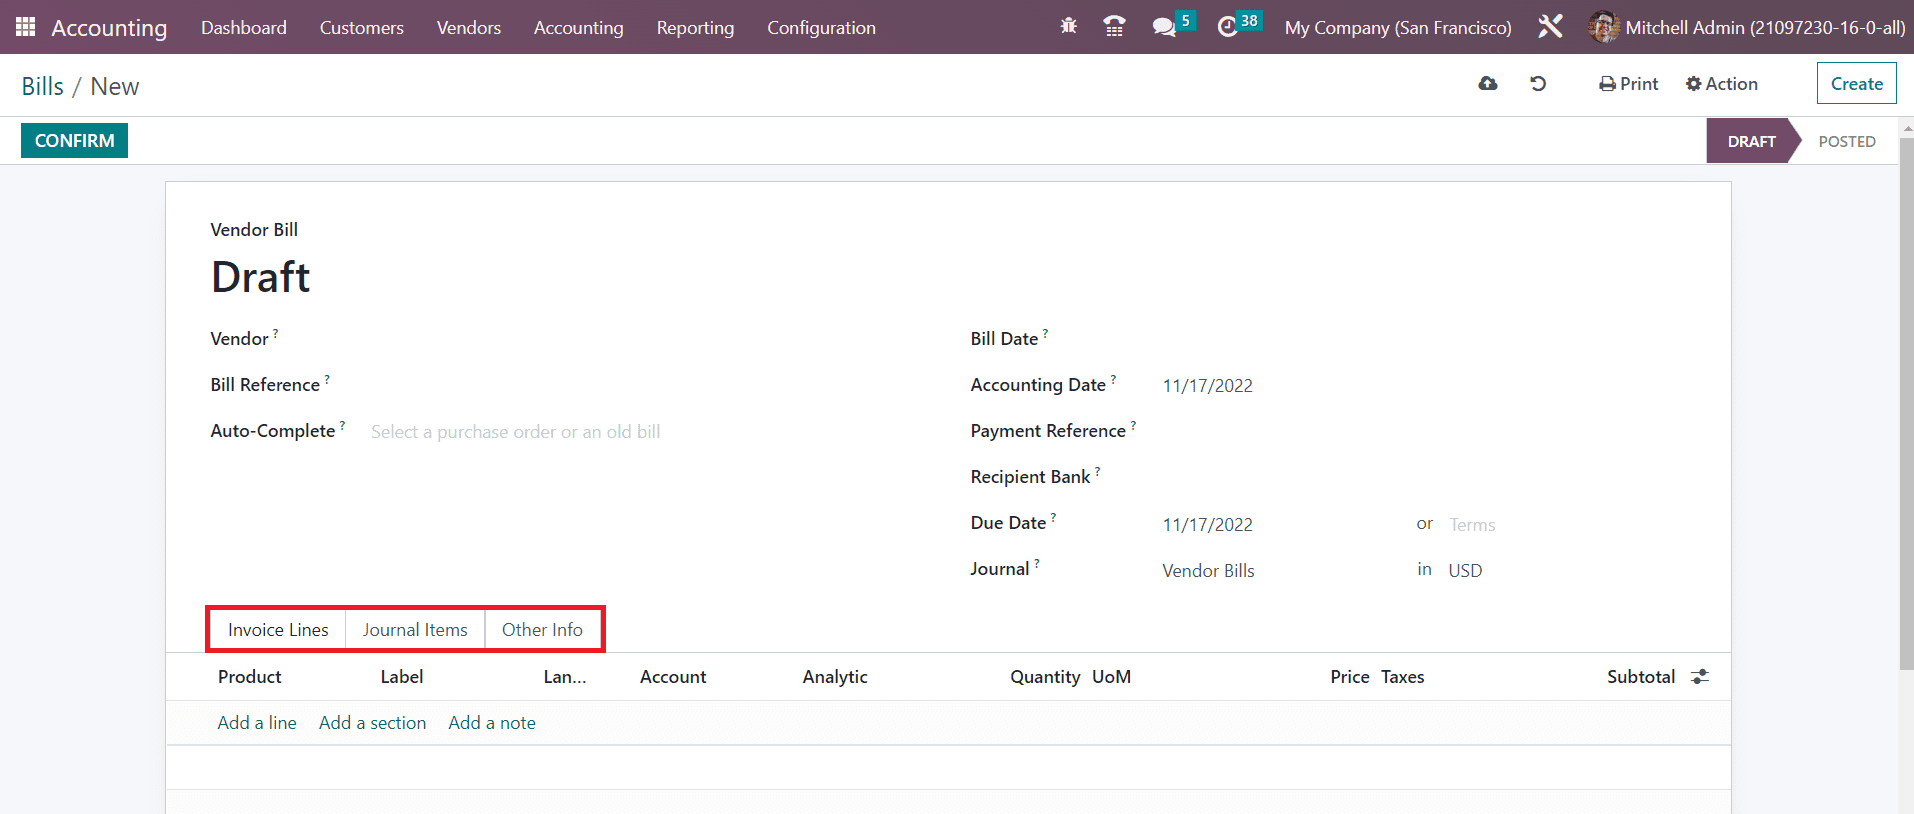
Mention the id of the vendor in the Vendor field and reference related to the bill in the Bill Reference field. You can autocomplete the remaining fields of the bill by specifying a past bill or purchase order related to this bill in the Auto-Complete field. The date on which the bill is generated can be mentioned in the Bill Date field. The Accounting Date shows the date on which the accounting entries of this bill are updated in the system. In the respective fields, you can specify Payment Reference, Recipient Bank, Due Date of the bill, and Journal .
The Invoice Line, Journal Items, and Other Info tabs are the same as that of the invoice. Once you complete all necessary fields, click the Confirm button to confirm the bill. The status of the bill will change from Draft to Posted once you confirm the bill. You can manage the vendor bills from the Accounting Dashboard also.
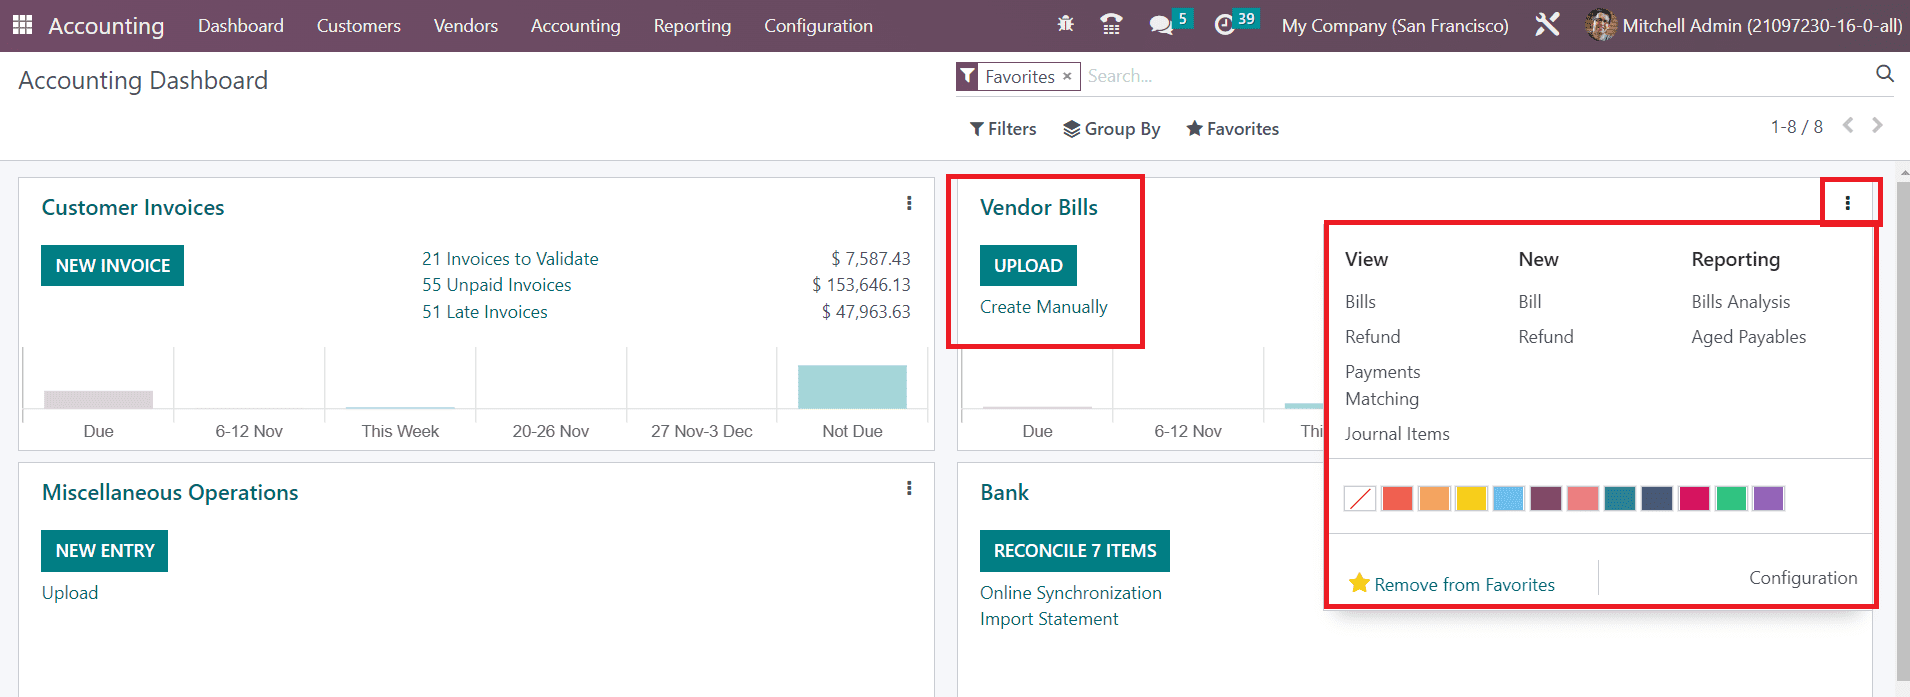
You can upload a vendor bill using the Upload button and create a new bill using the Create Manually button. There are options available to create and view Bills, Refunds, and Journal Items. Using the Payment Matching option, you can match invoices and payments with corresponding bank statements.
As we mentioned, you can create refunds from the Accounting Dashboard itself. You will get a separate platform under the Vendors menu to generate Refunds. We already discussed the generation of customer credit notes. In the same method, you can generate vendor credit notes also. As shown in the image below, you will get the Add Credit Note option on a bill.
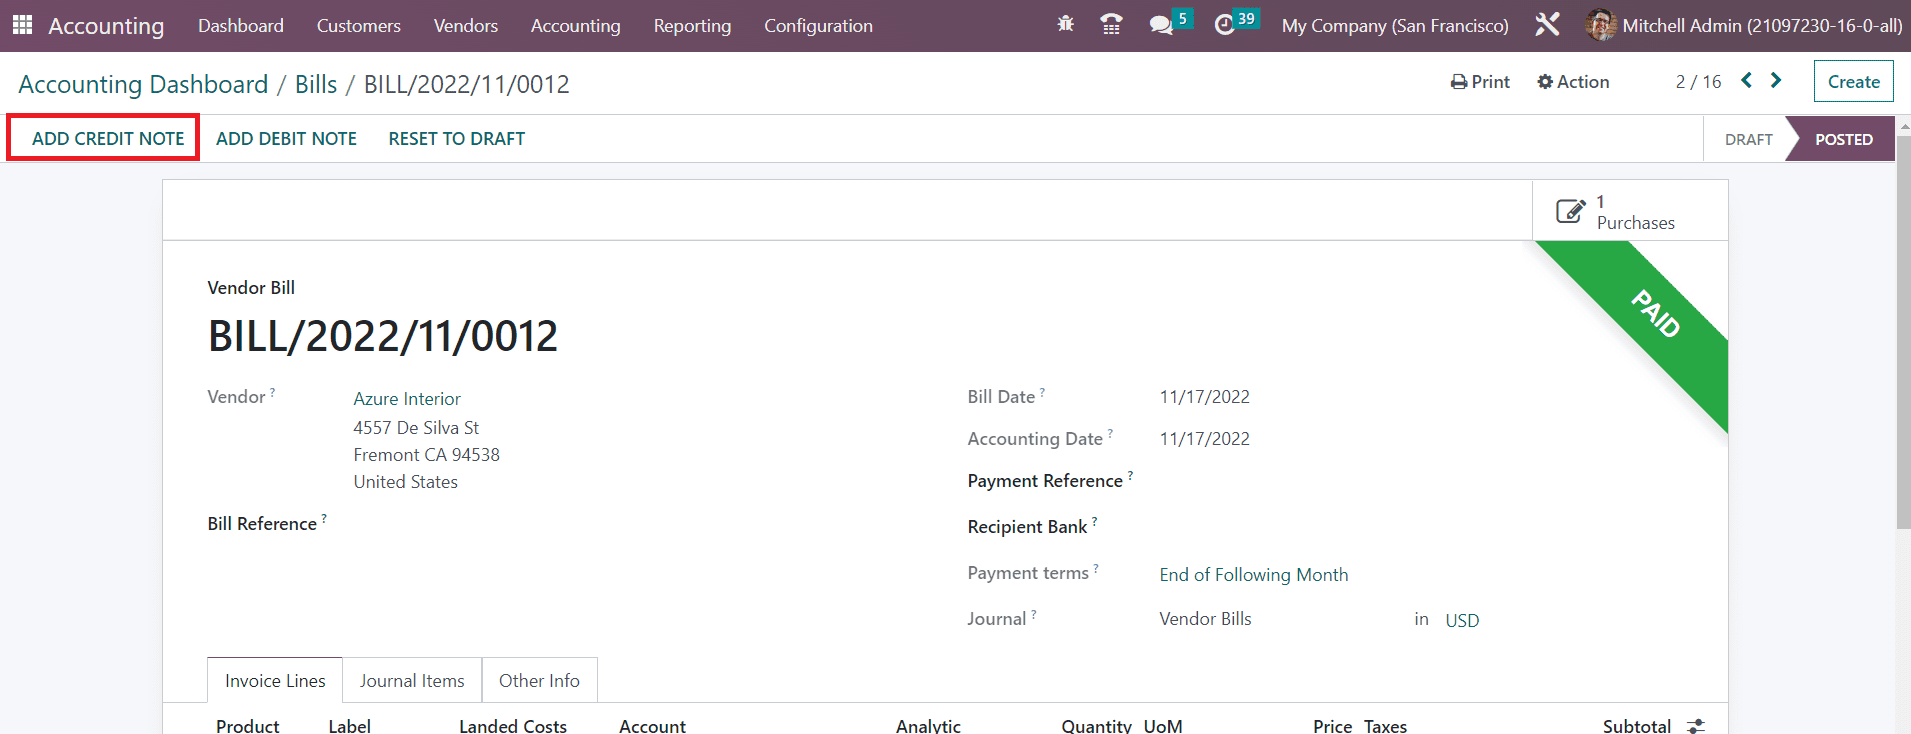
You can trigger a vendor credit note using this button. These vendor credit notes will be recorded under the Refunds platform available in the Vendors menu.
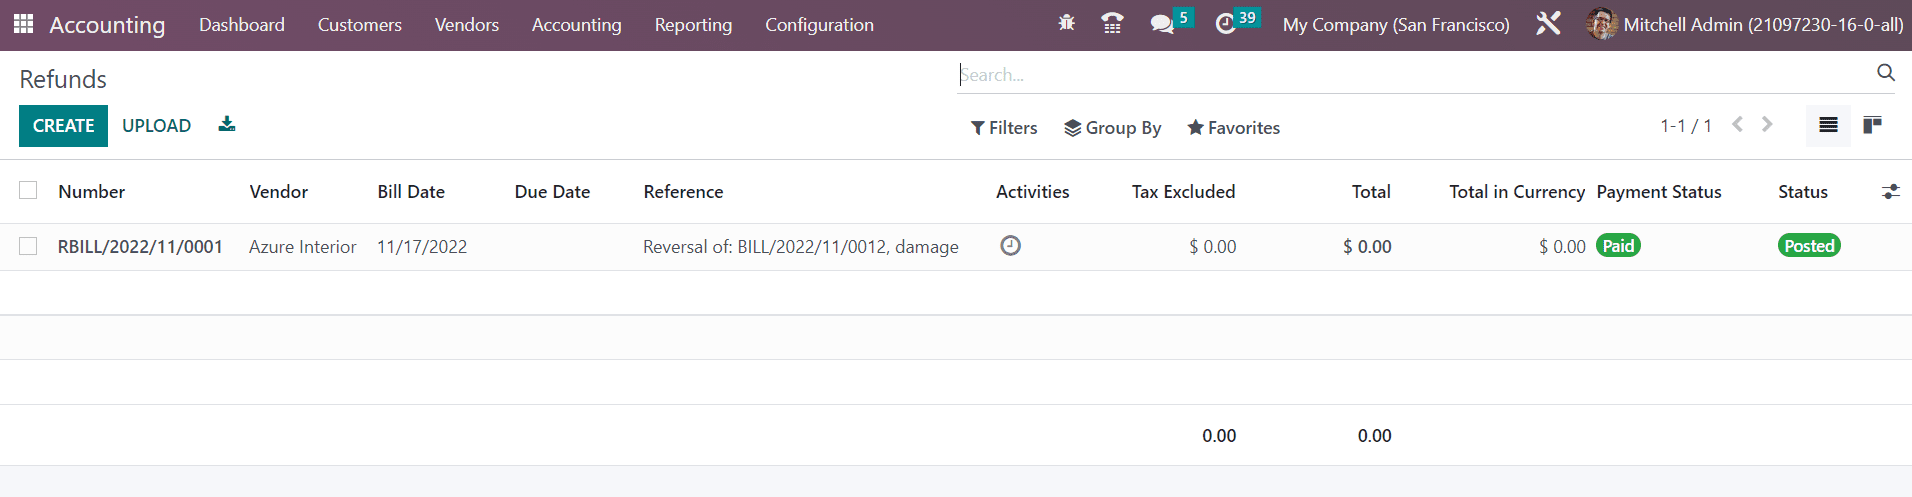
You can create a new refund using the Create button.
Last updated