> For the complete documentation index, see [llms.txt](https://docs.wafra.sa/llms.txt). Markdown versions of documentation pages are available by appending `.md` to page URLs; this page is available as [Markdown](https://docs.wafra.sa/accounting/payments.md).
# Payments
### Payments
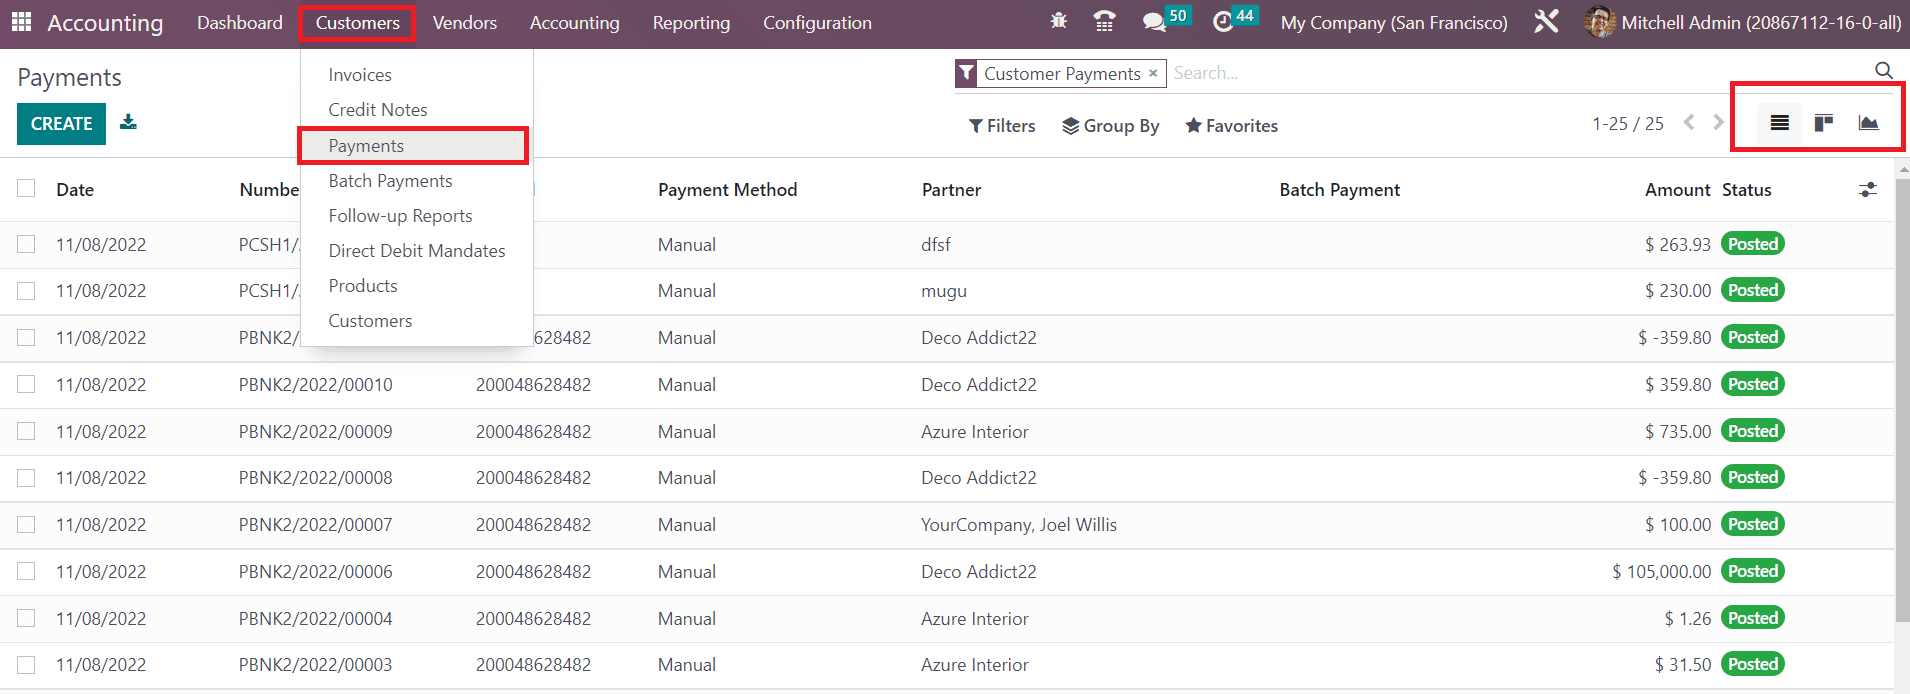
Odoo offers a dedicated platform in the Accounting module to record all payments from customers. You can check payment records from the **Payments** option available under the **Customers** menu. The preview of the list view shows the Date, Number, Journal, Payment Method, Partner, Batch Payment, Amount, and Status.
The view of the platform can be altered between List, Kanban, and Graph as per your demand. As sorting options, you will get filters and group by options.
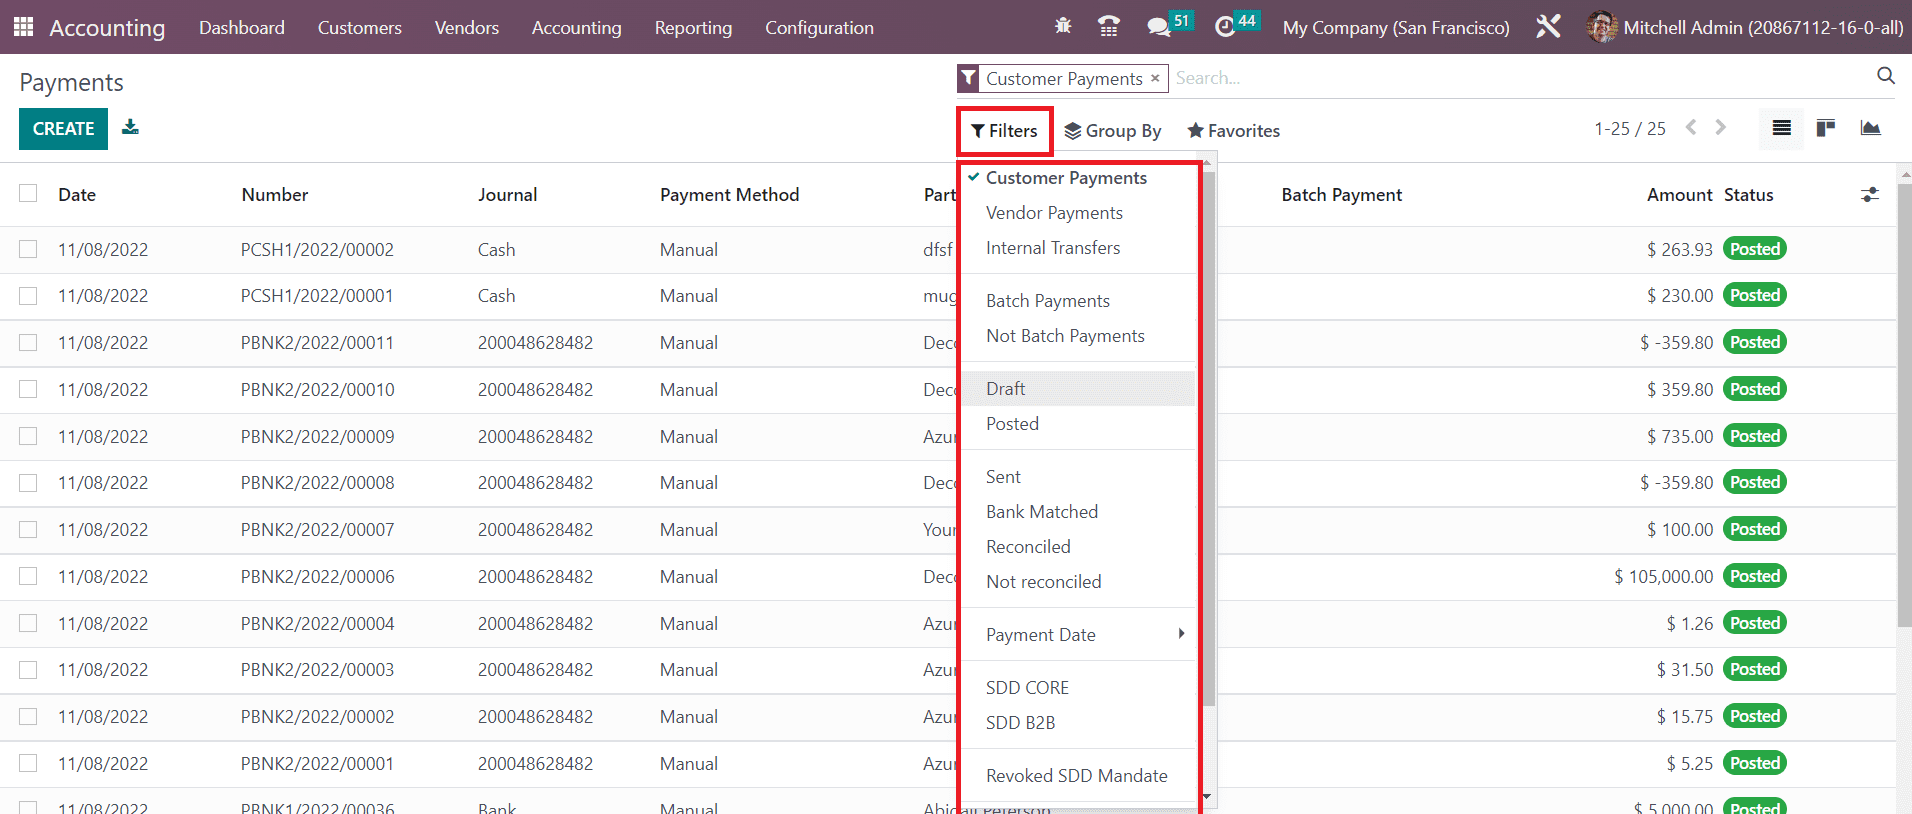
Odoo offers Customer Payments, Vendor Payments, Internal Transfers, Batch Payments, Not Batch Payments, Draft, Posted, Sent, Bank Matched, Reconciled, Not Reconciled, Payment Date, SDD CORE, SDD B2B, Revoked SDD Mandate, and Checks to Print as default filters. Adding custom filters is an easy task using the Add **Custom Filters** option.
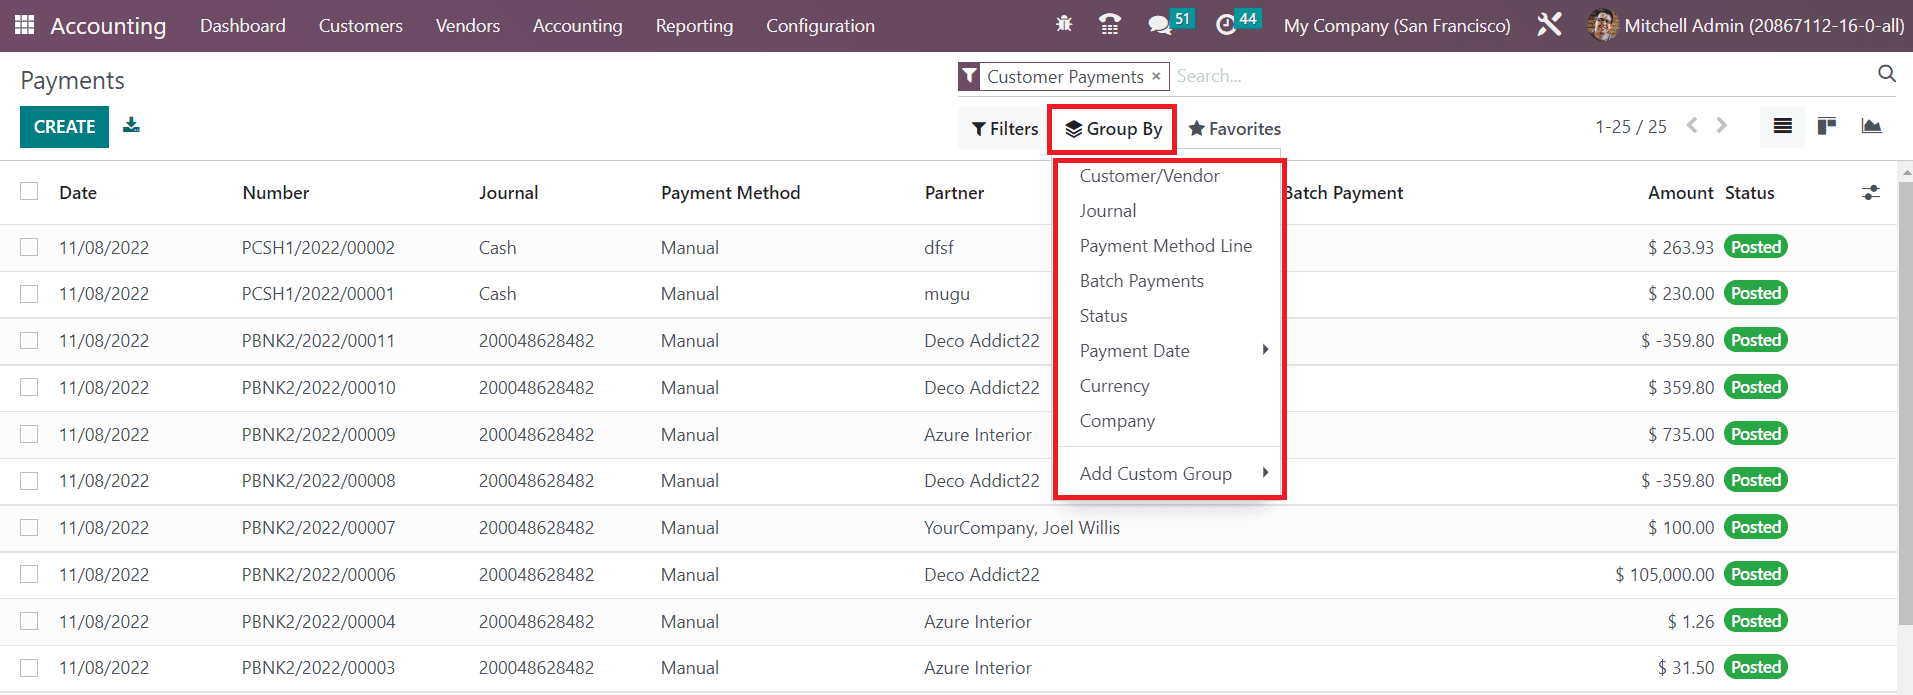
You are allowed to group the payments according to the Customer/Vendor, Journal, Payment Method Line, Batch Payments, Status, Payment Date, Currency, and Company. If required, you can use the **Add Custom Group** option to create customized grouping options.
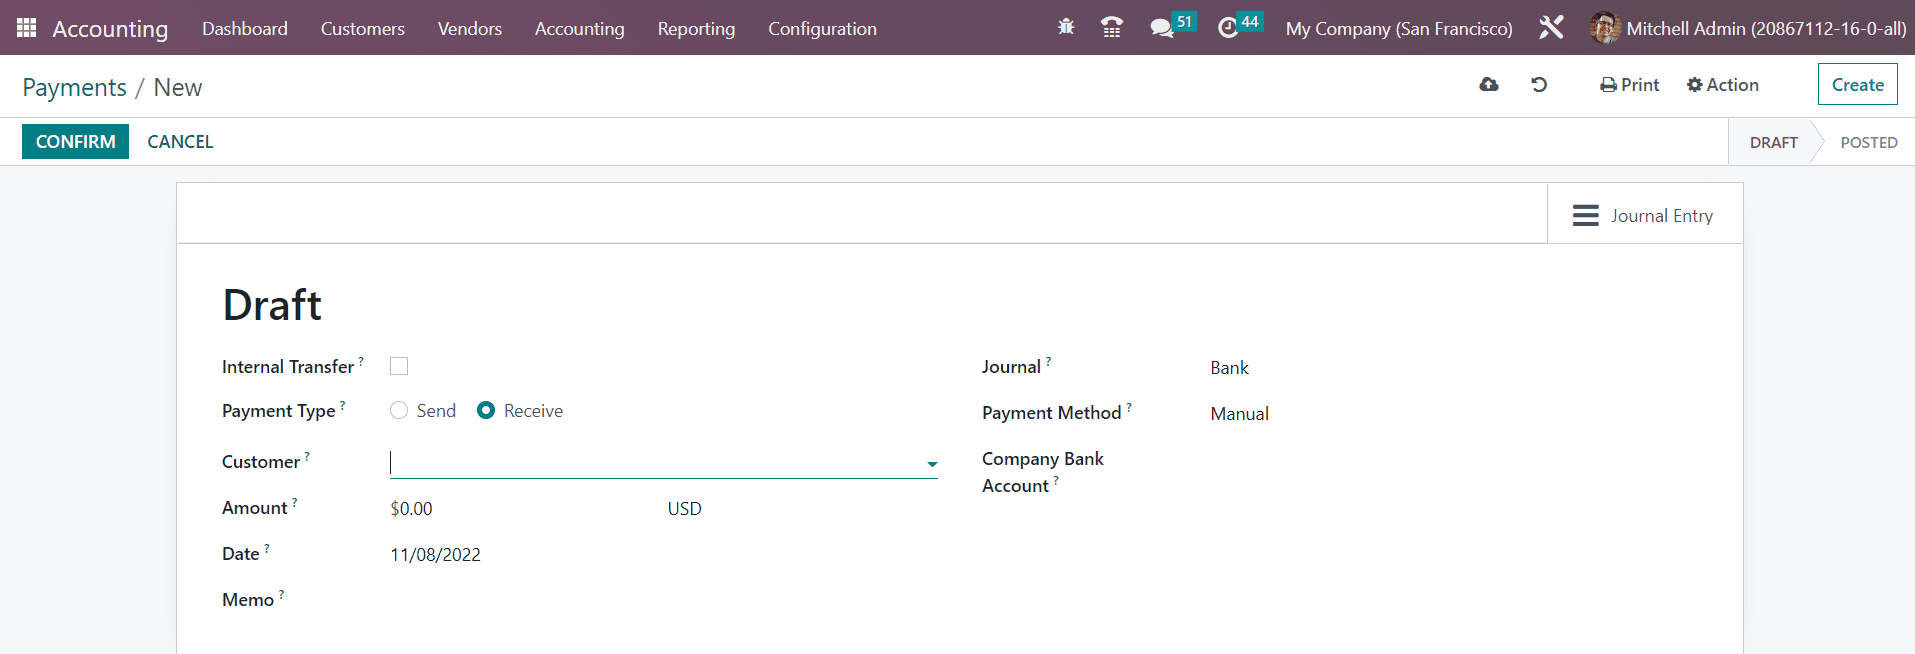
Click on the **Create** button to create a payment record manually.
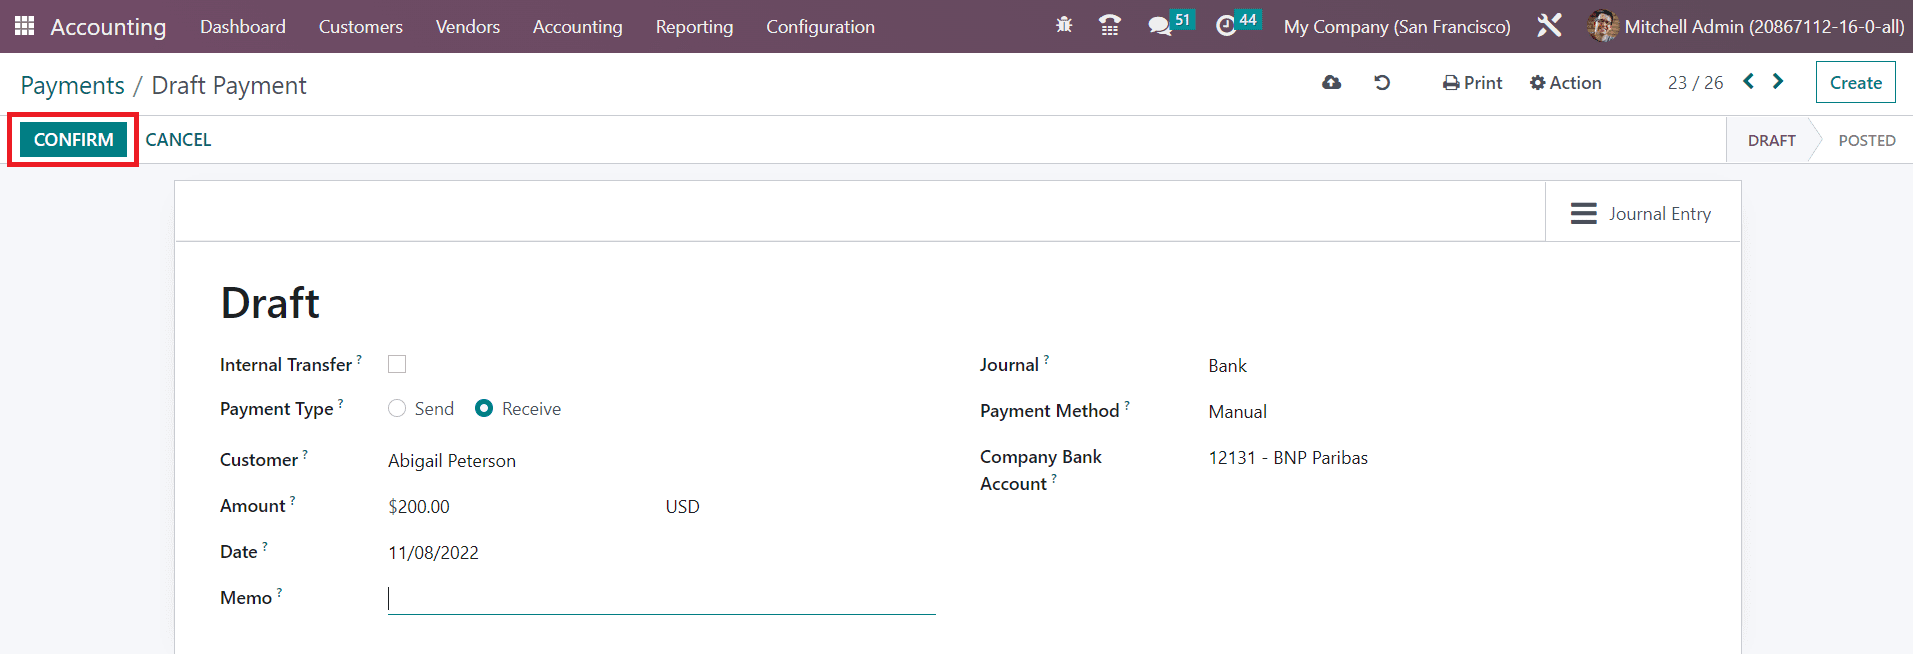
If you are creating this payment record for an internal transfer, you can activate the **Internal Transfer** field. Internal transfer refers to the transactions that move funds from one account to another within the company. Since it is a customer payment, the **Payment Type** can be set as Receive. The payment type **Send** is used in the case of vendor payment. You can specify the customer id in the Customer field. In the corresponding fields, you can mention the Amount, Date, Memo of the payment, Journal to record the payment, Payment Method, and Company Bank Account. The customer can choose manual, payment providers, check, batch deposit, SEPA credit transfer, or SEPA Direct Debit as the payment method to pay the amount.
Using the **Confirm** button, you can confirm the draft payment.
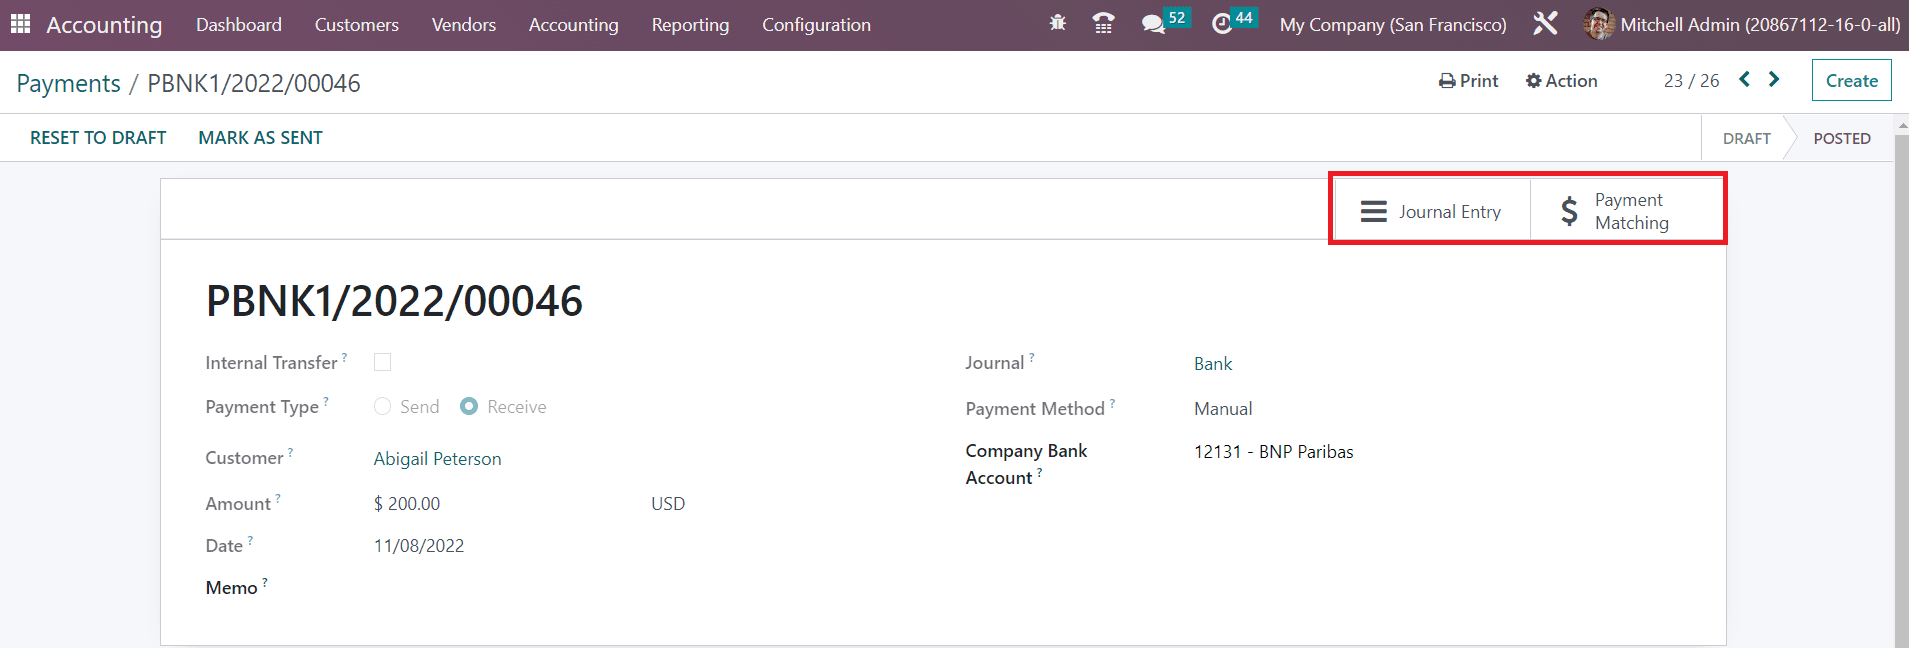
You can observe the **Journal Entries** related to this payment using the corresponding smart button available in the window. Once the customer completes the payment, you can add this payment to the pending invoices of that particular customer by using the **Payment Matching** smart button. This button will display all open invoices of that customer. You can choose an invoice from the list with the same amount and reconcile it. You can use the **Mark as Sent** option to label the payment as Sent and the **Reset to Draft** button to reset the payment to draft.
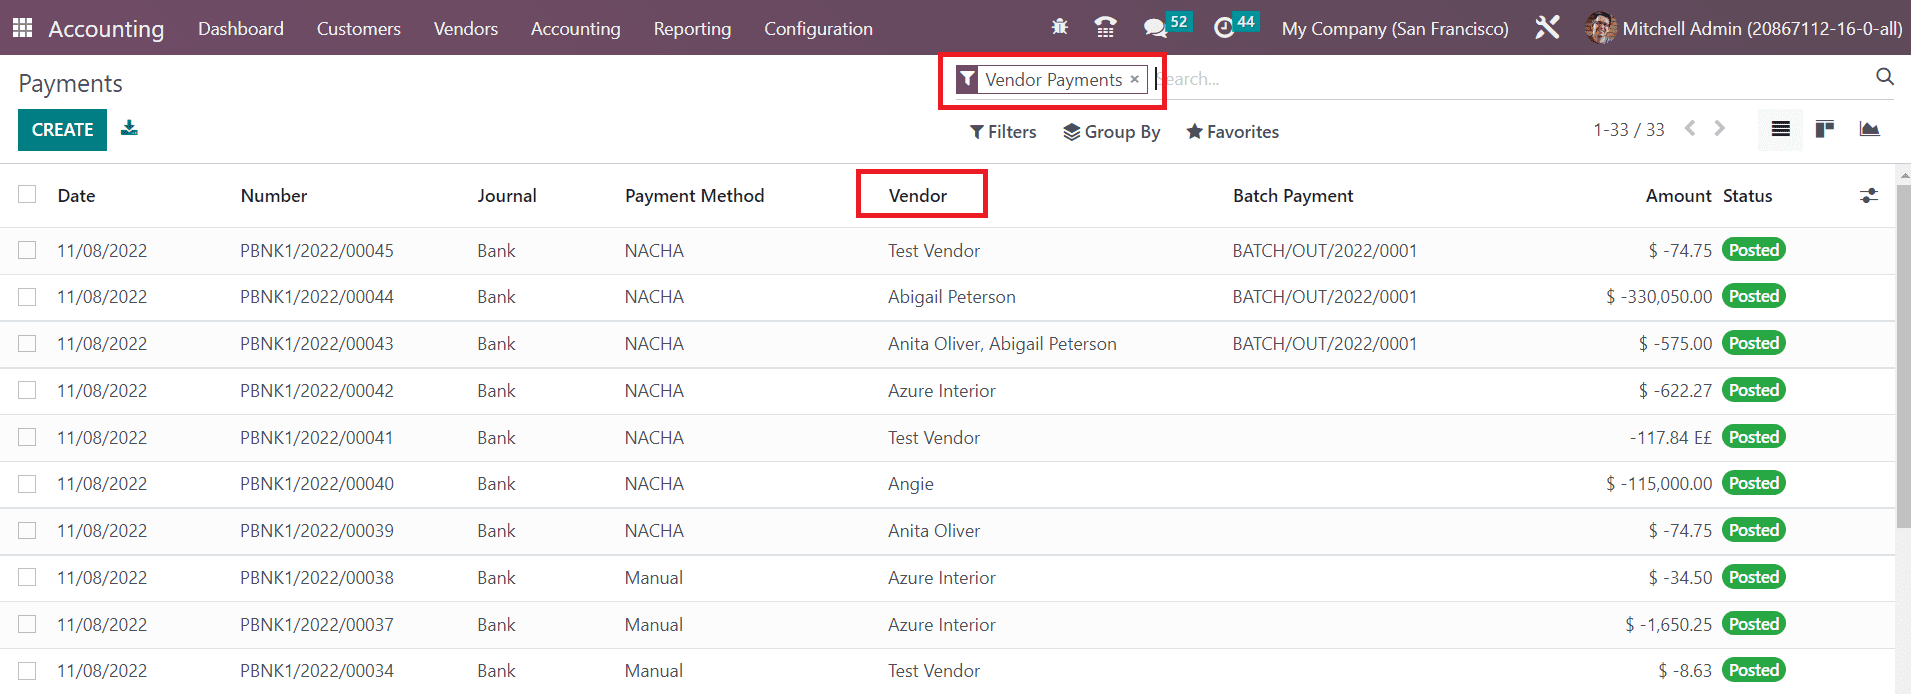
In order to manage vendor payments, Odoo gives you the option **Payments** under the **Vendor** menu also. This platform is almost similar to that of the customer payment window.
The list view of the vendor payments will show the name of the Vendor instead of the customer name. You will get the list of **Vendor Payments** from the customer payment window itself by using the filter Vendor Payment as shown in the image above.
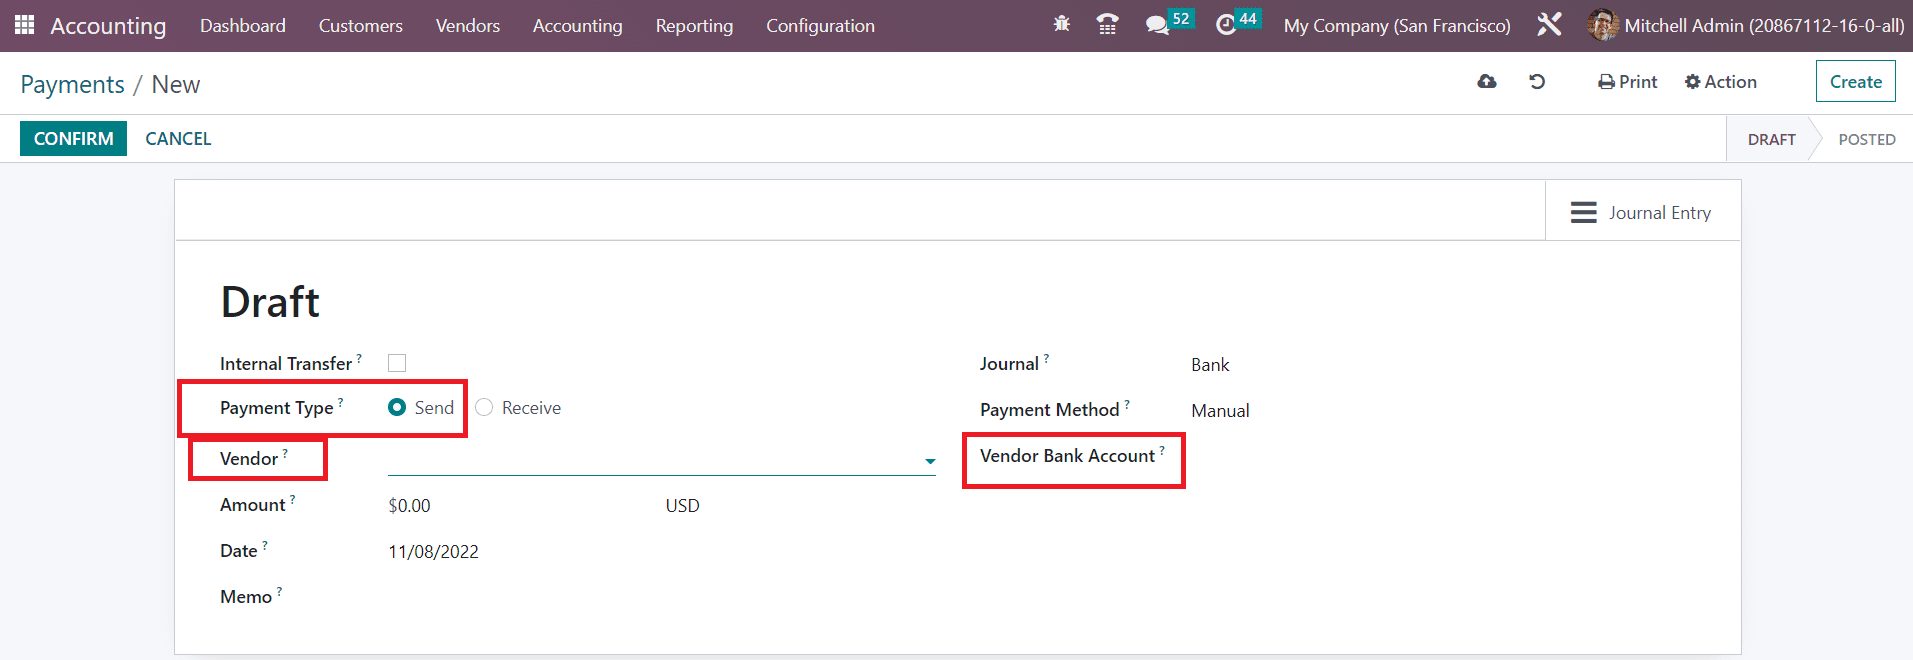
While recording a vendor payment, you need to mention the **Vendor** id and **Vendor Bank Account** in the corresponding fields.
Since it is a vendor payment, the **Payment Type** will be available as **Send.**
Now, let’s discuss the Receipt management window in the Accounting module