Scrap Management
Scrap Management
Scrap in inventory is considered useless or damaged products. The date expired products can be also included in scraps. While managing inventory, there may be chances to find expired or damaged products in the inventory. Removing these items from the stock as soon as possible is important because we can not sell damaged or expired products. In most cases, the products with negligible damages are used for repairing processes. The reusable parts of the scraps can be used for the recycling processes. A smarter scrap management solution will help you to save your money and most importantly the environment around us also. The scraper collected from the inventory can be moved to a scrap location.
From the storage locations available in the warehouse, you can allot a location for scrap. Let’s look at how Odoo helps you to manage scrap location in your storage. We already discussed the configuration and management of storage locations in the Odoo Inventory. Following the same method, you can configure a location for scrap also. For this, you can go to the Locations menu available under the Configuration menu. A new window will open as shown below.

Click the Create button to create a new location for scrap.

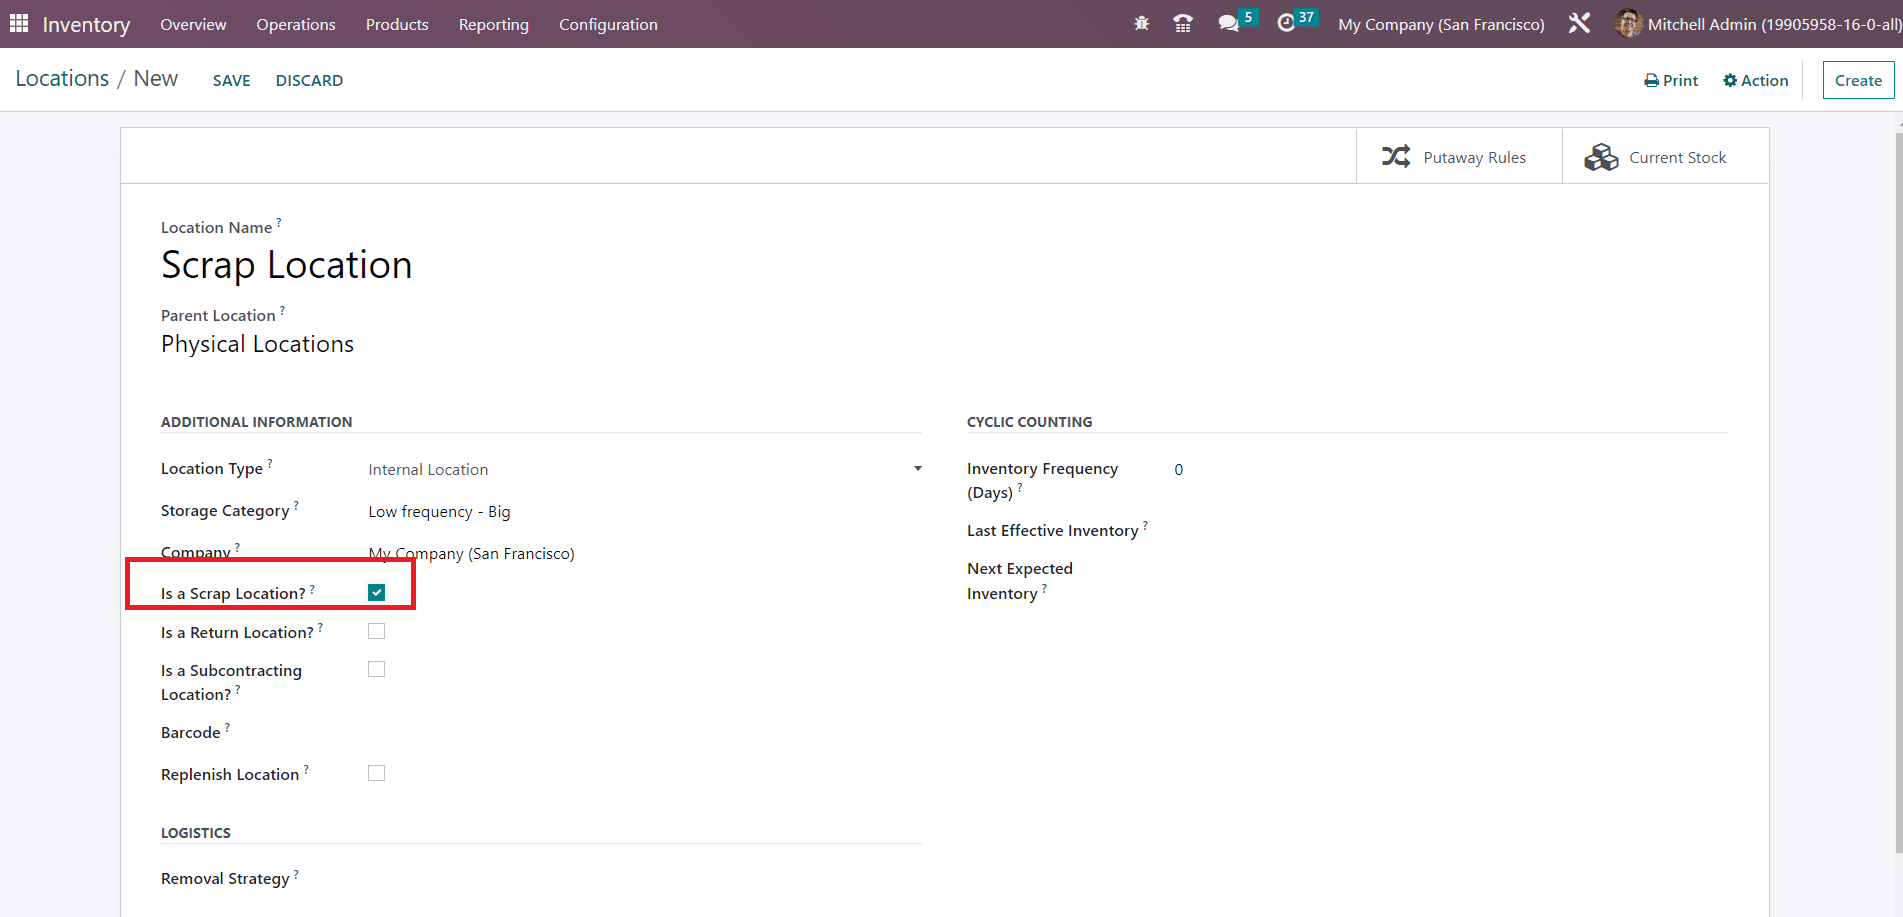
In the new location creation window, you can mention the name of the location in the given field. Here, we mentioned the location name as Scrap Location. You can follow the remaining steps just like we detailed in the Location configuration section earlier. The most important step is that you need to activate the Is a Scarp Location field to consider this location as a scrap location. After specifying necessary details in the Additional Information, Cyclic Counting, and Logistics tab, you can click the Save button. We have completed the creation of a location for scrap in the storage. You can create more scrap locations following this method.
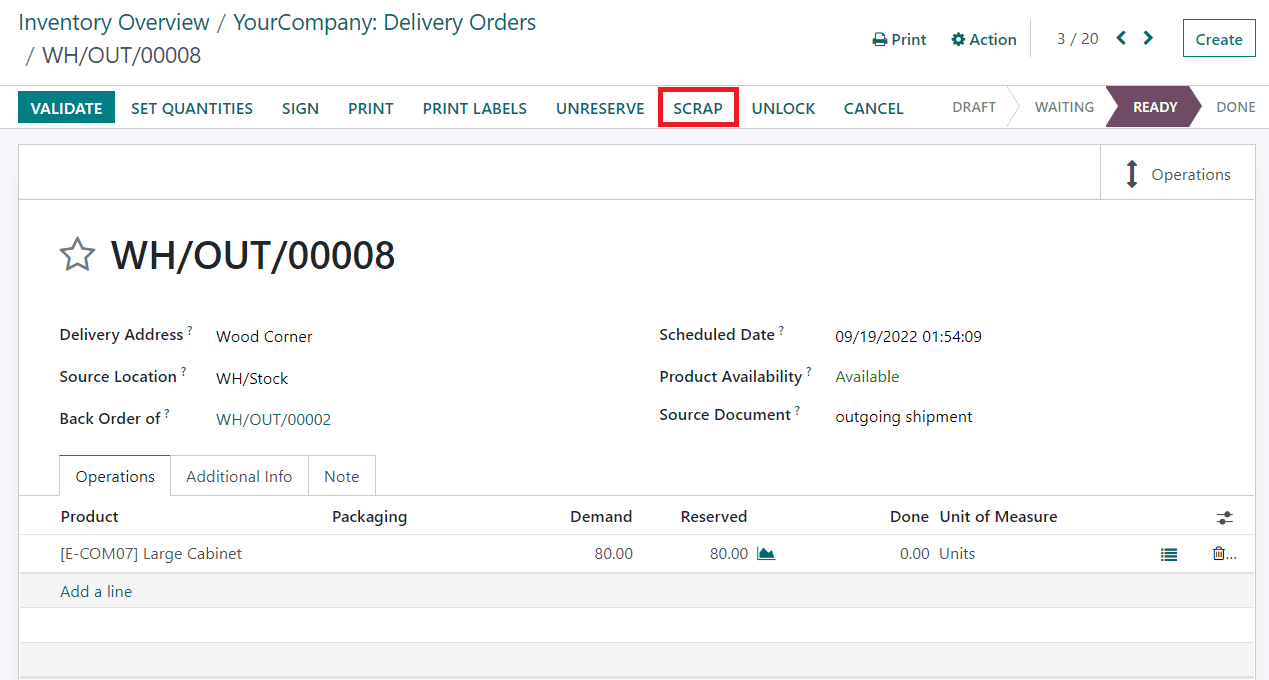
Now, let’s check how to add products to the scrap location. In the Odoo Inventory management system, you will get the option to add to Scrap in the majority of the operations such as Receipts, Delivery Orders, Internal Transfers, Manufacturing Orders, POS Orders, and many more. Here, we took a delivery order for the demo.

You can find the Scrap button on the delivery orders as shown in the screenshot above. In case, any products in the delivery order are damaged or expired, you can click on this button to add those products to scrap.

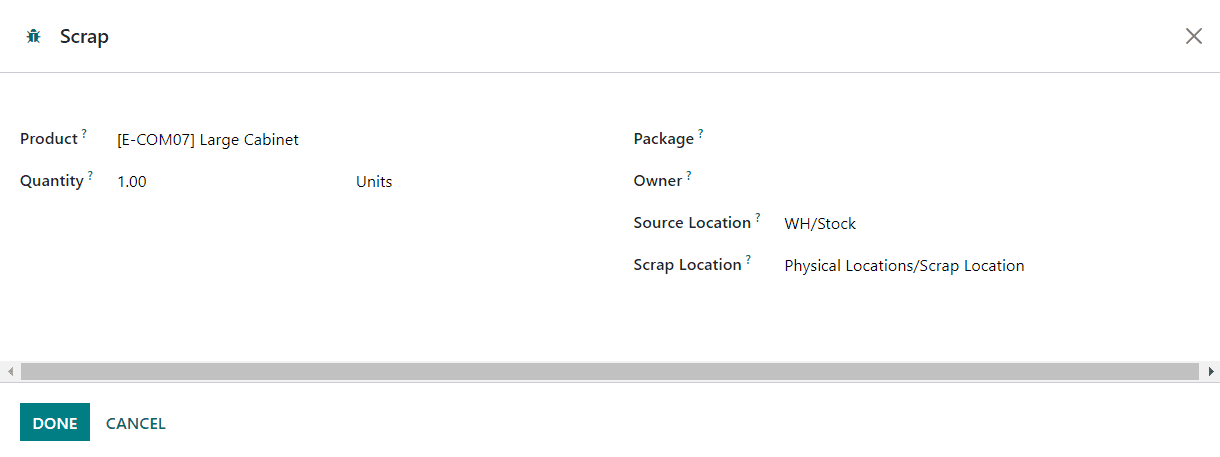
Here, you can mention the name of the scrap Product, Quantity, Package, and Owner in the respective fields. The Source Location of the product will be available in this window. In the Scrap Location, you can select the scrap location from the drop-down to where you want to move the damaged or expired product. Clicking on the Done button will move the product to the specified scrap location. The quantity of the scrap product will be deducted from the delivery orders.
Under the Operation menu of the Inventory module, you will get a separate platform to manage all these scrap orders as shown below.

The user will get List, Kanban, Pivot, and Graphical views on this platform. From the List view, you will get the Reference, Date, Product, Quantity, Unit of Measure, Source Location, Scrap Location, Company, and Status details of the Scrap Orders. It is also possible to create a new scrap order from this window itself using the Create button. You can use the default and customizable options in the Filters and Group By features for sorting operations.
Now, let’s move to the landed cost feature available in the Inventory module
Last updated