Barcode Scanner
Barcode Scanner
Odoo supports barcode scanning to organize inventory operations of products in a more manageable method. You can use the barcode scanning method to trace and locate products in your inventory. In order to make use of the features of the barcode scanner for your inventory management in Odoo, make sure to install the Barcode module from the Odoo AppStore. Once you complete the installation process, you can go to the Settings menu of the Inventory module.

As shown in the image above, you can find the Barcode Scanner option under the Barcode tab. You can activate this feature. In the Barcode Nomenclature field, you can select a suitable set of rules for the creation of the barcode. After activating this feature, you can click on the Configure Product Barcode option to assign barcodes for products.

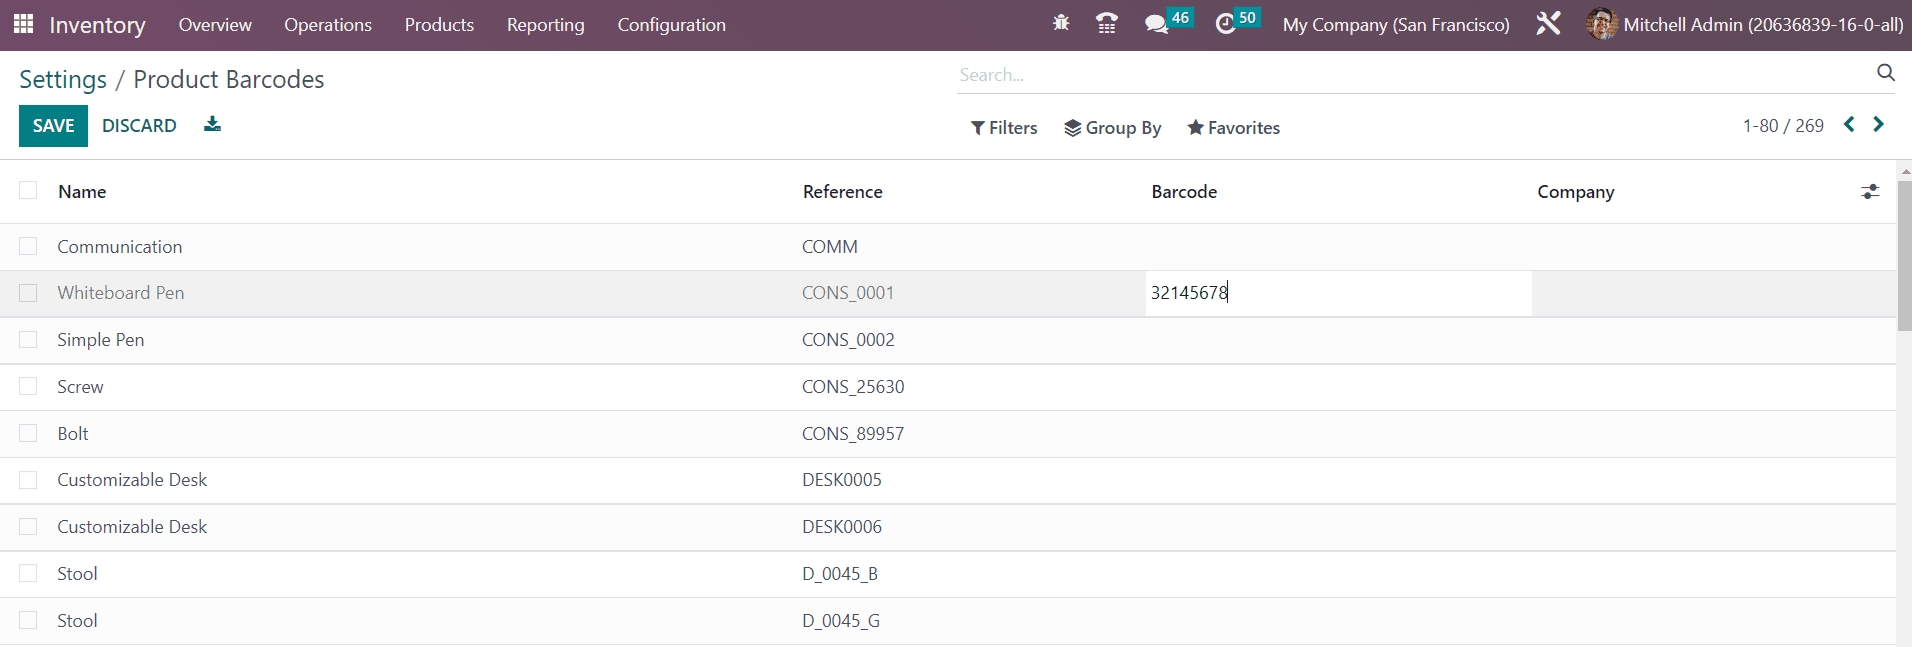
Odoo will lead you to a new platform where you will get the list of already configured products in your database. You can easily add Barcode to each product by clicking on the Barcode field of the respective product. After adding a barcode to the product, you can click on the Save button. You can assign barcodes for all products by this method. Using this barcode you can locate products during different inventory operations with the help of a barcode scanner.
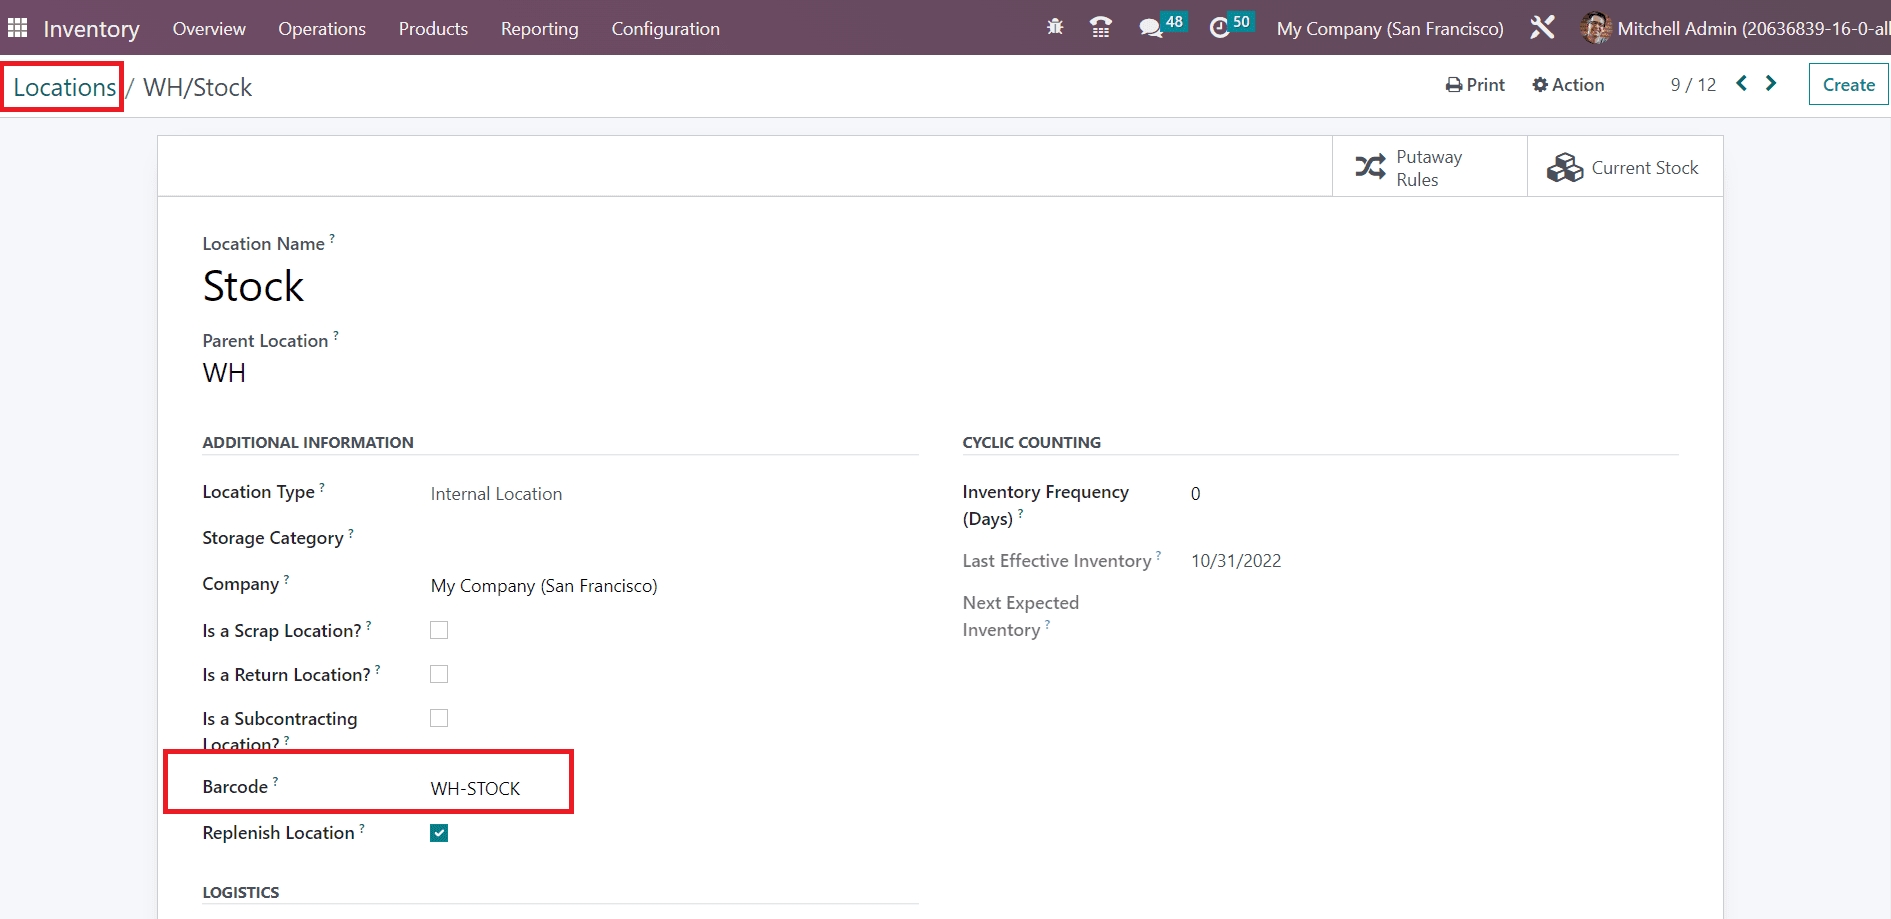
It is possible to create a barcode for storage location also. While configuring locations in Odoo, you will be able to get the Barcode field to set the location barcode as shown in the image below.

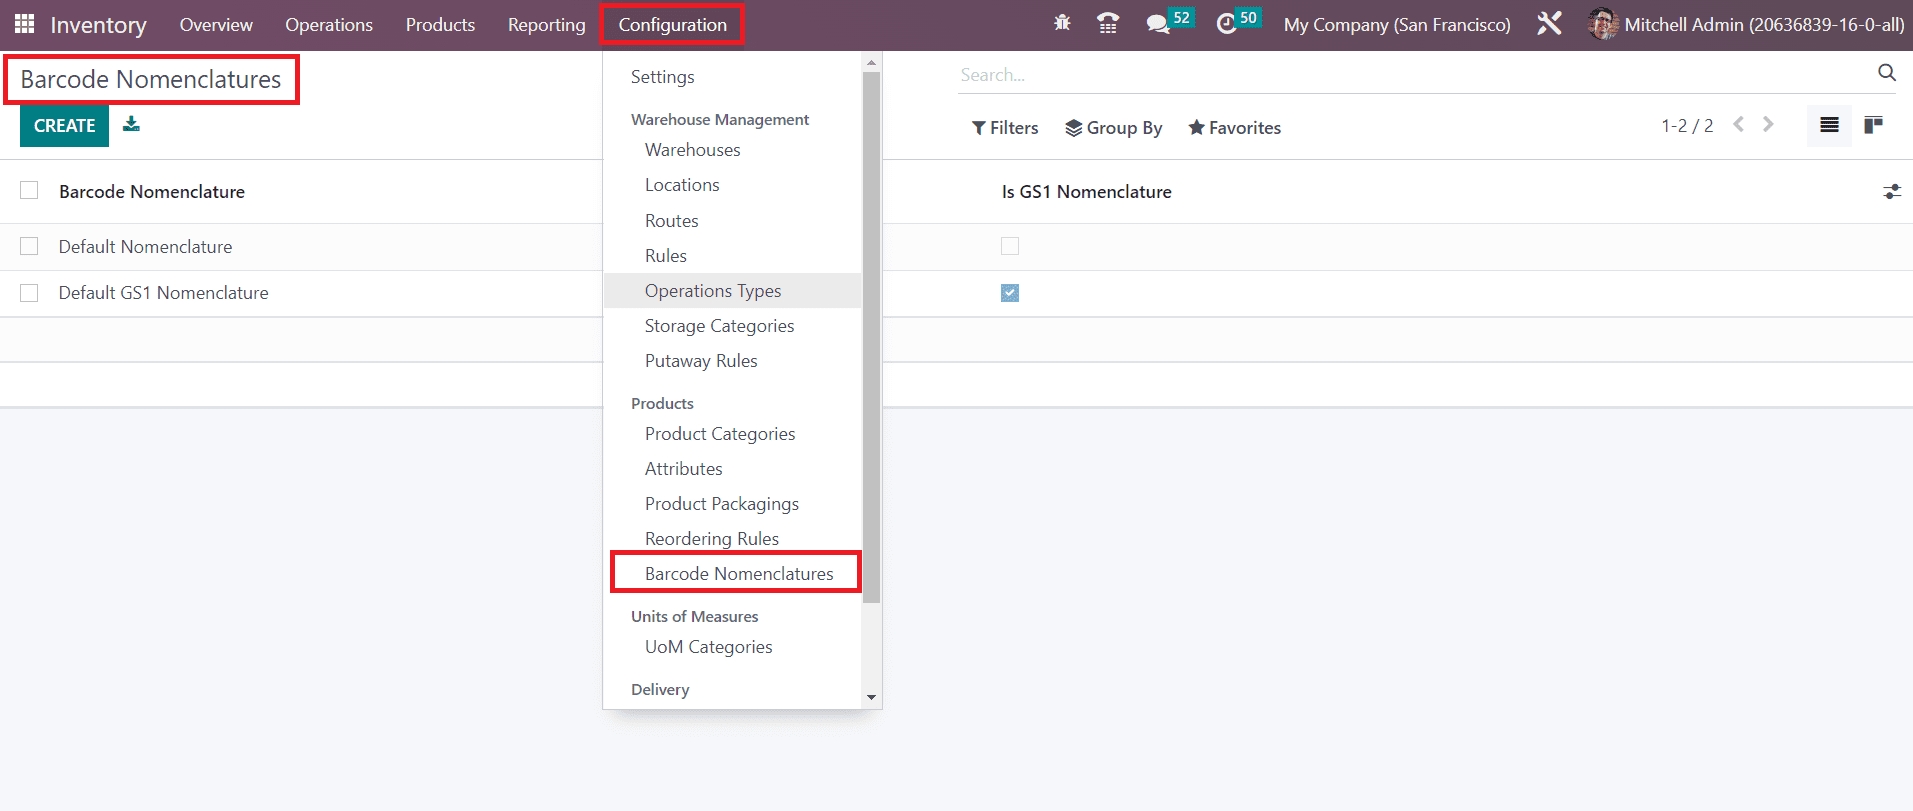
You can set certain rules for the creation of the barcode with the help of the Barcode Nomenclature feature available in the Odoo ERP system. In order to set the barcode nomenclature in the Odoo Inventory module, you must activate the developer mode. Once you change into developer mode, you can find the Barcode Nomenclature option under the Configuration menu of the Inventory module as shown below.

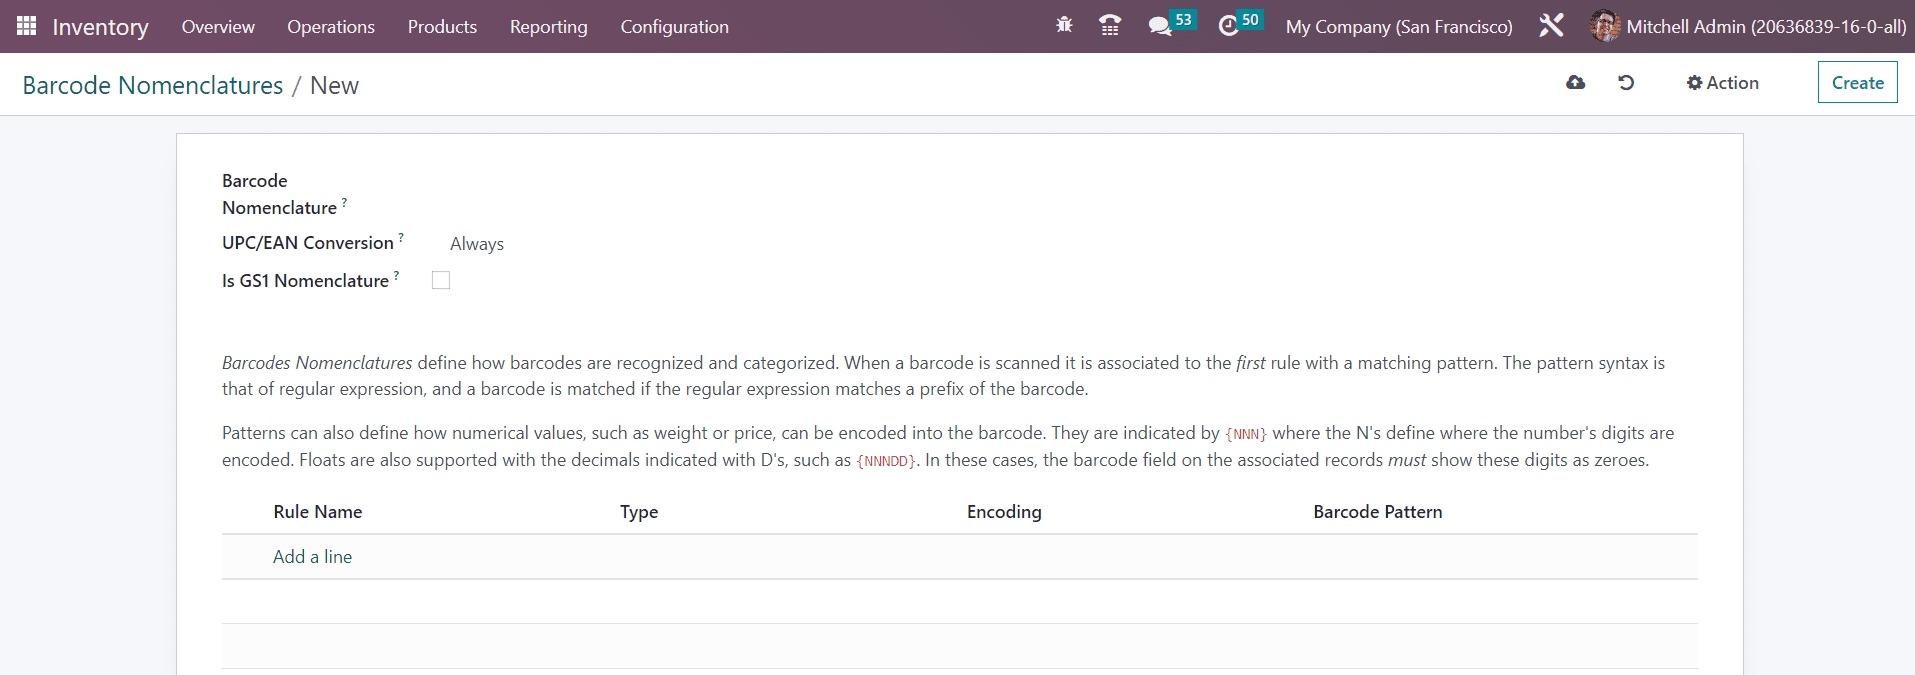
Using the Create button, let’s create a new Barcode Nomenclature.

In the Barcode Nomenclature field, you can mention a name for the internal identification of this barcode nomenclature. The UPC/EAN Conversion can be set as Always, EAN-13 to UPC-A, UPC-A to EAN-13, or Never as per your requirements. UPC Codes can be converted to EAN by prefixing them with zero. This setting determines if a UPC/EAN barcode should be automatically converted in one way or another when trying to match a rule with the other encoding. By activating the Is GS1 Nomenclature feature, this nomenclature uses the GS1 specification, only GS1-128 encoding rules are accepted in this kind of nomenclature.
Barcodes Nomenclatures define how barcodes are recognized and categorized. When a barcode is scanned it is associated with the first rule with a matching pattern. The pattern syntax is that of a regular expression, and a barcode is matched if the regular expression matches a prefix of the barcode. Patterns can also define how numerical values, such as weight or price, can be encoded into the barcode. They are indicated by {NNN} where the N's define where the number's digits are encoded. Floats are also supported with the decimals indicated with D's, such as {NNNDD}. In these cases, the barcode field on the associated records must show these digits as zeroes.
Using the Add a Line button, you can add rules to this nomenclature. A pop-up will appear as shown below where you can set rules one by one.

Here, you can set a Rule Name, Sequence (used to order rules such that rules with a smaller sequence match first), Type, Encoding, and Barcode Pattern. You can add different rules to the nomenclature by this method.
After configuring the Barcode Nomenclature, you can define which nomenclature should be used while creating barcodes in the Inventory module from the Settings menu.

Here, you will get a drop-down in the Barcode Nomenclature field, from where you can select the suitable one for your operations.
Last updated