Rules and Routes
Rules and Routes
The routes defined on a product will help you to understand and track each movement of the product. It is the track or path of operations used for inventory movements. Without a proper strategy, it is difficult to monitor and manage the inventory movements in a company. Based on your company policies, you can set certain rules of operation to define the product movements in inventory. Using these rules, Odoo will allow you to configure different routes of operations for the products. This will ensure proper inventory management within your company.
In the Odoo 16 Inventory module, the users will get separate platforms to define suitable rules and routes for the stock movements. The routes in Odoo work associated with the respective storage locations and warehouse operations so make sure to configure both these options before defining routes for inventory. To set up new routes in Odoo, you are requested to enable this feature from the Settings menu of the module. You can find the Warehouse tab as shown below, from where you can activate the Multi-Step Routes.

While activating this option, the Storage Location feature will be automatically activated since they are interlinked. We already discussed how to configure warehouses and locations for inventory management. Now, let’s look at the configuration of rules for the product movement in a company.
Creating Rules
The user can find the option to configure new rules for the inventory movements from the Configuration menu of the Inventory module. Clicking on the Rules option from the Warehouse Management tab opens a new window with the list view of the already configured Rules as shown below.
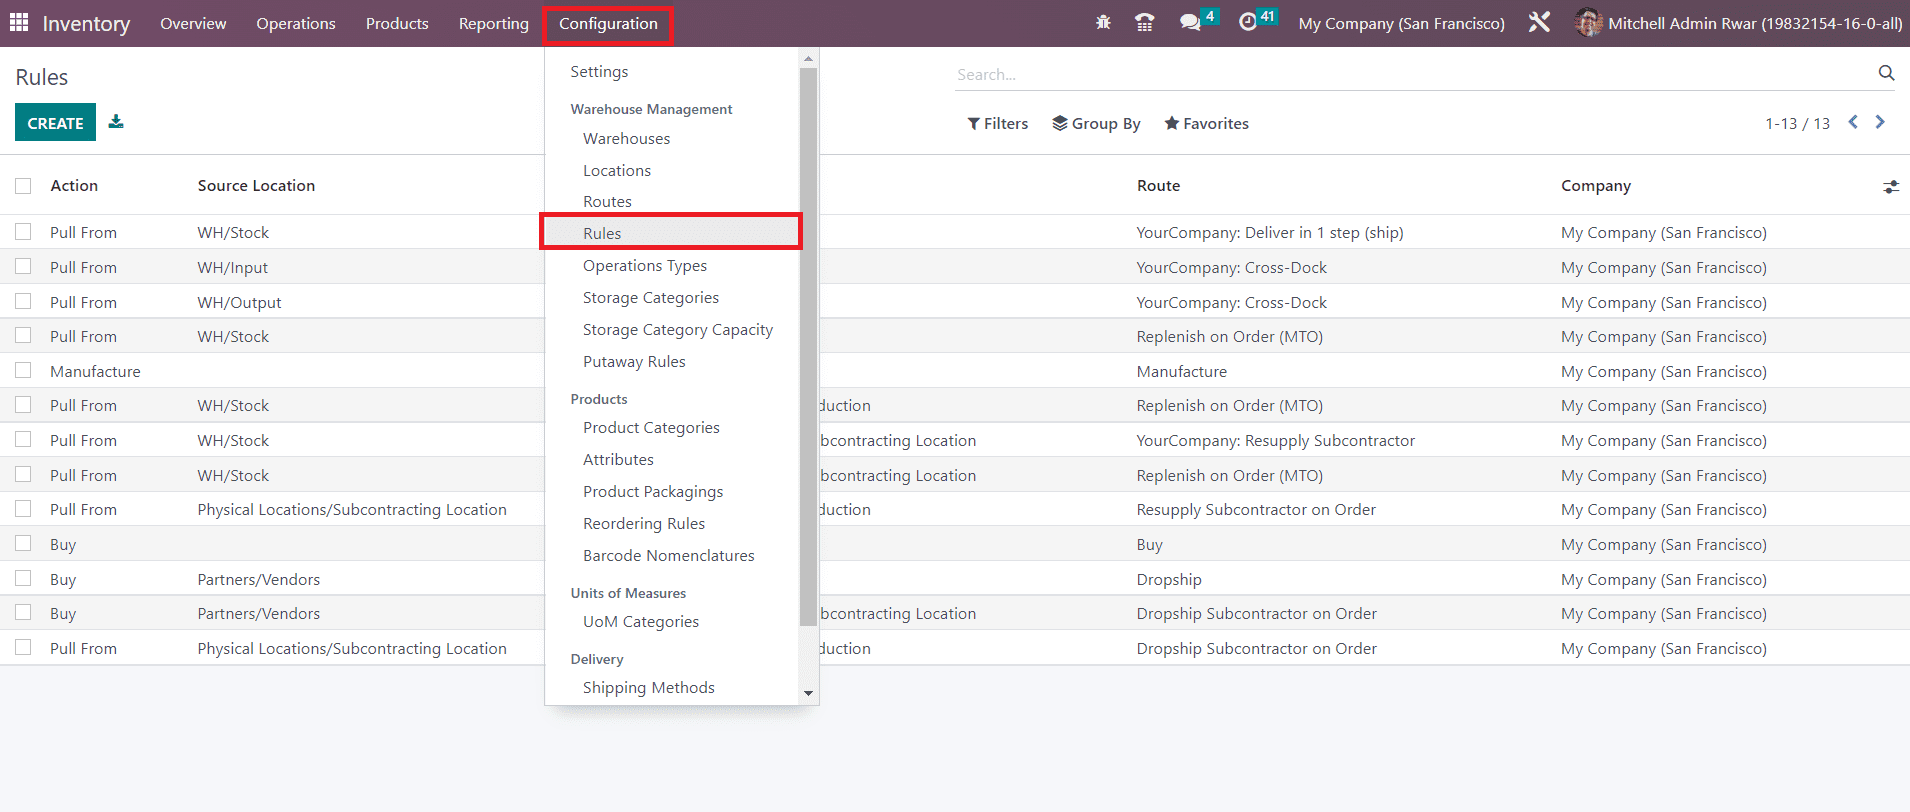
From this preview, you will get the Action, Source Location, Destination Location, Route, and Company details of each Rule. Just like in any other platform, Odoo makes sure of the availability of the default and customizable Filters and GroupBy options to simplify the searching operations. Without any delay, you can click the Create button to know the steps of the configuration of the new rule in Odoo.
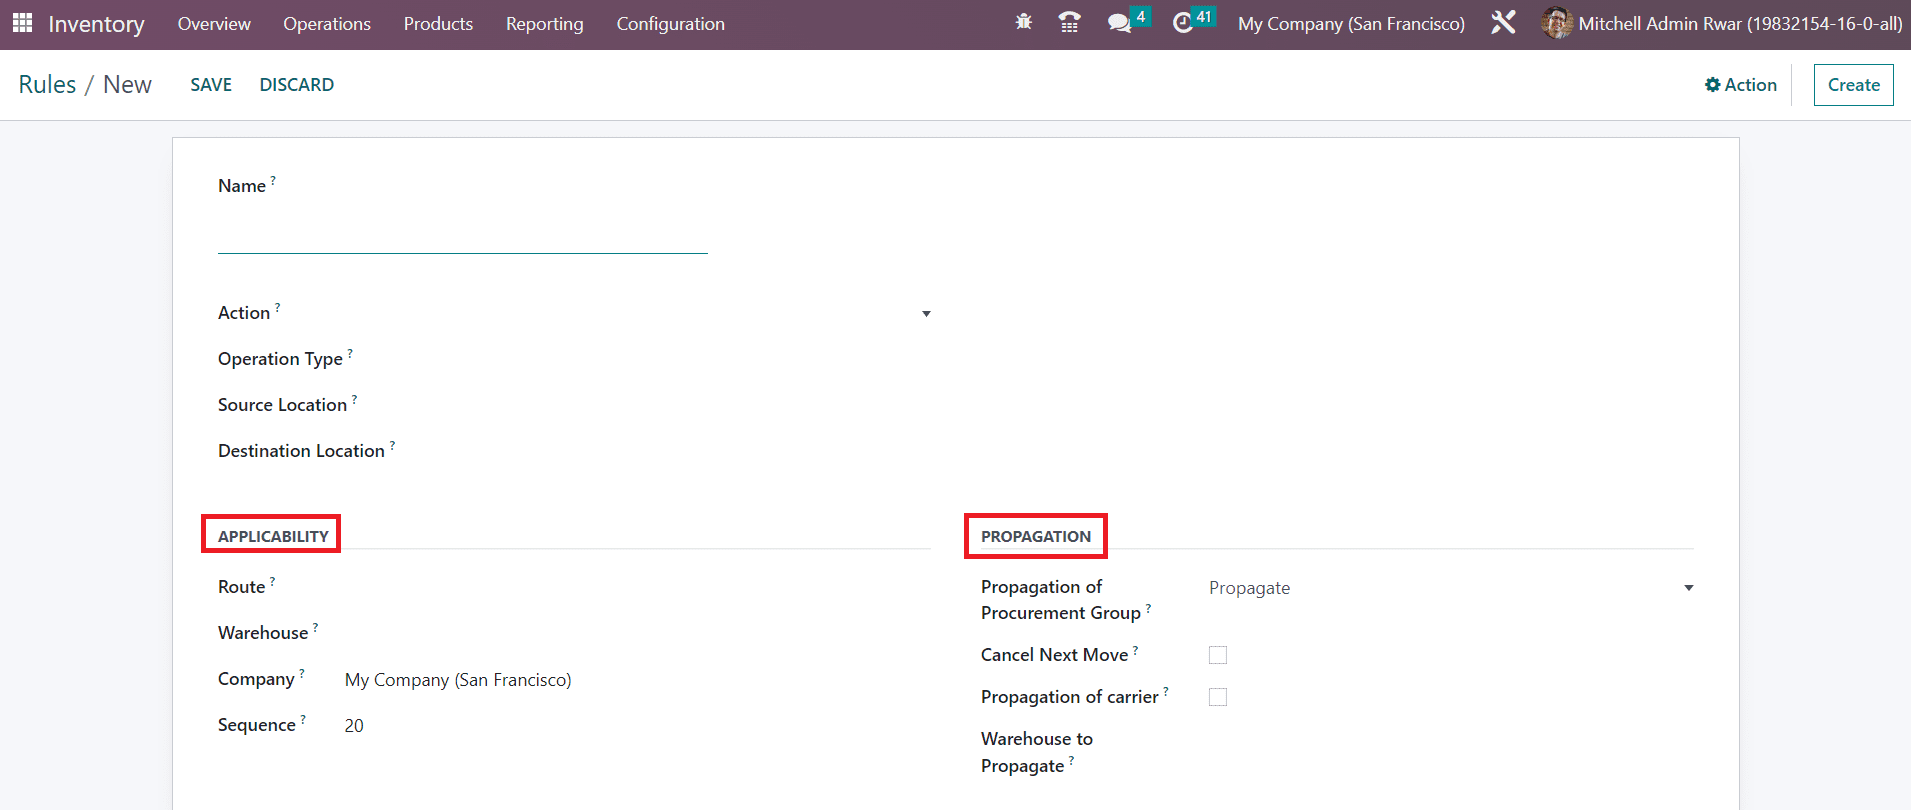
In the Name field, you can mention a proper title for the new rule. The next step is to define the Action for the new rule. You will get a drop-down menu here to select the suitable action.
● Pull From: You can set this action when products are needed in the destination location. It can be either from a sales order or a manufacturing order. When the demand for a product happens in the destination location, Odoo will generate a picking operation type from the source location to complete the requirement. ● Push To: You can use this rule to move a product to another location. When products arrive in the source location, you can move them to another location using this action. In this case, Odoo will generate a picking operation type to send them to the destination location. ● Push & Pull: This action can be used in both cases explained above. When products are needed in the destination location a picking is generated from the source location to fulfill the need. This demands product requirements in the source location. Once the source location is fulfilled with the requirement, the products will be pushed to the destination location to fulfill the needs of the destination location. ● Manufacture: Using this action, you can directly generate manufacturing orders to complete the requirements of the source location. ● Buy: When products are needed at the destination location, Odoo will generate a request for quotation to buy the product to fulfill the need with the help of this action.
In the next fields, you can mention the Operation Type, Source Location, and Destination Location respectively. In the Applicability tab, you can specify the Route, Warehouse, Company, and Sequence on which this rule is applicable. Under the Propagation tab, you can set the Propagation of Procurement Group as Empty, Fixed, or Propagate. By enabling the Cancel Next Move, the move created by this rule is canceled and the next move will be canceled too. Activating the Propagation of Carrier will propagate the carrier of shipment. In the Warehouse to Propagate field, you can specify the warehouse to propagate on the created move/procurement which can be different from the warehouse this rule is for.
Now, let’s check how to configure routes using these rules in the Odoo Inventory.
Creating Routes
The Warehouse Management tools available in the Configuration menu of the Inventory module will give access to the platform to manage and create various routes of operation. The user can observe the preconfigured list of routes here with the details of the name of the routes and the company.
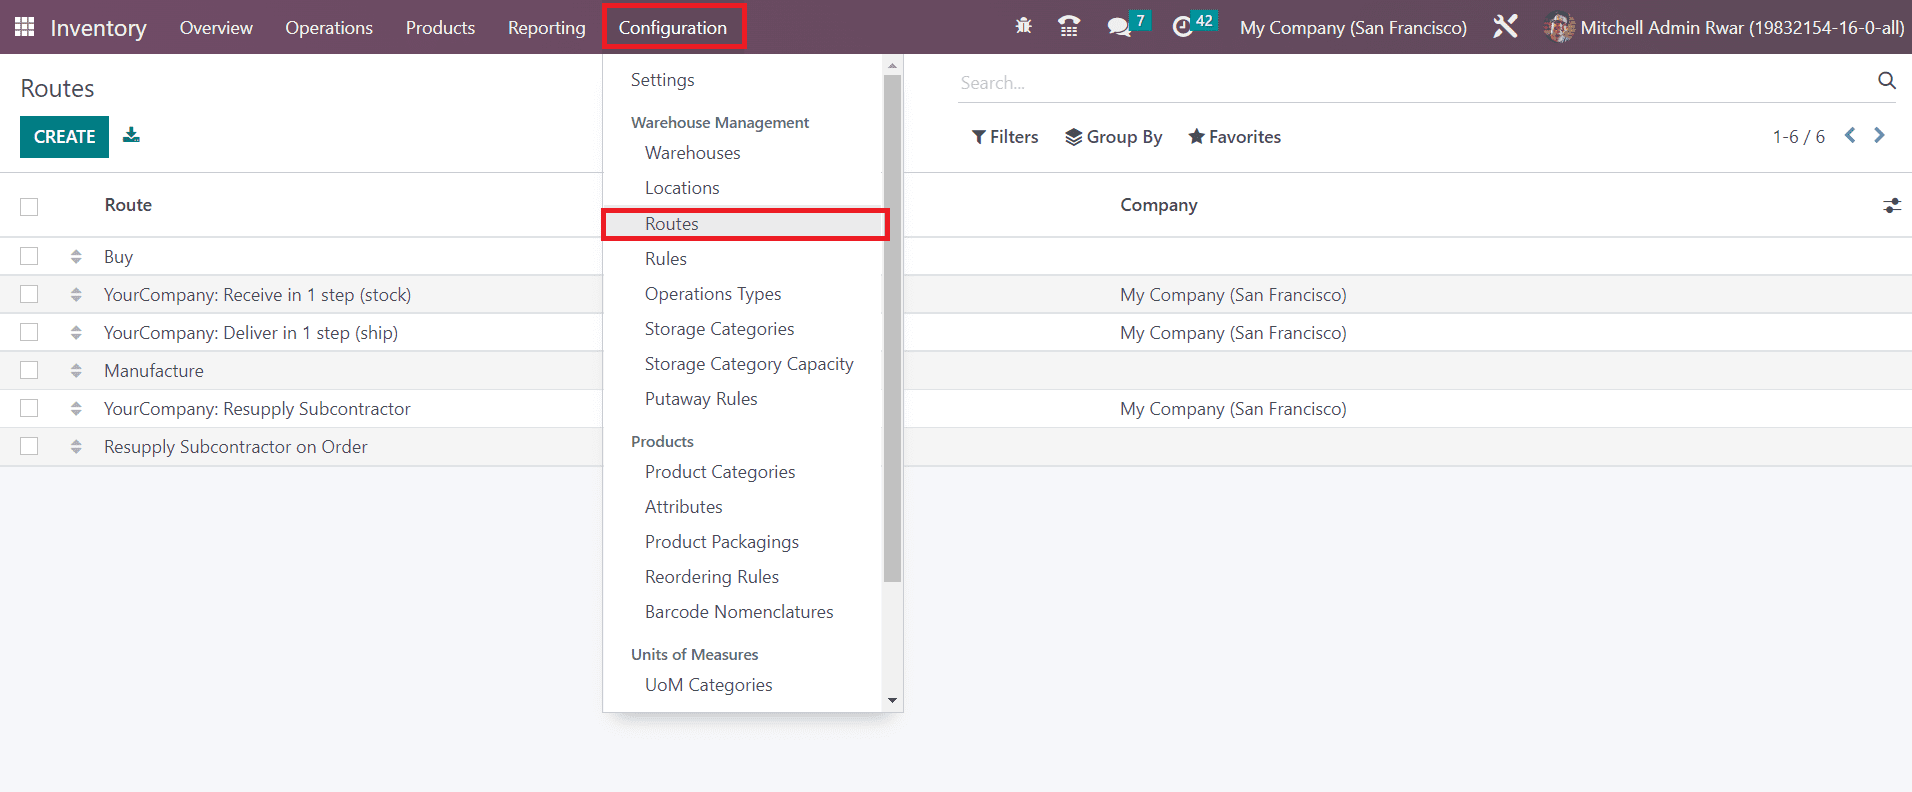
Click the Create button to create a new route for inventory movements.
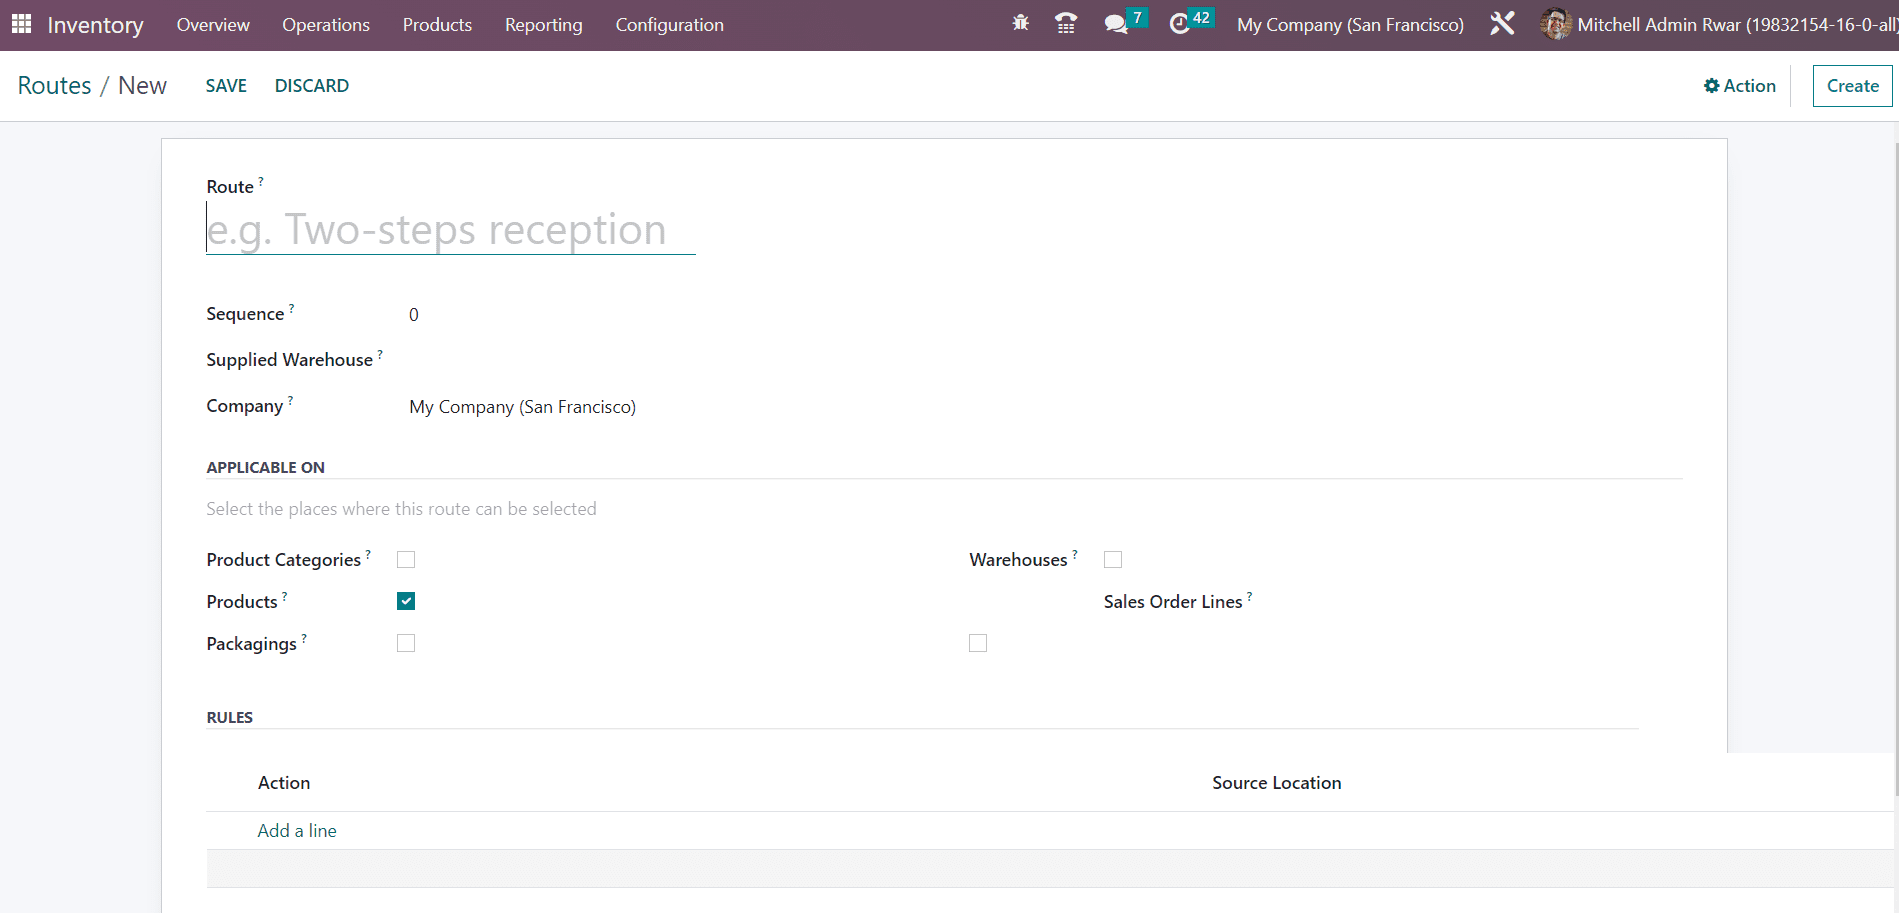
The name of the route can be defined in the Route field. Additionally, you can specify the Sequence, Supplied Warehouse, and Company in the respective fields. You can leave the Company field empty if this route is shared between all companies configured in your database. In the Applicable On tab, you can select the places where this route can be selected. Here, you will get the Product Categories, Products, Packaging, Warehouse, and Sales Order Lines to select based on your company policies. Under the Rules tab, you can specify the rules used for this route of operation with the help of the Add a Line button. You can configure new rules for this route by following the steps we discussed in the earlier section. Finally, don’t forget to click the Save button to save the changes.
In Odoo, you can define a specific route of operation for each product while configuring them in the database. In the products management window, you can find a dedicated field under the Inventory tab as shown below exclusively to select the suitable route for the inventory movement of a product.
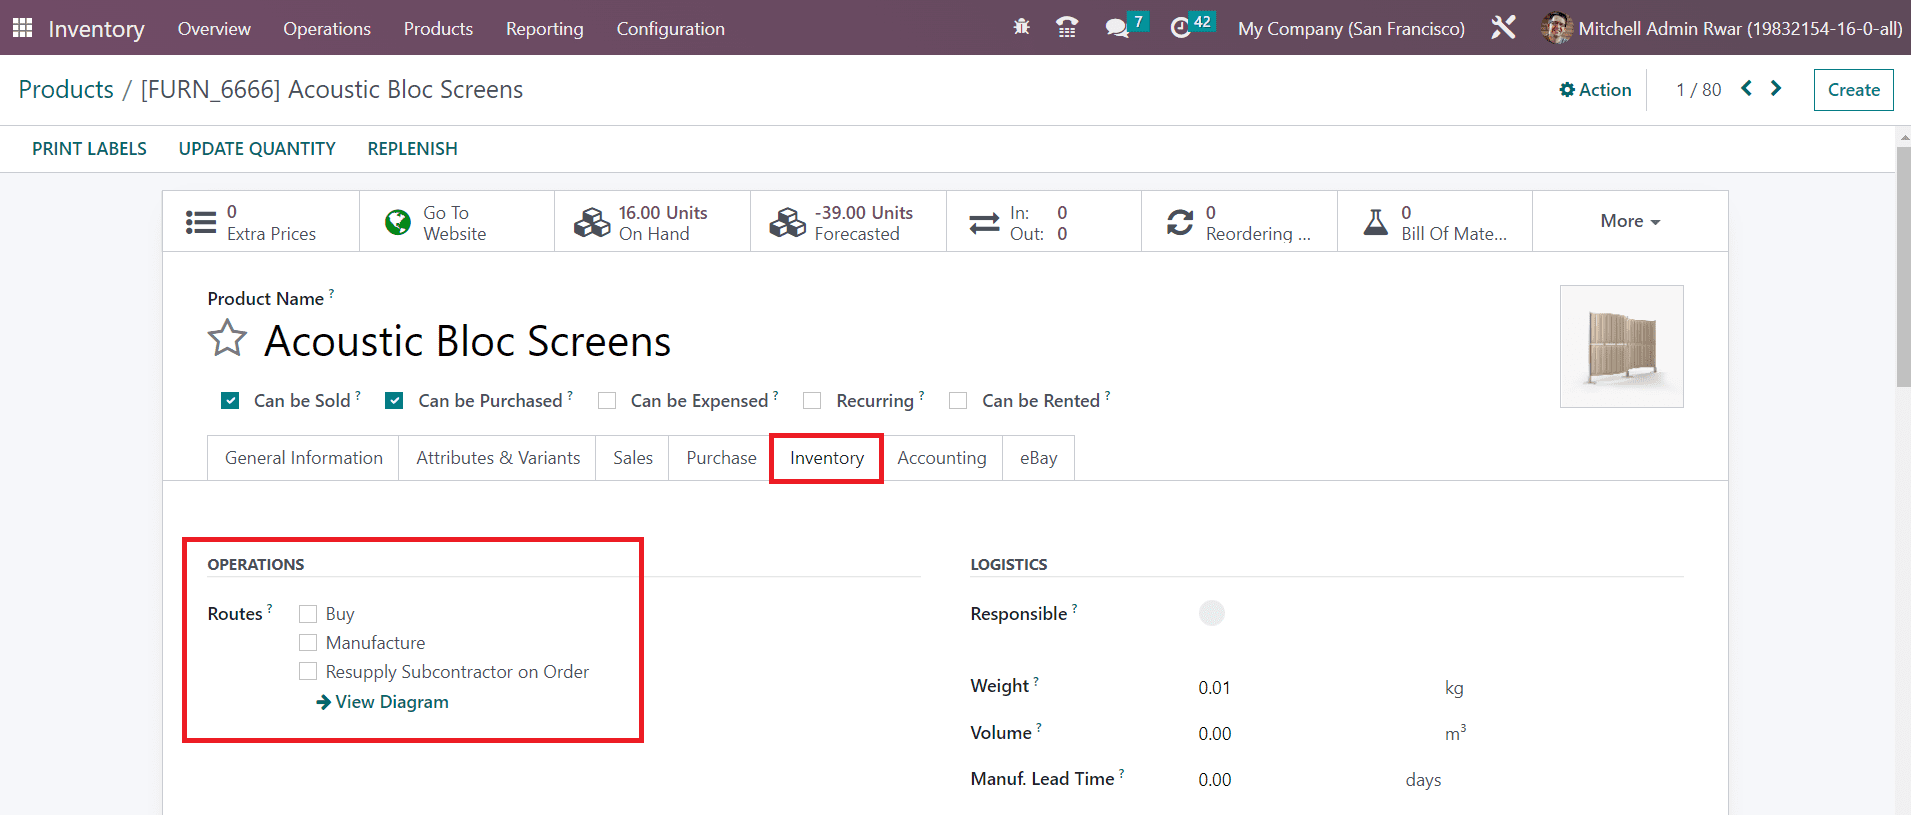
Depending on the module you installed in your Odoo database, this field will allow you to set the route of a product. It can be bought, manufactured, replenished on order, etc, based on the route you select. This is how we define routes for product movement in Odoo Inventory.
Last updated